Mastery of the iPod Starts Here
Archive for November, 2010
How to Add a Firmware Bundle to PwnageTool
Nov 29th


These are instructions on how to add a firmware bundle to PwnageTool.
You may need to do this to add the unofficial iPhone Dev-Team bundle that will let you create a custom ipsw for the old bootrom iPhone 3GS that won’t update your baseband when upgrading to iOS 4.2.1.
Step One
Make a folder called “Pwnage” on the desktop. Download PwnageTool 4.1.3 into the folder.
You will also need to get the minimal iPhone 3GS bundle from here. Double click to extract it to the Pwnage folder.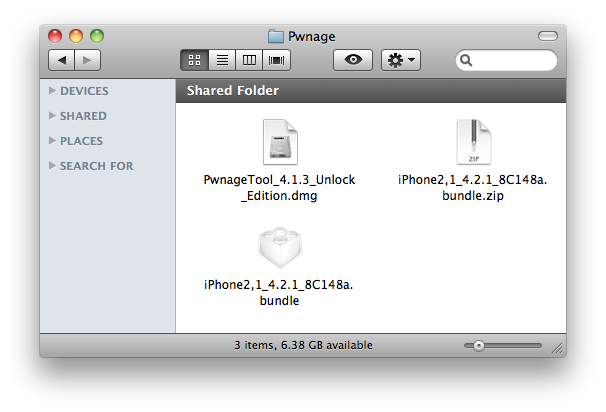
Step Two
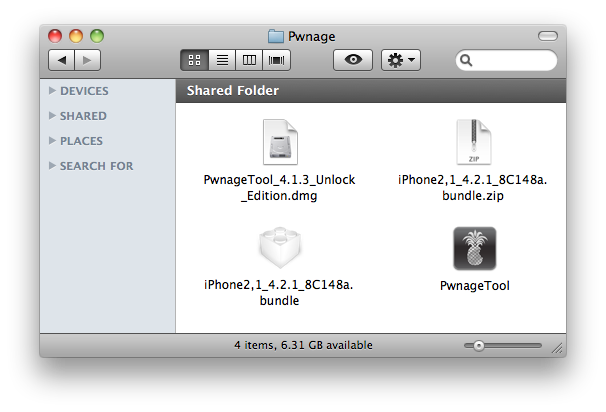
Double click to mount PwnageTool then drag the PwnageTool icon into the Pwnage folder.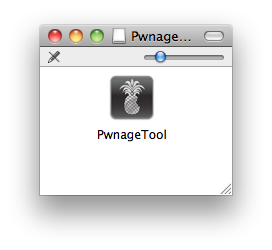
Step Three
Right click the extracted PwnageTool app and choose Show Package Contents from the menu that appears.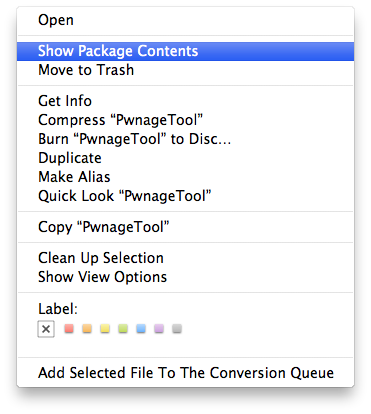
Step Four
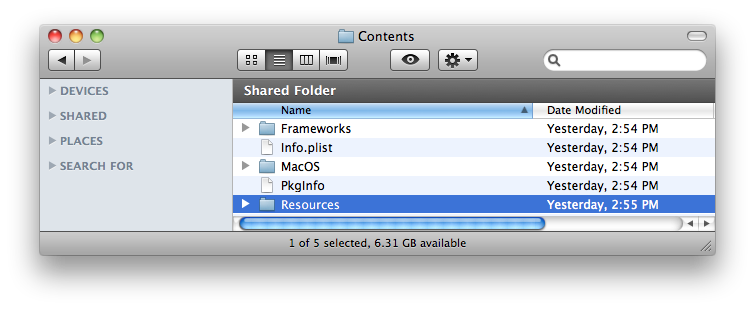
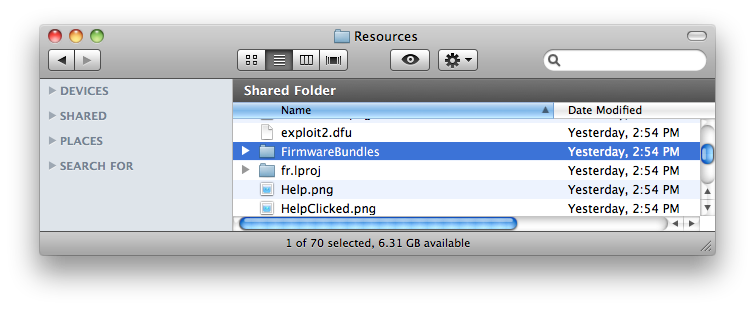
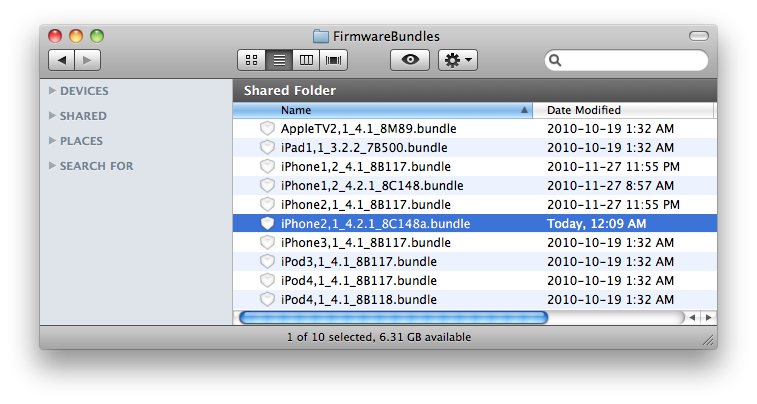
Navigate to Contents/Resources/FirmwareBundles/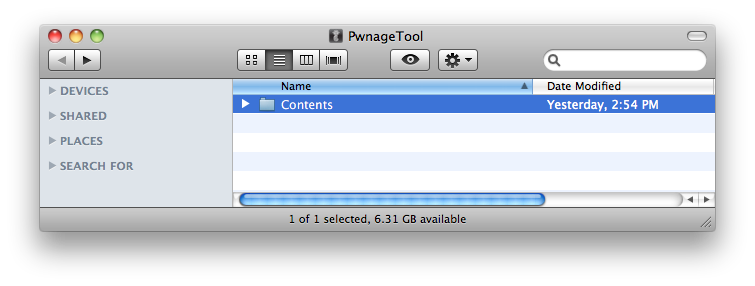
Step Five
Copy and paste the iPhone2,1_4.2.1_8C148a.bundle from the Pwnage folder on your desktop into the FirmwareBundles folder.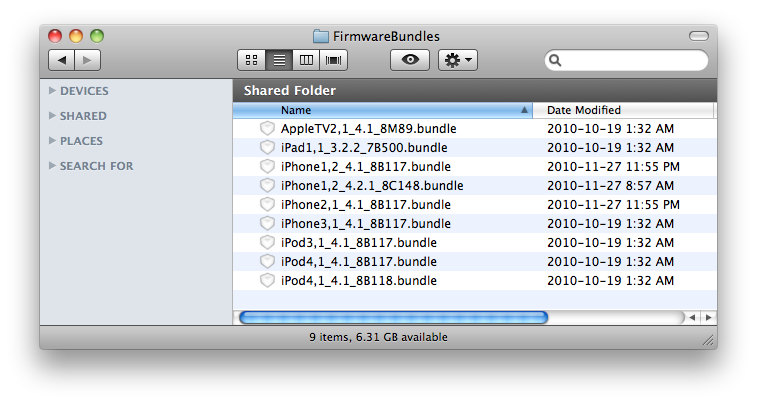
Step Six
You can now launch PwnageTool from the Pwnage folder on your desktop and the application will detect your new firmware bundle.
[DOWNLOAD]Cydia 1.0.3366-1
Nov 29th

Just Download and install to get the new Cydia version made by Saurik and Chpwn. I can say just that it’s… REALLY FAST!
You can install it on these iOS versions
- iOS 4.0
- iOS 4.0.1
- iOS 4.0.2
- iOS 4.1
Patched version, should work on >4.0 firmwares (didnt try this one btw)
http://bit.ly/gFvKgP
QuickDo 3.0 -=Crack=-
Nov 29th


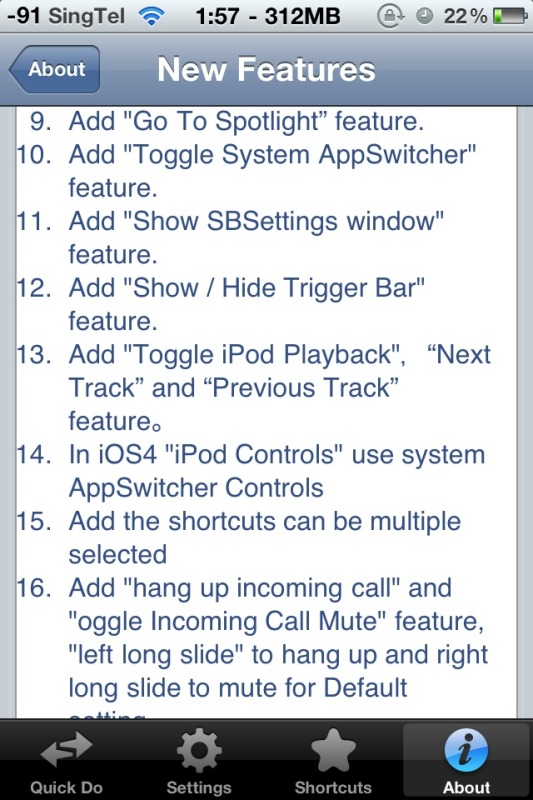
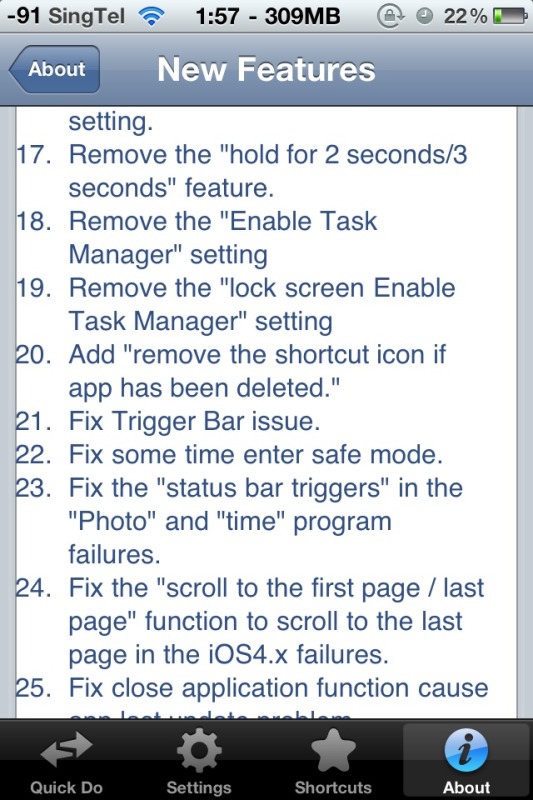
As you can see in the screen shots from my phone, WiFi and 3G is still on
serial from keygen still works
Survives[Quickdo still working] +3G + Wifi
1) rebooting via power dialog
2) respring via power dialog
3) rebooting via sbsettings
4) respring via sbsettings
5) opening quickdo app for settings
seems the irritating bug from 2.0.1 and 2.0.2 is gone!!!!
TAKE NOTE!!
1) You still need to TURN OFF Wifi+3G before you enter quickdo 3.0 to input your activation serial
2) after it resprings, you can safely turn them back on and configure quickdo 3.0
do feedback if you guys encounter problems…. I will con’t to test for you guys
here’s the stock deb for v3.0
QuickDo v3.0 STOCK DEB
http://www.multiupload.com/BLSDQAJRPA
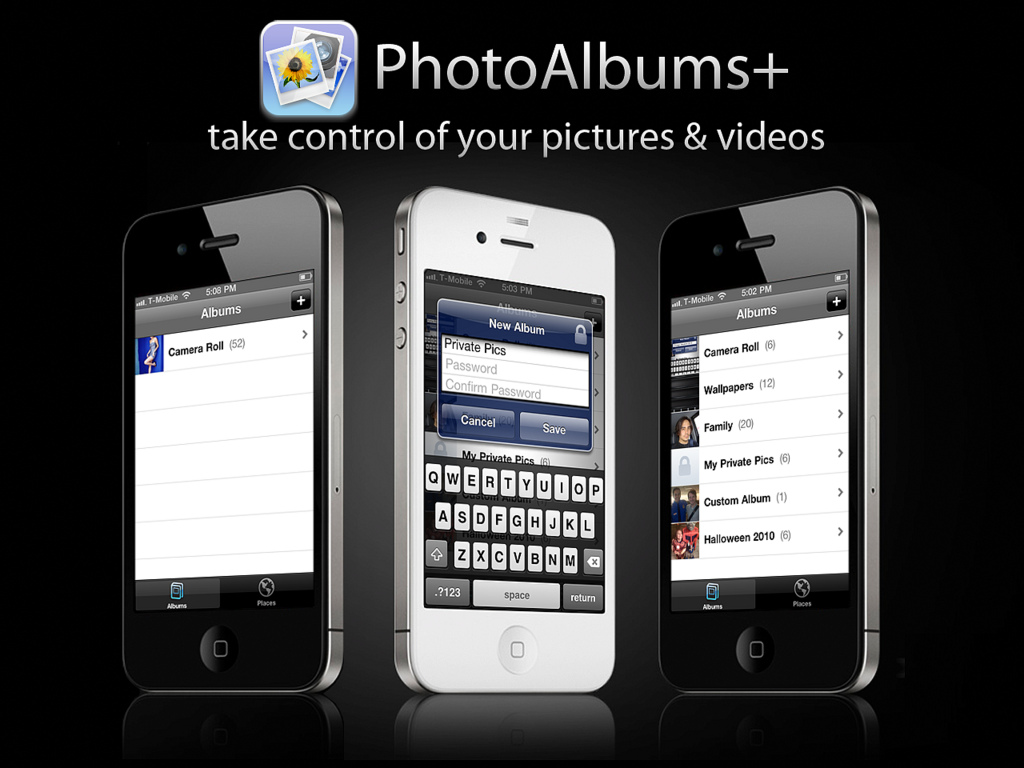
PhotoAlbums+
Nov 29th

What is it, and what does it do?
PhotoAlbums+ is a new tweak for the native Photos application compatible with iOS4 capable iPhones & iPod Touches.
What it basically does is cut out the tedious iTunes tethered process of creating albums and organizing your photos… No longer do you have to be at your desktop to add or remove albums.. no longer to do you have to export the photos/videos to your pc before you can create and import an album to your device. No longer are you at the mercy of iTunes and forced to settle for a flawed, inconvenient and impractical photo management tool!
Now with the touch of a button you can create new custom photo albums! Use the native media selection method to choose which photos/videos to MOVE out of the camera roll into your new custom albums… even move items from one custom album to the next. Simply use the ‘move’ option to distribute your photos across your custom albums. If you have ever used the ‘move’ option in the Mail.app, then you already know how to use PhotoAlbums+. The UI has almost a zero learning curve as it is seamlessly integrated into the Photos application in such a way that you actually will think that this is really the way the Photos app should have been from the very beginning.
Another exciting feature is the ability to create password protected albums. Simply click on the ‘Lock’ icon within the album creation popup and create a password. Its that easy. No fuss, no muss.
To delete and album use the swipe method. And upon deletion all the photos contained in the set will be moved back to the Camera Roll. Best of all this doesn’t interfere with the iTunes syncing process, and you can backup your photos to your PC with ease. The tweak also is compatible with applications that hook into the photos app, so when choosing to insert pictures via twitter apps or messages apps, your albums will still be organized, password protected and ready for use. So take control over your Camera Roll and get it together with PhotoAlbums+!
PhotoAlbums+ Manage your iPhone/iPod Photo Albums on device without iTunes – Home
Create an Album:
To create custom albums just press the “plus” button in the upper-right corner of the screen.
Just name the album, go into the camera roll and begin distributing your pictures and videos into your custom albums!
Easy to use and beautifully integrated. You’ll really wonder how you got along without it all this time.
Moving your Images and Videos:
Moving your pictures and videos between albums is as easy as
1) select the items you wish to move.
2) press the MOVE button found along the bottom of the screen.
3) select the album you wish to move the items into.
Delete an Album:
Easily delete an unwanted album by simply swiping your finger across the album cell. This will produce a DELTET option in which you must press to confirm deletion.
Note that deleting an album does not delete the contents. The grouping of images and videos are what is purged while the actual pictures and videos are moved back into the Camera Roll.
Password Protection of an Album:
Ever want to keep certain pictures and videos out of the reach of prying eyes?
Well now you can!
With PhotoAlbums+ you have the power to password protect your custom albums.
Its easy, just tap on the LOCK graphic in the upper-right corner of the New Albums popup and a set of password fields will populate the screen. Setup your password, select SAVE and your finished!
Fast, easy, intuitive.
Windows Export:
PhotoAlbums+ will detect your custom albums and create seperate folders in the Windows File Explorer for increased control and ease over what you choose to export to your desktop.
Managing your Camera Roll just got easier!
(note: folder names will appear generic in nature, so you will have to go through the folders to determine what album is which.
Windows Explorer Album View:
Upon entering one of the custom folders you can view the contents on your Album folder within the Windows File Explorer. Drag items directly to your desktop or the entire folder to easily export photos and videos to your Windows PC.
Managing your Camera Roll just got easier!
PhotoAlbums+ is available for $2.99 on BigBoss repo
FAQ:
Q: What devices is PhotoAlbums+ compatible with?
A: iOS4 capable iPhones & iPod Touches
Q: Does PhotoAlbums+ work on the iPad?
A: Not at this time.
Q: What firmwares is PhotoAlbums+ compatible with?
A: iOS4.0 – iOS4.2.1
Q: Can you manage videos?
A: Yes, it can move both Images and Videos.
Q: Can you manage your iTunes Synced photo albums?
A: No, PhotoAlbums+ ONLY allows you to manage images & videos from your camera roll.
Q: Can you rename albums?
A: No, in order to rename an album you would have to make a new album and move all the contents over.
Q: Can I add password protection to after an album has been created?
[i]A: No. Password protection can only be added at time album is created.
Q: How do password protect a new album?
A: Press the lock icon in the New Album popup.
Q: How do I delete an album?
A: Swipe to delete.
Q: If I delete an album, what happens to the pictures inside?
A: The pictures will get moved back into the camera roll automatically when you delete an album.
Q: How much is PhotoAlbums+ ?
A: $2.99 on the CydiaStore
How to Jailbreak and Unlock Your iPhone 3G Using RedSn0w (Windows) [4.2.1]
Nov 29th


These are instructions on how to jailbreak your iPhone 3G on the iOS 4.2.1 firmware using RedSn0w for Windows. The Mac version of this tutorial is here
IMPORTANT FOR UNLOCKERS
During this process you can update your baseband to the 06.15 version. If you are on 05.14 or 05.15 or higher you will need to do this to unlock. You do not need to do this for jailbreak only. Please read the following very carefully before deciding whether to do this.
1. There is no way to come back down from 06.15, and there’s no hiding the baseband version from Apple. You’ll be voiding your warranty in a very obvious way.
2. If some future baseband comes out with a critical fix, you won’t be able to update to it if it remains down in the 05.xx sequence (then again, you wouldn’t update to it if you wanted to keep your unlock anyway).
3. Starting with FW 4.2.1 if you have 06.15 on your iPhone you won’t ever be able to restore to stock firmware (it will fail). You’ll need to only restore to custom IPSWs (then again, if you’re unlocker you should already be doing that).
Don’t update to 06.15 if you don’t need to! Only do this if you need the unlock and you’re stuck on 05.14 or 05.15, and you’re willing to assume the above risks.
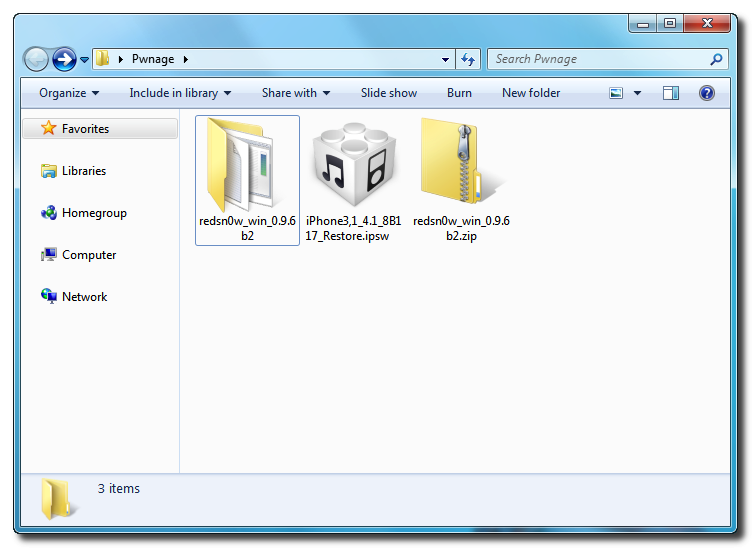
Step One
Create a folder on your desktop called Pwnage
Download RedSn0w from here and place it in the Pwnage folder. Likewise, download the latest 4.2.1 firmware from below and place it in the same folder.
4.2.1 (3G): iPhone1,2_4.2.1_8C148_Restore.ipsw
Extract the redsn0w executable from the RedSn0w zip file into the same folder.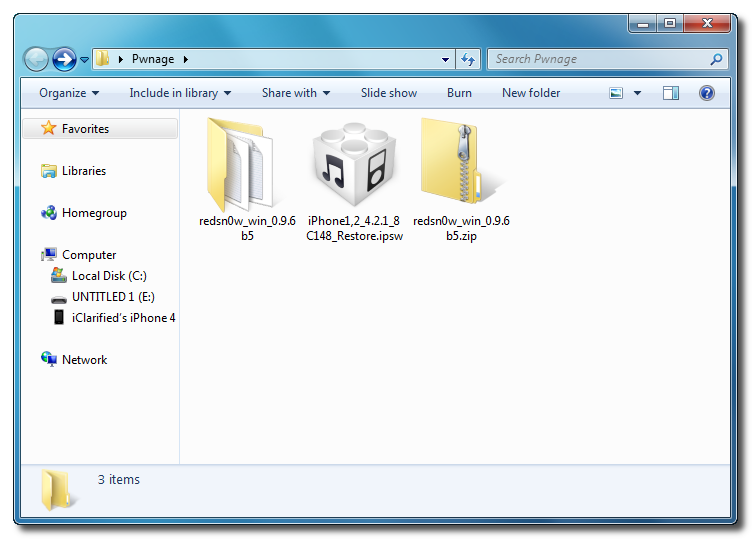
Step Two
Connect your iPhone to the computer and launch iTunes. 
Select your iPhone from the list of devices on the left. Now hold down Shift and click the Restore button. Restore is preferred as it won’t create any wasted space on your iPhone.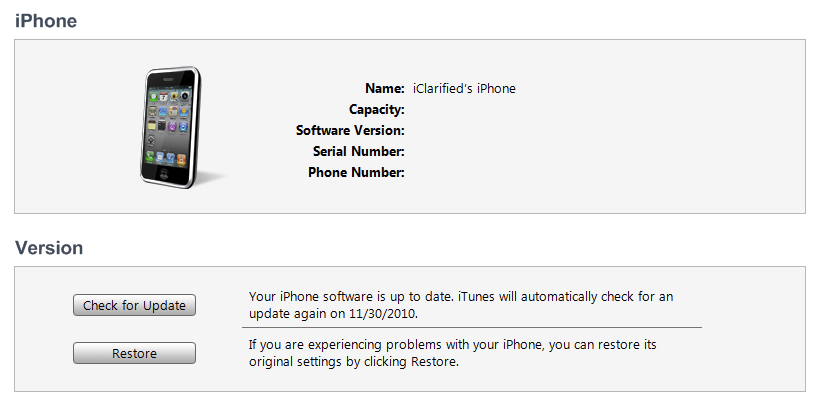
Navigate to the Pwnage folder on your desktop and select the 4.2.1 firmware ipsw. Click the Choose button to continue. 
Step Three
Once iTunes has finished updating your iPhone to the desired firmware open the Pwnage folder on your desktop and launch the redsn0w application from the redsn0w folder we extracted earlier.
Step Four
Once RedSn0w opens click the Browse button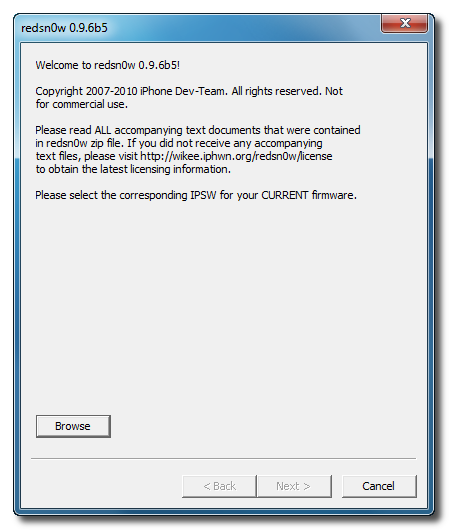
Step Five
Select the 4.2.1 firmware ipsw we placed in the Pwnage folder on our desktop then click Open. 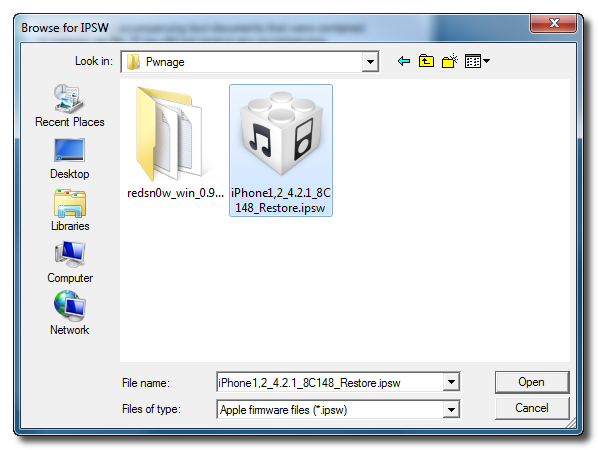
Step Six
Once the firmware has been verified click the Next button to continue.
Step Seven
RedSn0w will now prepare the jailbreak data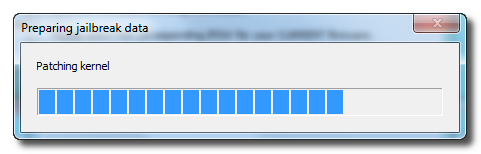
Step Eight
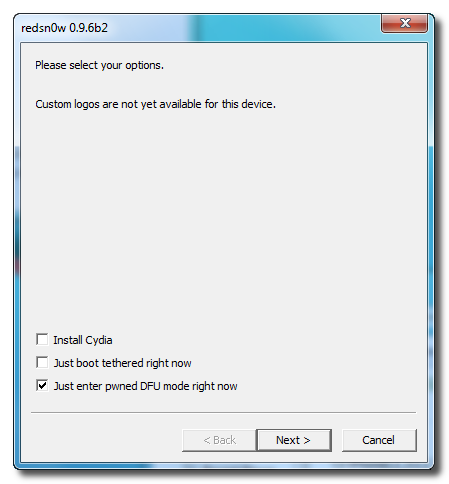
From this window you can select the jailbreak options you would like.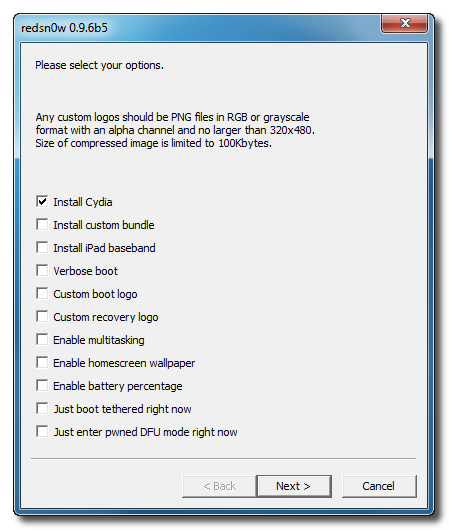
Verbose boot displays detailed information on boot of your device and is generally only needed by developers and advanced users.
Make sure Cydia is selected. For this tutorial we will also select Custom boot logo and Custom recovery logo.
When you click to select each custom logo option a dialog window will appear asking you to select the image. Locate the image you would like to use then press the Open button.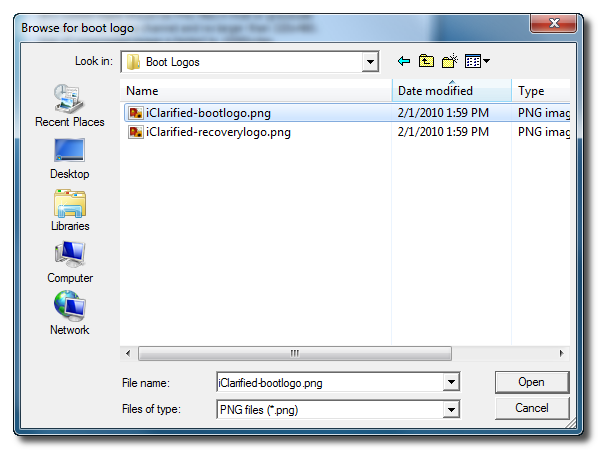
*Remember the rules for boot logos are: RGB or Grayscale format with Alpha channel and dimension below 320×480.
Notice that RedSn0w can Enable multitasking, Enable homescreen wallpaper, and Enable battery percentage. If you do not need multitasking we would recommend deselecting it as it makes your iPhone 3G run very slow.
If you read the warning above and you would like to update your baseband to the 06.15 iPad version for unlock then check Install iPad Baseband. Click Yes when prompted to confirm your decision.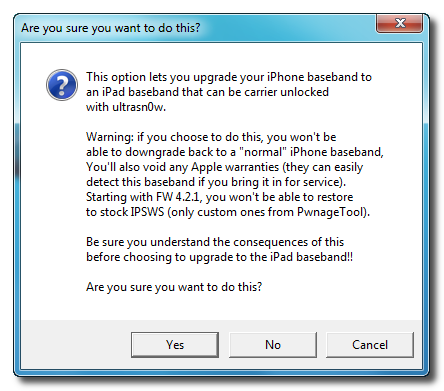
Click the Next button to continue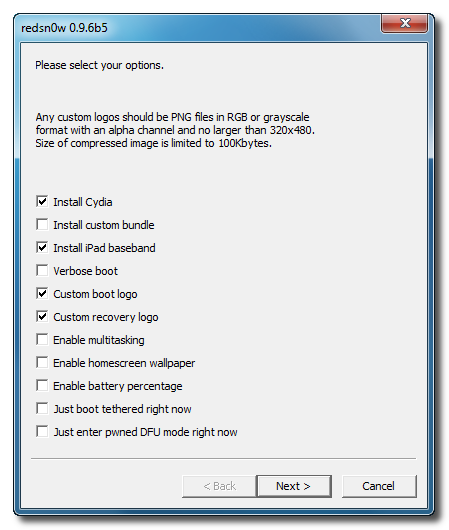
Step Nine
Please plug your iPhone into the computer and make sure its OFF then click the Next button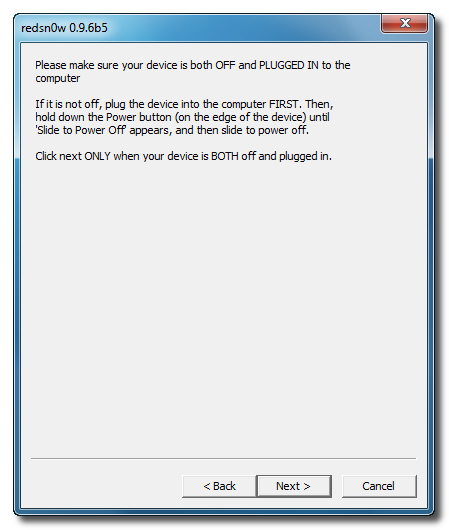
Step Ten
RedSn0w will now guide you through the steps to get into DFU mode.
Hold down both the Home button and the Power button for 10 seconds.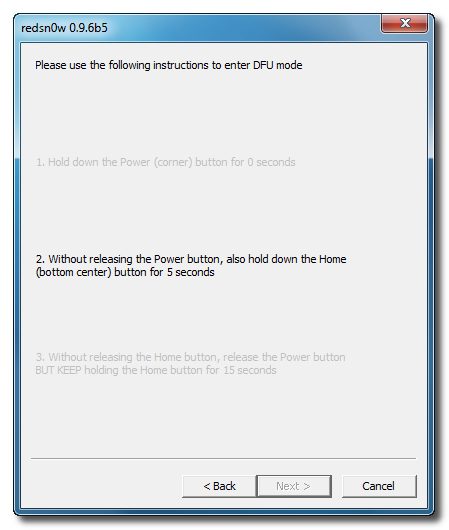
Release the Power button and continue holding the Home button until RedSn0w detects the device.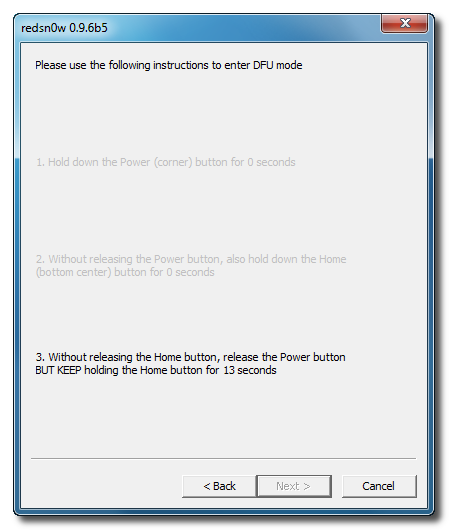
Step Eleven
RedSn0w will now downloaded the iPad baseband if needed and your iPhone will reboot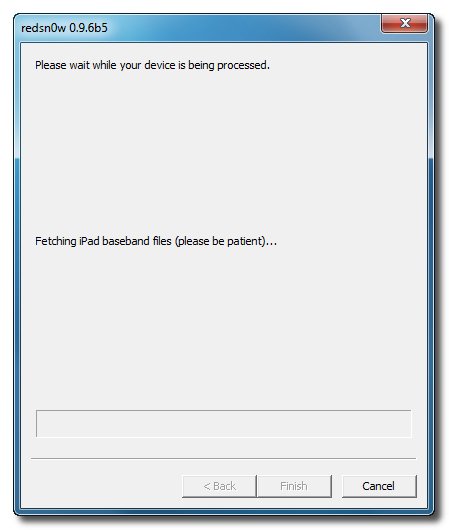

Step Twelve
RedSn0w will then begin uploading the new RAM Disk and Kernel.
Step Thirteen
Once this is complete you will be notified that RedSn0w is done. Click the Finish button. When your iPhone finishes rebooting (5 minutes or so) it will be jailbroken with Cydia on the SpringBoard.
NOTES:
If you have problems with RedSn0w on Windows Vista or Windows 7. Right click the executable and set it to run as administrator in Windows XP compatibility mode.
UNLOCK:
You can now follow this tutorial if you want to unlock your device.
*As usual a big thanks to the iPhone Dev-Team for their hard work and contribution to the iPhone community.
How to Jailbreak Using a Custom Restore IPSW and RedSn0w (Windows)[4.2.1]
Nov 28th


These are instructions on how to jailbreak your iPhone 3G & iPhone 3GS on iOS 4.2.1 using a custom restore ipsw and RedSn0w for Windows.
Step One
Create a folder on your desktop called Pwnage
Download RedSn0w from here and place it in the Pwnage folder. Likewise, download the latest 4.2.1 firmware for your device from here.
Custom Firmwares
iPhone 3G : iOS 4.2.1 Custom_Restore
-
Extract the redsn0w zip that you just downloaded into the same folder.
Step Two
Launch the redsn0w application from the redsn0w folder we extracted earlier.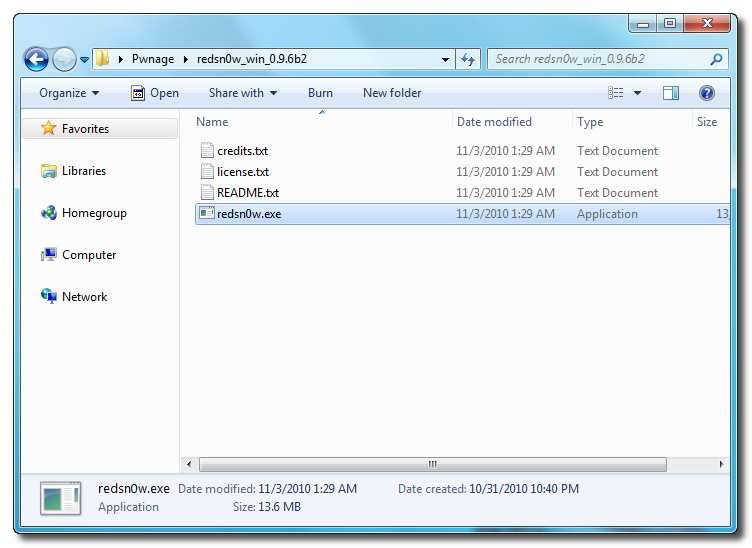
Step Three
Once RedSn0w opens click the Browse button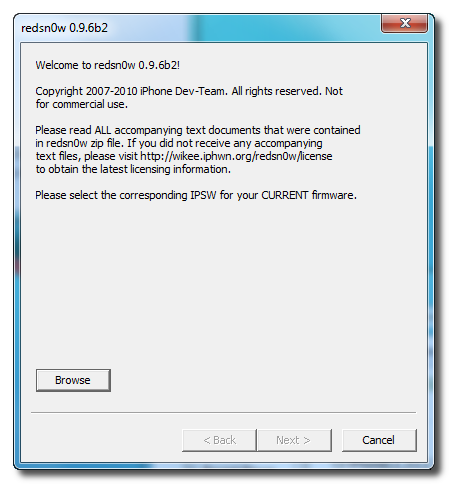
Step Four
Select the 4.2.1 firmware ipsw we placed in the Pwnage folder on our desktop then click Open.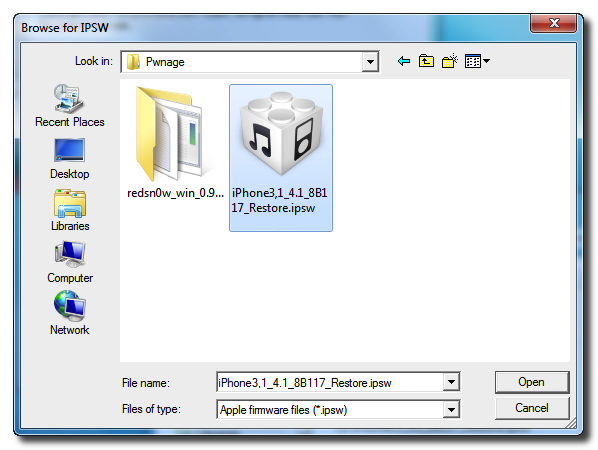
Step Five
Once the firmware has been verified click the Next button to continue.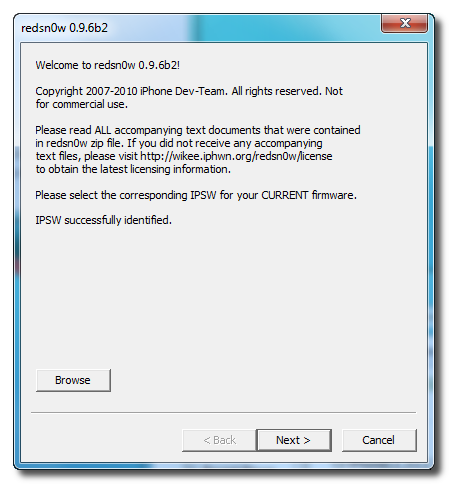
Step Six
RedSn0w will now prepare the jailbreak data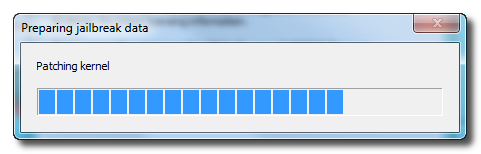
Step Seven
From this window you can select the jailbreak options you would like. Choose to put your iPhone in DFU mode.
Step Eight
Please plug your iPhone into the computer and make sure its OFF then click the Next button
Step Nine
RedSn0w will now guide you through the steps to get into DFU mode. You can find more help with DFU mode here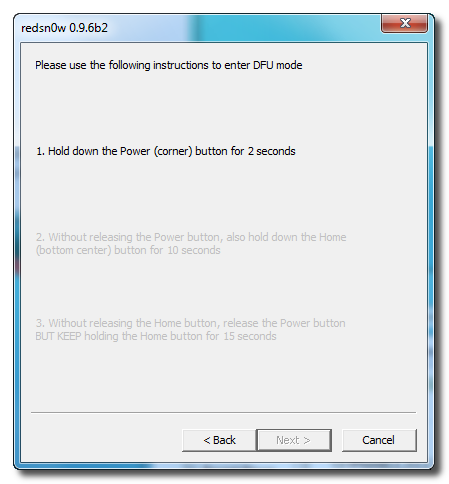
Hold down both the Home button and the Power button for 10 seconds.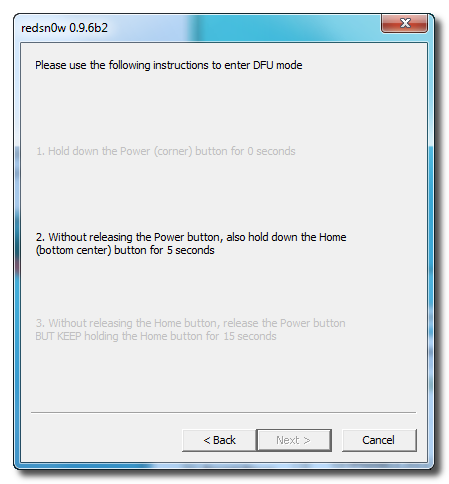
Release the Power button and continue holding the Home button until RedSn0w detects the device.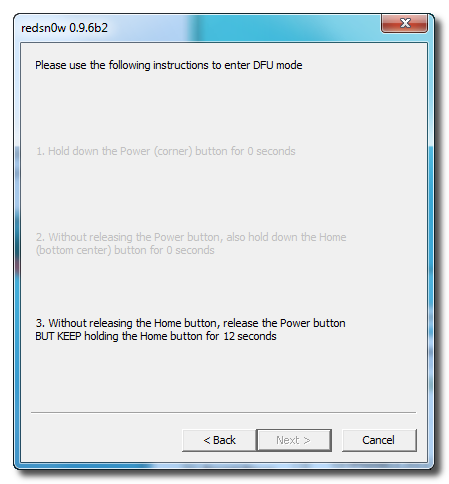
Step Ten
RedSn0w will now exploit your device with limera1n.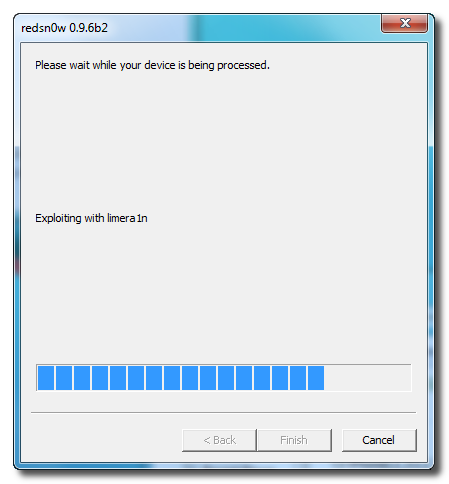
Step Eleven
Your device will now be in pwned DFU mode.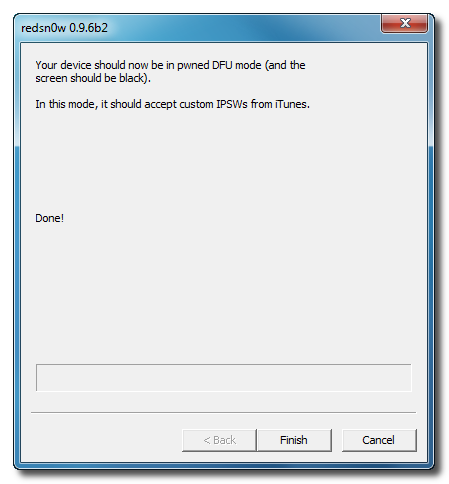
Step Twelve
Launch iTunes and select your device from the list on the left. To make iTunes restore to a custom ipsw, hold down Shift and click the Restore button. This will bring up window letting you select the custom ipsw for restore.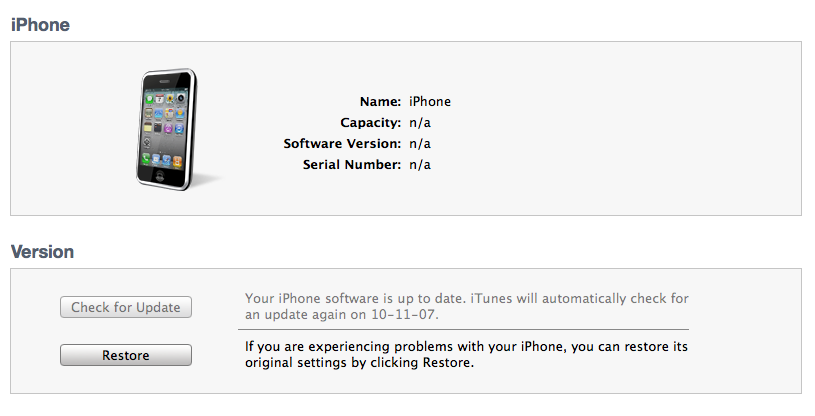
*As Always a big thanks to the iPhone Dev-Team.
How to Jailbreak and Unlock Your iPhone 3GS Using RedSn0w (Windows) [4.2.1]
Nov 28th

These are instructions on how to jailbreak your iPhone 3GS on the 4.2.1 firmware using RedSn0w for Windows. The Mac version of this tutorial is here.
If you have an iPhone 3GS with the new bootrom you will only be able to perform a tethered jailbreak at this time. This means you will need Redsn0w’s assistance to boot into your jailbroken device.
IMPORTANT FOR UNLOCKERS
During this process you can update your baseband to the 06.15 version. If you are on 05.14 or 05.15 or higher you will need to do this to unlock. You do not need to do this for jailbreak only. Please read the following very carefully before deciding whether to do this.
1. There is no way to come back down from 06.15, and there’s no hiding the baseband version from Apple. You’ll be voiding your warranty in a very obvious way.
2. If some future baseband comes out with a critical fix, you won’t be able to update to it if it remains down in the 05.xx sequence (then again, you wouldn’t update to it if you wanted to keep your unlock anyway).
3. Starting with FW 4.2.1 if you have 06.15 on your iPhone you won’t ever be able to restore to stock firmware (it will fail). You’ll need to only restore to custom IPSWs (then again, if you’re unlocker you should already be doing that).
Don’t update to 06.15 if you don’t need to! Only do this if you need the unlock and you’re stuck on 05.14 or 05.15, and you’re willing to assume the above risks.
Step One
Create a folder on your desktop called Pwnage
Download RedSn0w from here and place it in the Pwnage folder. Likewise, download the latest 4.2.1 firmware from below and place it in the same folder.
4.2.1 (3GS): iPhone2,1_4.2.1_8C148a_Restore.ipsw
Extract the redsn0w executable from the RedSn0w zip file into the same folder.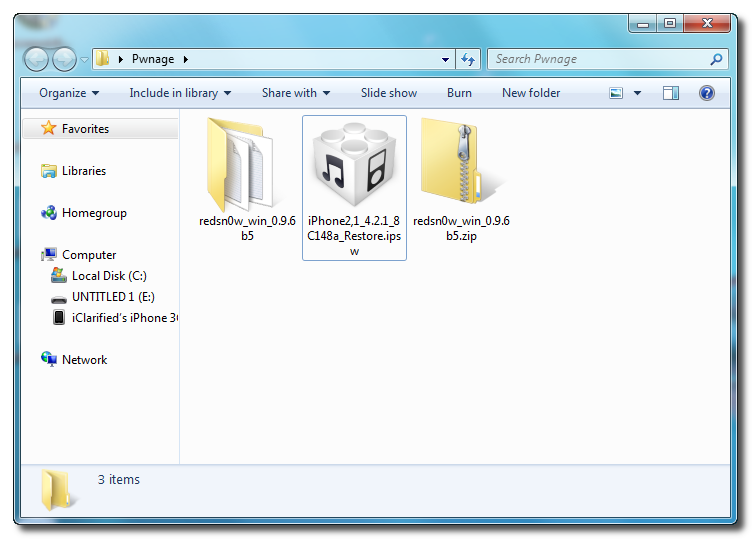
Step Two
***If you are already on iOS 4.2.1 you can skip this step.
Connect your iPhone to the computer and launch iTunes. 
Select your iPhone from the list of devices on the left. Now hold down Shift and click the Restore button. Restore is preferred as it won’t create any wasted space on your iPhone.
Navigate to the Pwnage folder on your desktop and select the 4.2.1 firmware ipsw. Click the Choose button to continue. 
Step Three
Once iTunes has finished updating your iPhone to the desired firmware open the Pwnage folder on your desktop and launch the redsn0w application from the redsn0w folder we extracted earlier.
Step Four
Once RedSn0w opens click the Browse button
Step Five
Select the 4.2.1 firmware ipsw we placed in the Pwnage folder on our desktop then click Open. 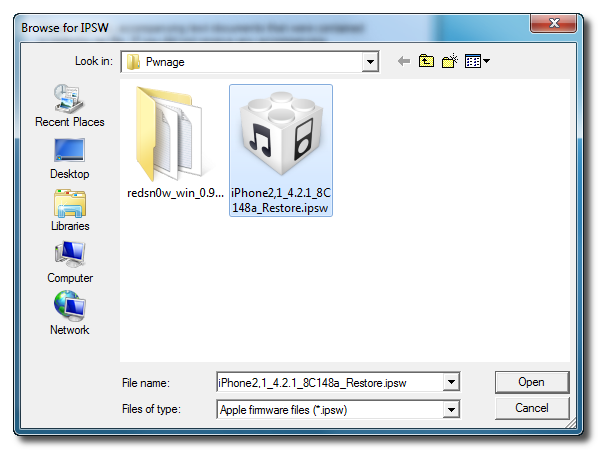
You will be asked if this device is a newer fixed model. If yours is then click the Yes button; otherwise, click the No button. At this time you can only perform an untethered jailbreak on the older model.
Step Six
Once the firmware has been verified click the Next button to continue.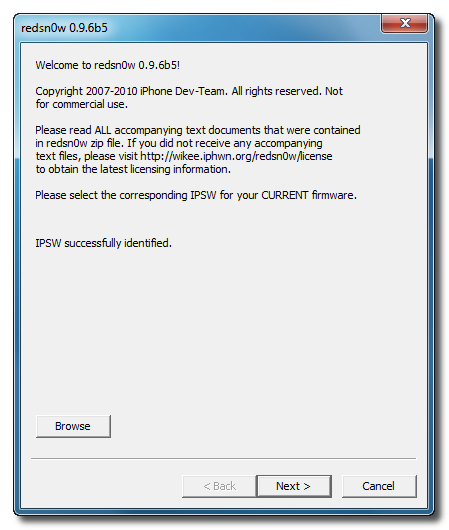
Step Seven
RedSn0w will now prepare the jailbreak data
Step Eight
From this window you can select the jailbreak options you would like.
Verbose boot displays detailed information on boot of your device and is generally only needed by developers and advanced users.
Make sure Cydia is selected. For this tutorial we will also select Custom boot logo and Custom recovery logo.
When you click to select each custom logo option a dialog window will appear asking you to select the image. Locate the image you would like to use then press the Open button.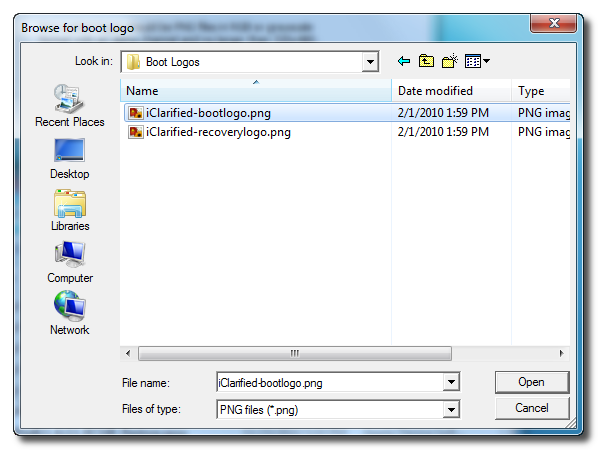
*Remember the rules for boot logos are: RGB or Grayscale format with Alpha channel and dimension below 320×480.
If you read the warning above and you would like to update your baseband to the 06.15 iPad version for unlock then check Install iPad Baseband. Click Yes when prompted to confirm your decision.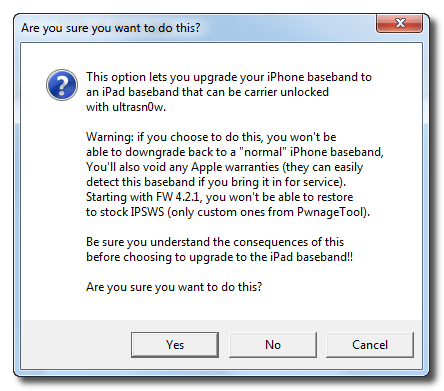
Click the Next button continue.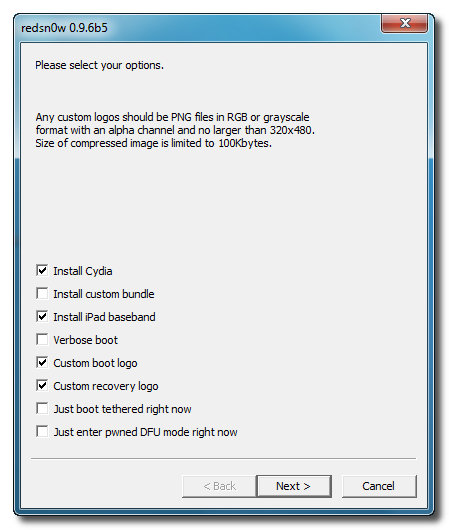
Step Nine
Please plug your iPhone into the computer and make sure its OFF then click the Next button
Step Ten
RedSn0w will now guide you through the steps to get into DFU mode.
Hold down both the Home button and the Power button for 10 seconds.
Release the Power button and continue holding the Home button until RedSn0w detects the device.
Step Eleven
RedSn0w will now download the iPad baseband if needed and your iPhone will reboot

Step Twelve
RedSn0w will then begin uploading the new RAM Disk and Kernel.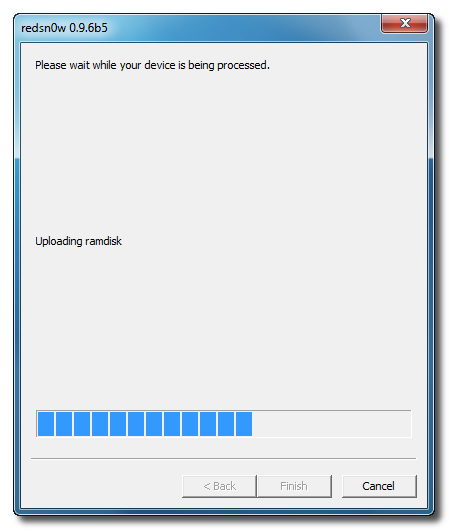
Step Thirteen
Once this is complete you will be notified that RedSn0w is done. Click the Finish button. When your iPhone finishes rebooting (5 minutes or so) it will be jailbroken with Cydia on the SpringBoard.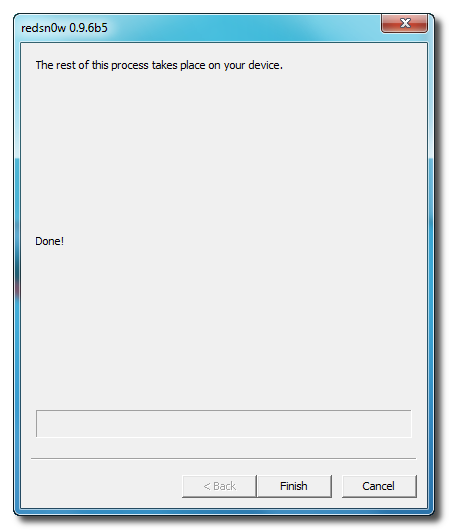
IMPORTANT:
If you have a newer iPhone 3GS and performed a tethered jailbreak you can use Redsn0w to help you boot back into your jailbroken device. Simply select Just boot tethered right now from the options window and click Next.
UNLOCK:
Follow this
*As usual a big thanks to the iPhone Dev-Team for their hard work and contribution to the iPhone community.
How to Jailbreak and Unlock Your iPhone 3GS Using PwnageTool (Mac) [4.1]
Nov 28th


These are instructions on how to jailbreak your iPhone 3GS on iOS 4.1 using PwnageTool for Mac. This tutorial will help you upgrade your baseband if needed for unlock.
**Important: iPhone3GS users with old bootroms who want to go to 4.2.1 and unlock should not use this PwnageTool! Update to stock 4.2.1 first, then use the upcoming redsn0w to update your baseband.**
Step One
Make a folder called “Pwnage” on the desktop. In it you will need a couple of things. PwnageTool 4.1.3, found here
You will also need the 4.1 iPhone firmware.
4.1.0 (3GS): iPhone2,1_4.1_8B117_Restore.ipsw
If you are on the 05.14 or 05.15 baseband you will also need the iPad 3.2.2 firmware.
3.2.2: iPad1,1_3.2.2_7B500_Restore.ipsw
When downloading the IPSW file, it is best to download it with Firefox since Safari often auto extracts it!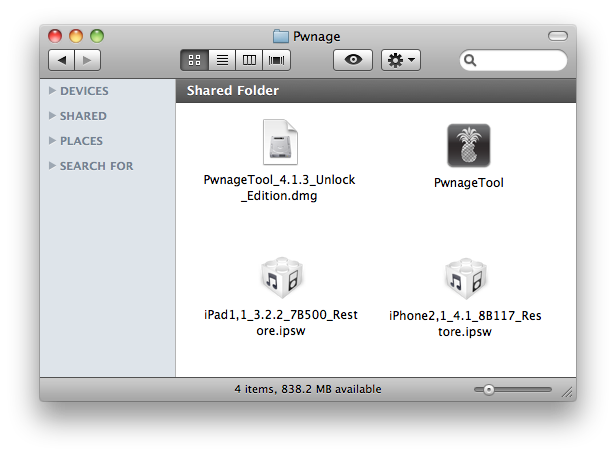
Step Two
Double click to mount PwnageTool then drag the PwnageTool icon into the Pwnage folder.
Then from the Pwnage folder double click to launch the PwnageTool application.
Click Ok if presented with a warning.
Step Three
Click to select Expert Mode from the top menu bar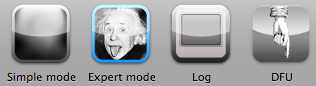
Step Four
Click to select your device. A check-mark will appear over the image of the device. Click the blue arrow button to continue.
Step Five
You will be brought to the “Browse for IPSW” page. Click the Browse for IPSW… button.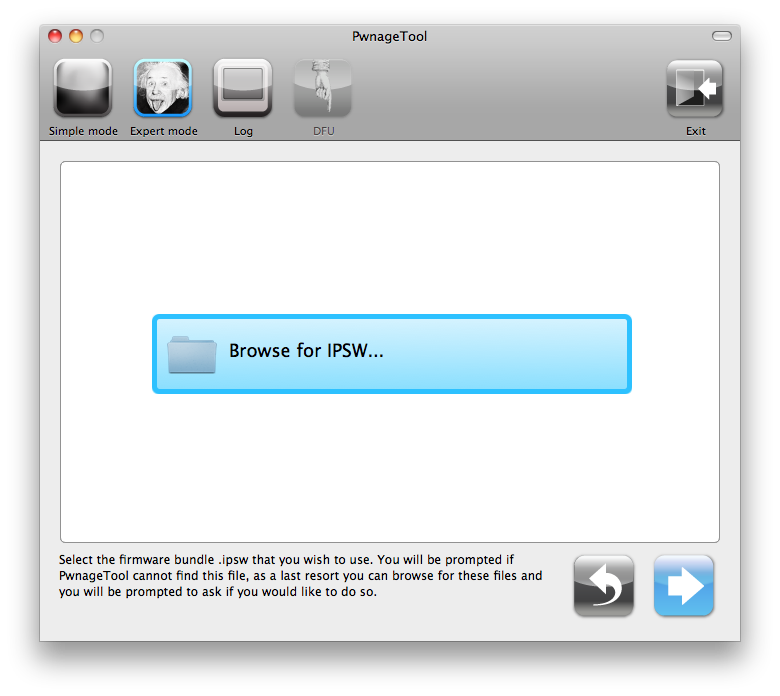
From the popup window select your firmware from the Pwnage folder then click the Open button.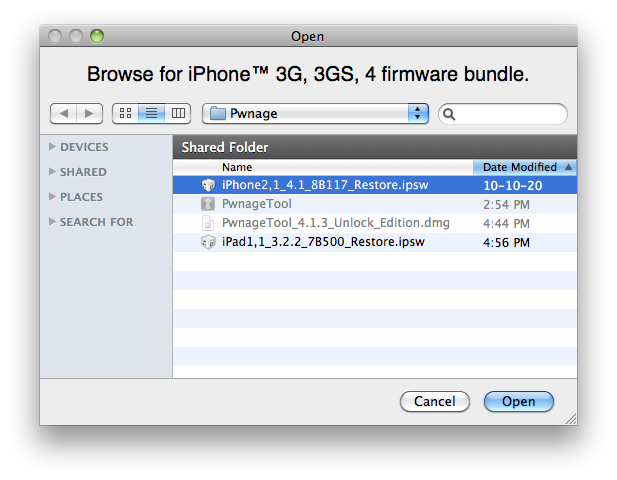
Step Six
You will now be asked if you want to update your baseband to the 06.15 version. If you are on 05.14 or 05.15 or higher you will need to do this to unlock. You do not need to do this for jailbreak only.
Please read the following very carefully before deciding whether to do this.
1. There is no way to come back down from 06.15, and there’s no hiding the baseband version from Apple. You’ll be voiding your warranty in a very obvious way.
2. If some future baseband comes out with a critical fix, you won’t be able to update to it if it remains down in the 05.xx sequence (then again, you wouldn’t update to it if you wanted to keep your unlock anyway).
3. Starting with FW 4.2.1 if you have 06.15 on your iPhone you won’t ever be able to restore to stock firmware (it will fail). You’ll need to only restore to custom IPSWs (then again, if you’re unlocker you should already be doing that).
Don’t update to 06.15 if you don’t need to! Only do this if you need the unlock and you’re stuck on 05.14 or 05.15, and you’re willing to assume the above risks.
If you pressed YES then click the Browse for IPSW… button.
From the popup window select the iPad 3.2.2 firmware from the Pwnage folder then click the Open button.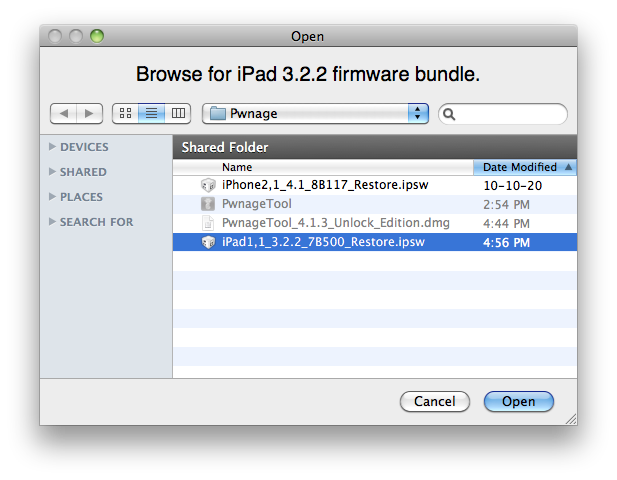
Step Seven
You will then be brought to a menu with several choices. Click to select General then click the blue arrow button.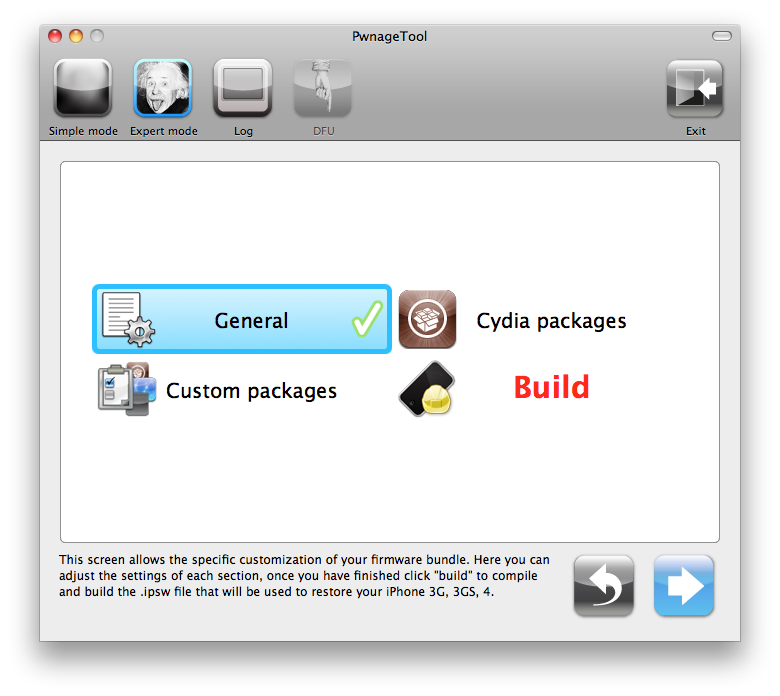
The General settings allows you to decide the partition size. Check Activate the phone if you are not with an official carrier then click the blue arrow button.
NOTE*: Deselect Activate if you have an iPhone legitimately activated on an official carrier.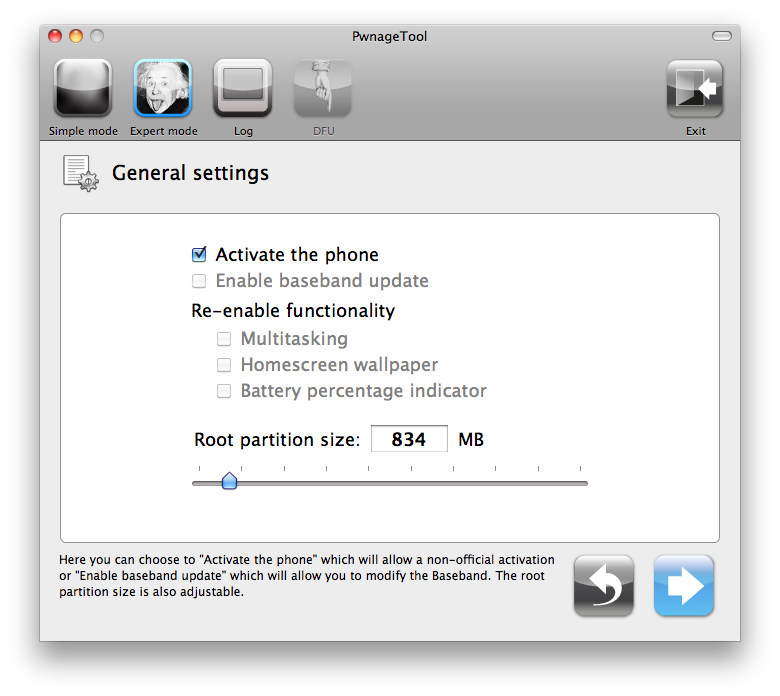
The Cydia settings menu allows you to create custom packages so you do not have to manually install the necessary them later.
Click to select the Download packages tab. Then click the Refresh button to display all the available packages. Double clicking the package you want will download it and make it available in the Select Packages tab.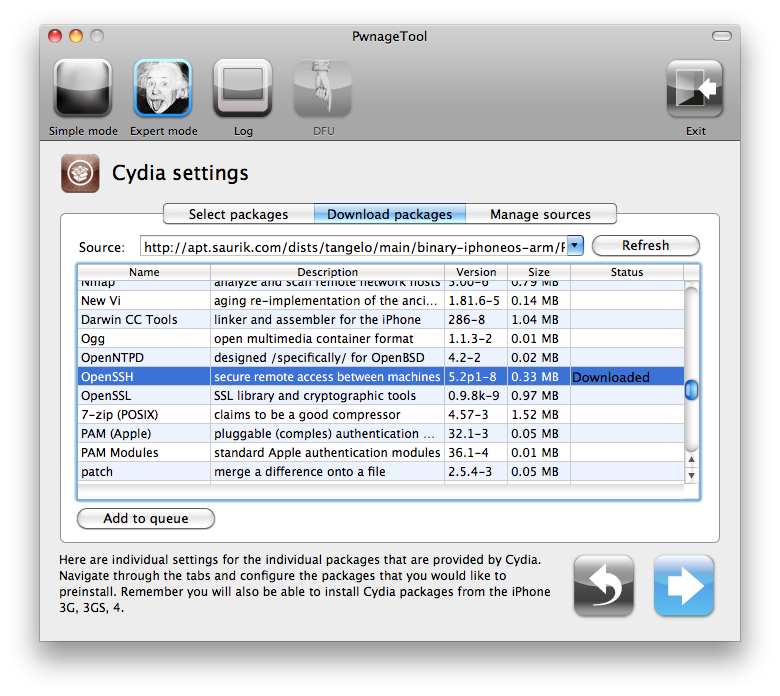
Checkmark the ones you want then click the blue arrow button.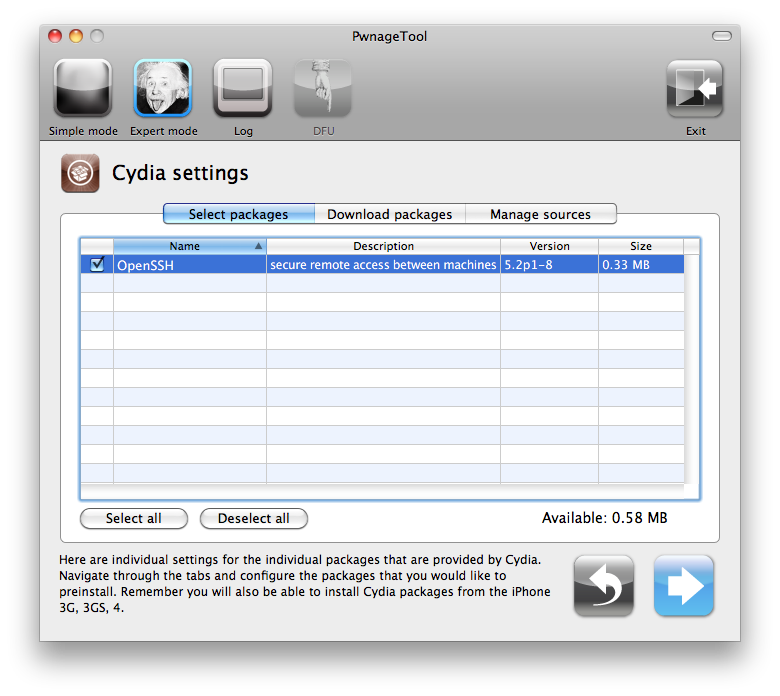
The Custom Packages Settings menu displays listed package settings for your custom IPSW. For know leave these settings as is. Click the blue arrow button to continue.
Step Eight
You are now ready to begin the pwnage process! Click the Build button to select it then click the Blue arrow button to begin.
Step Nine
You will be asked to save your custom .ipsw file. Save it to your Pwnage folder you created on your Desktop.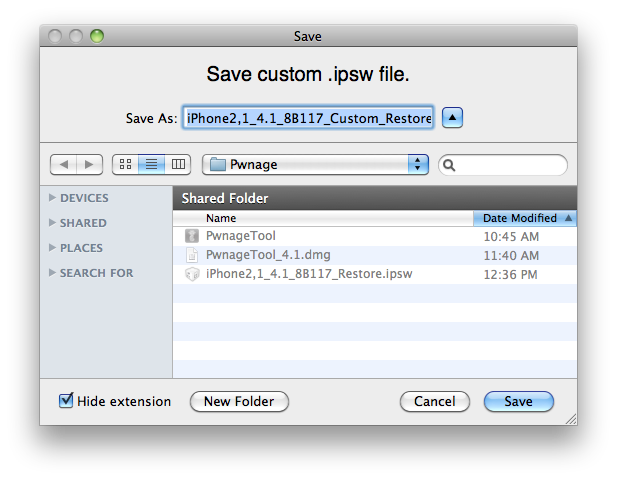
Your IPSW is now being built. Please allow up to 10 minutes.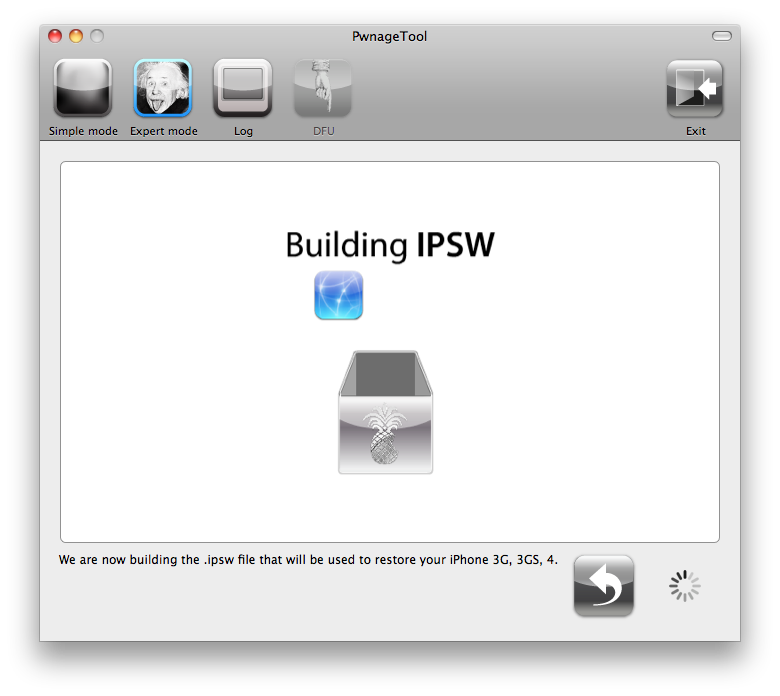
You will be asked to enter your administrator password. Do this then click the OK button.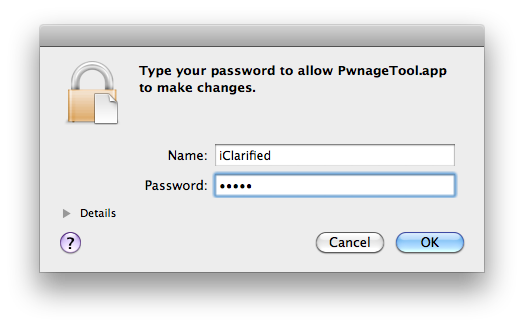
Step Ten
Once your ipsw has been built you will be asked to connect your iPhone to the computer. Once it detects your device PwnageTool will guide your through the steps to putting your iPhone into DFU mode.
Press and hold the power and home buttons for 10 seconds.
Then release the power button and continue holding the home button for 10 seconds.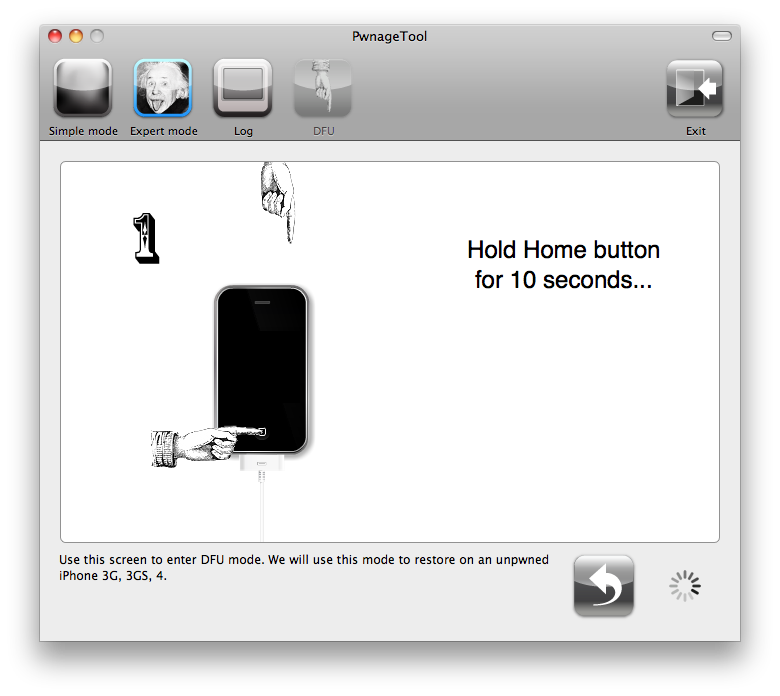
Once your iPhone is successfully in DFU mode, PwnageTool will prompt you to launch iTunes.
Step Eleven
Once In iTunes, hold the Alt/Option key and click Restore.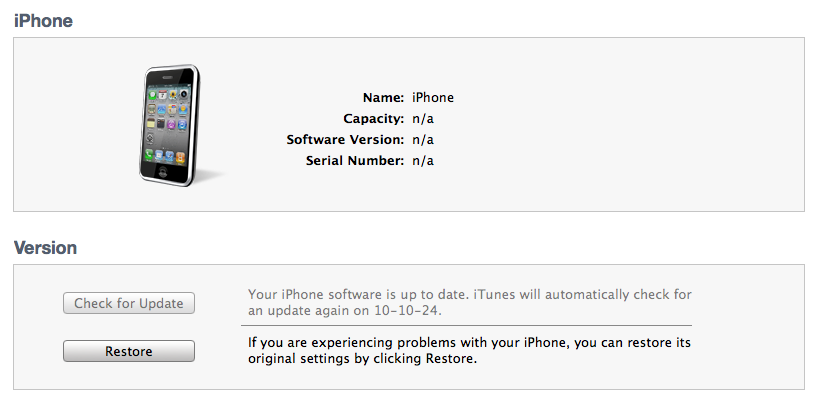
Step Twelve
Navigate to the Pwnage folder on your desktop using the dialog window that appears. Select the custom IPSW that was created and click the Choose button.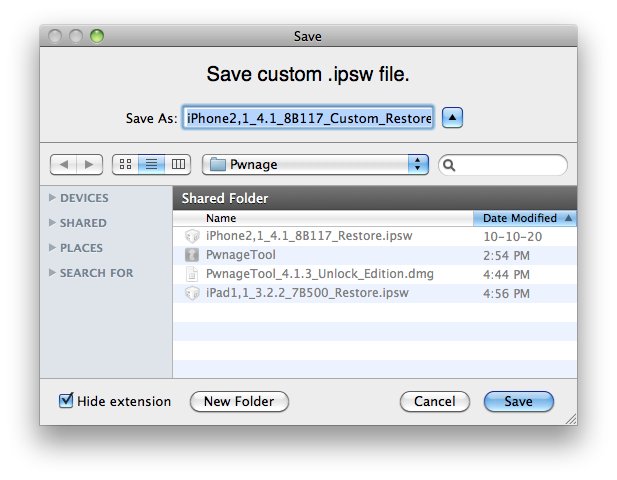
UNLOCK: You can now follow this tutorial to unlock your device.
***THANKS: Thank you to Geohot and the Dev-Teams for their hard work in making this jailbreak and tutorial possible!
How to Jailbreak and Unlock Your iPhone 3G Using PwnageTool (Mac) [4.2.1]
Nov 28th

 These are instructions on how to jailbreak and unlock your iPhone 3G on iOS 4.2.1 using PwnageTool for Mac. This tutorial will explain how to upgrade your baseband if needed for an unlock.
Step One
Make a folder called “Pwnage” on the desktop. In it you will need a couple of things. PwnageTool 4.1.3, found here
You will also need the 4.2.1 iPhone firmware.
4.2.1 (3G): iPhone1,2_4.2.1_8C148_Restore.ipsw
If you are on the 05.14 or 05.15 baseband you will also need the iPad 3.2.2 firmware.
3.2.2: iPad1,1_3.2.2_7B500_Restore.ipsw
When downloading the IPSW file, it is best to download it with Firefox since Safari often auto extracts it!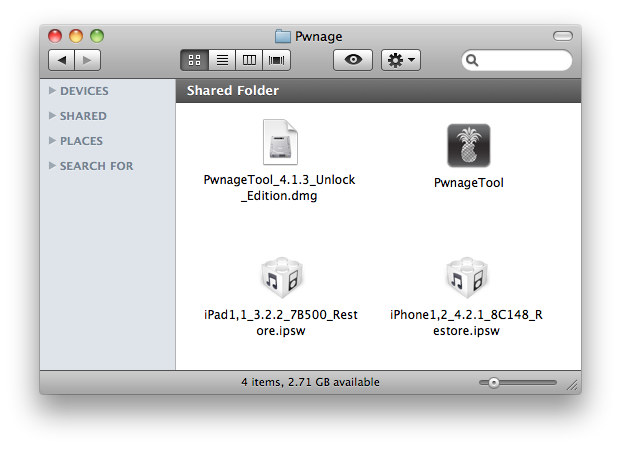
Step Two
Double click to mount PwnageTool then drag the PwnageTool icon into the Pwnage folder.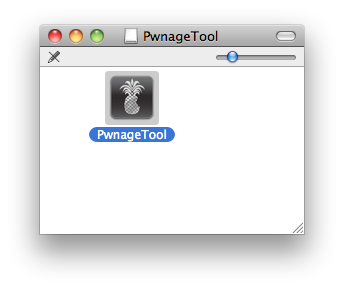
Then from the Pwnage folder double click to launch the PwnageTool application.
Click Ok if presented with a warning.
Step Three
Click to select Expert Mode from the top menu bar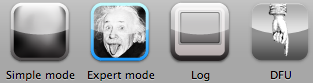
Step Four
Click to select your device. A check-mark will appear over the image of the device. Click the blue arrow button to continue.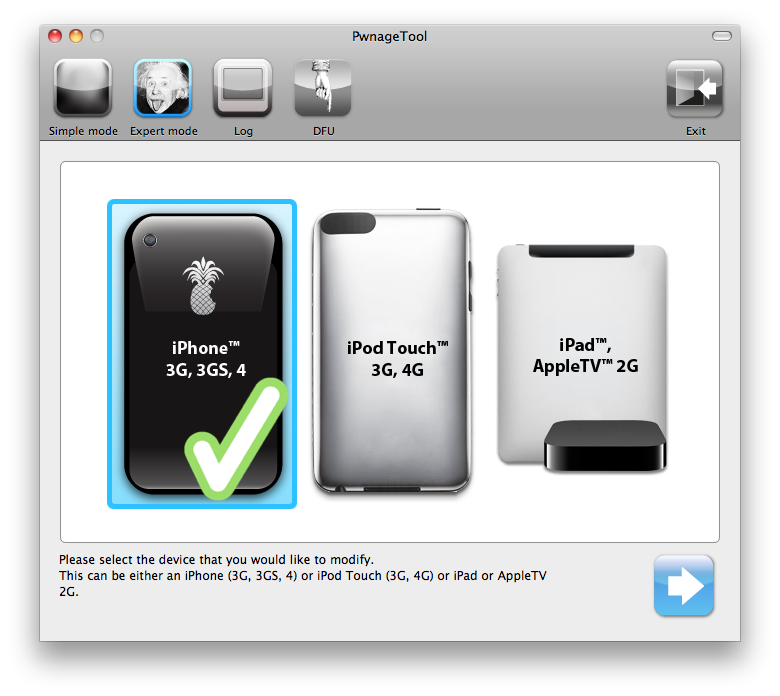
Step Five
You will be brought to the “Browse for IPSW” page. Click the Browse for IPSW… button.
From the popup window select your firmware from the Pwnage folder then click the Open button.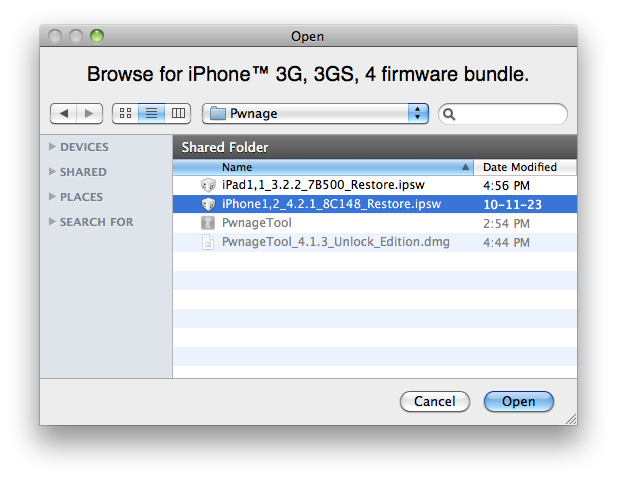
Step Six
You will now be asked if you want to update your baseband to the 06.15 version. If you are on 05.14 or 05.15 or higher you will need to do this to unlock. You do not need to do this for jailbreak only.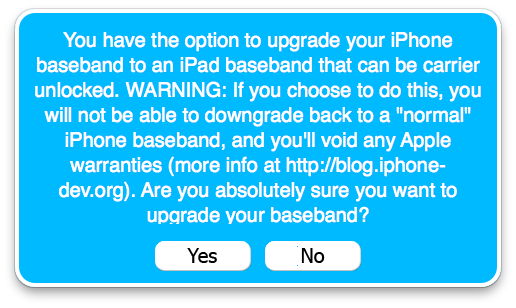
Please read the following very carefully before deciding whether to do this.
1. There is no way to come back down from 06.15, and there’s no hiding the baseband version from Apple. You’ll be voiding your warranty in a very obvious way.
2. If some future baseband comes out with a critical fix, you won’t be able to update to it if it remains down in the 05.xx sequence (then again, you wouldn’t update to it if you wanted to keep your unlock anyway).
3. Starting with FW 4.2.1 if you have 06.15 on your iPhone you won’t ever be able to restore to stock firmware (it will fail). You’ll need to only restore to custom IPSWs (then again, if you’re unlocker you should already be doing that).
Don’t update to 06.15 if you don’t need to! Only do this if you need the unlock and you’re stuck on 05.14 or 05.15, and you’re willing to assume the above risks.
If you pressed YES then click the Browse for IPSW… button.
From the popup window select the iPad 3.2.2 firmware from the Pwnage folder then click the Open button.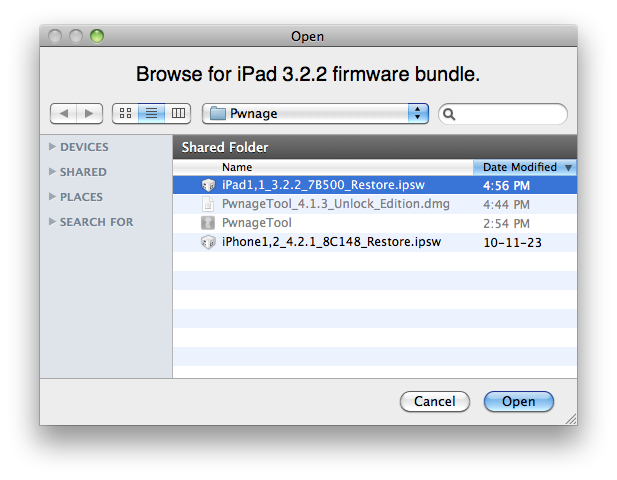
Step Seven
You will then be brought to a menu with several choices. Click to select General then click the blue arrow button.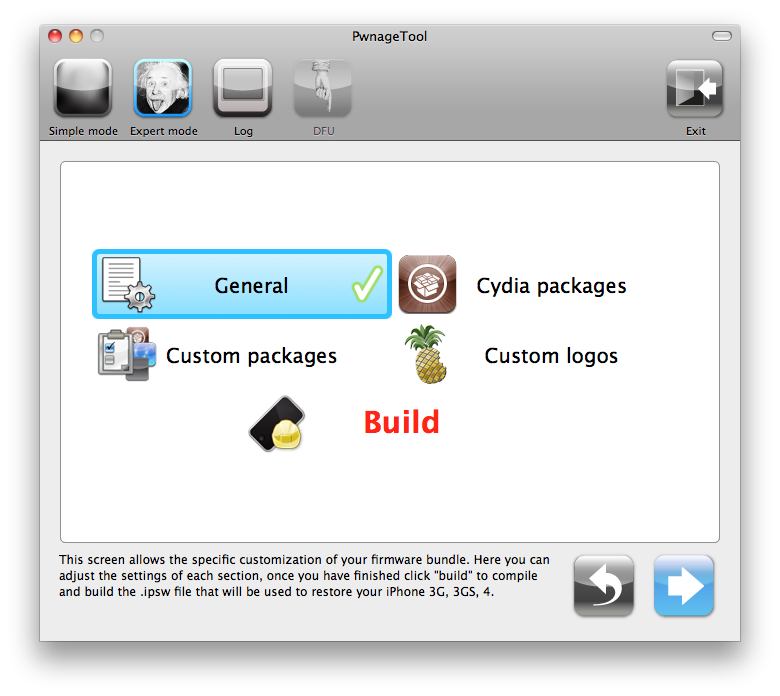
The General settings allows you to decide the partition size. Check Activate the phone if you are not with an official carrier then click the blue arrow button. Here you can also choose to enable iOS 4 features such as Multitasking, Wallpapers, and Battery Percentage. If you choose to do this please be aware that the performance of your device could suffer.
NOTE*: Deselect Activate if you have an iPhone legitimately activated on an official carrier.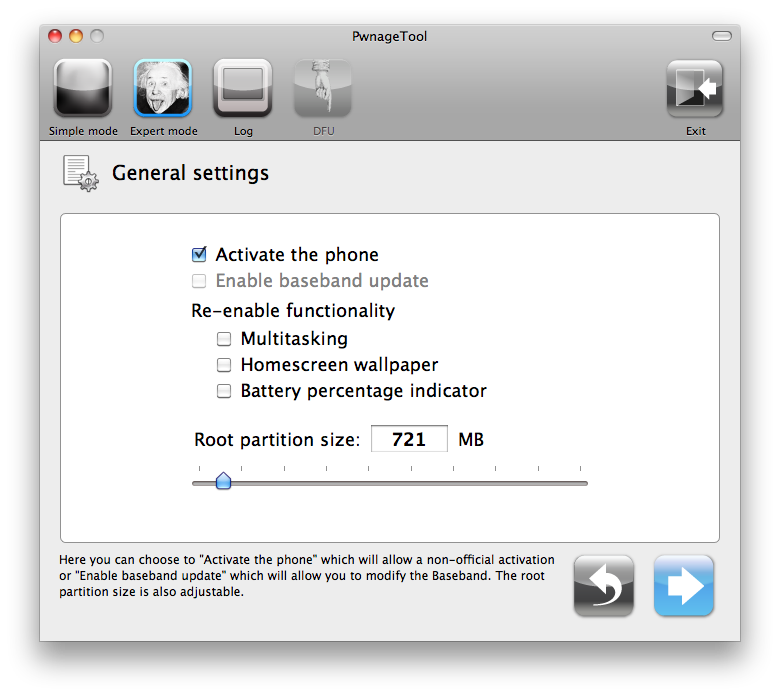
The Cydia settings menu allows you to create custom packages so you do not have to manually install the necessary them later.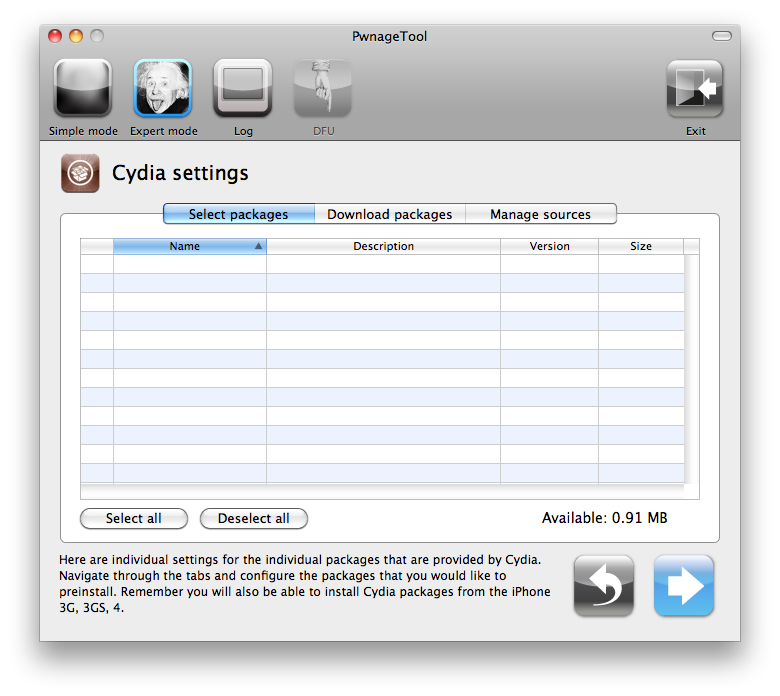
Click to select the Download packages tab. Then click the Refresh button to display all the available packages. Double clicking the package you want will download it and make it available in the Select Packages tab.
Checkmark the ones you want then click the blue arrow button.
The Custom Packages Settings menu displays listed package settings for your custom IPSW. For know leave these settings as is. Click the blue arrow button to continue.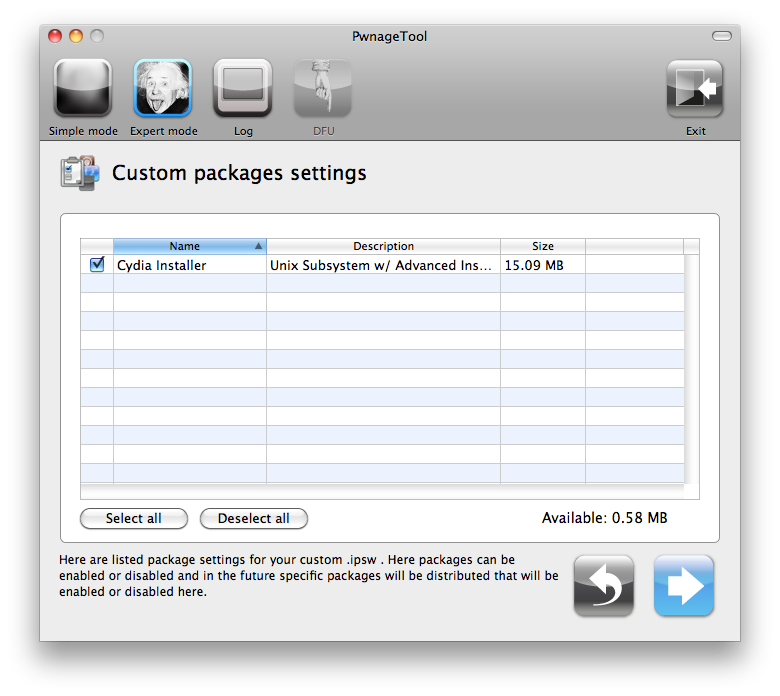
The Custom Logos Settings menu allows you to add your own images as boot logos. Click the Browse button to select your Boot logo and Recovery logo.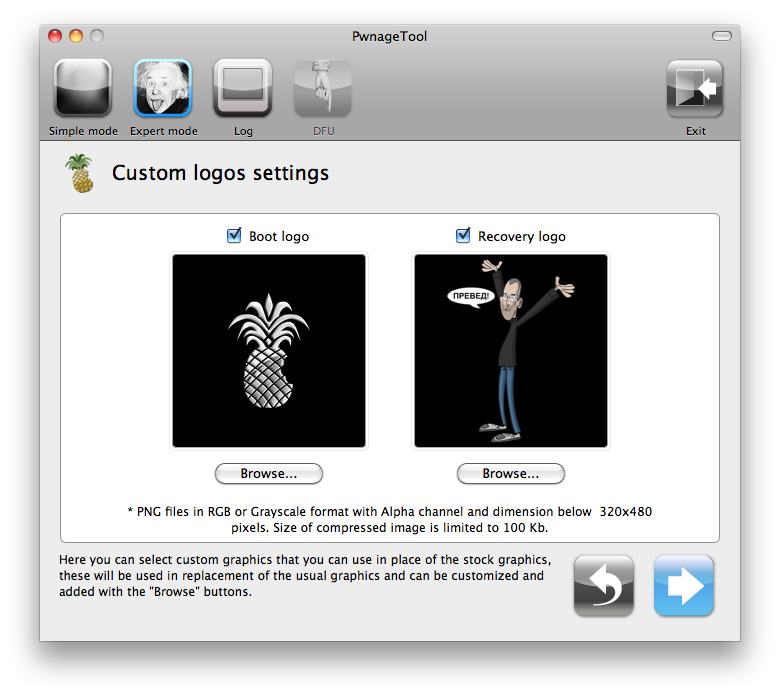
Remember the rules for them: RGB or Grayscale format with Alpha channel and dimensions below 320×480…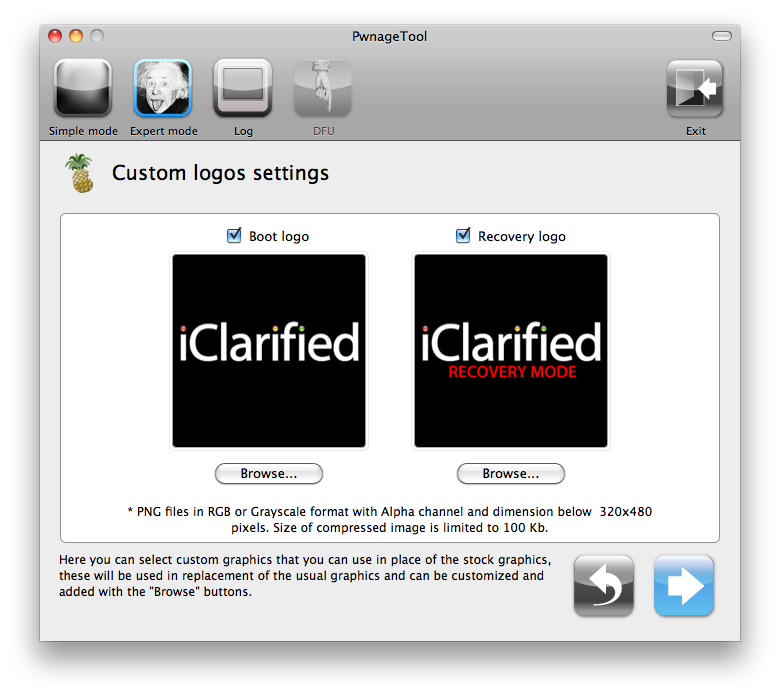
Click the blue arrow button to continue.
Step Eight
You are now ready to begin the pwnage process! Click the Build button to select it then click the Blue arrow button to begin.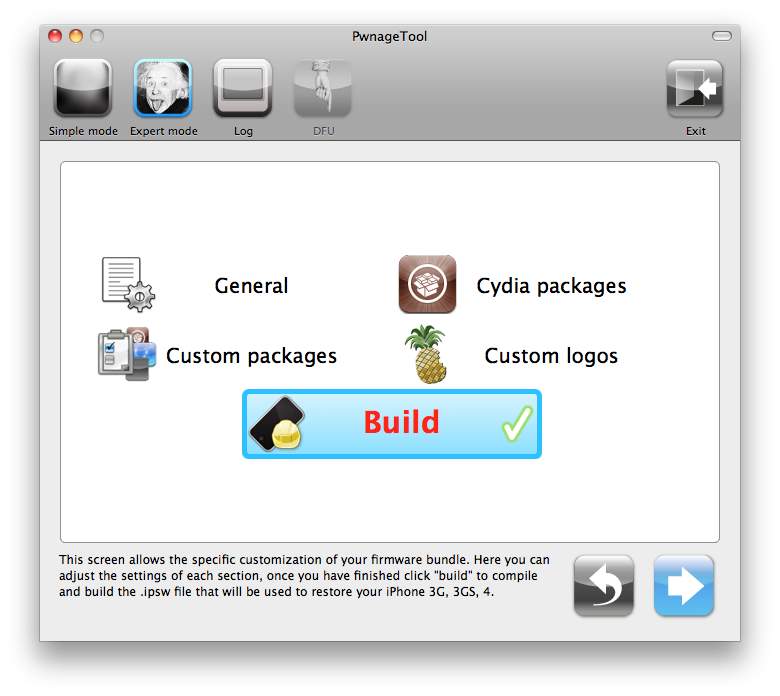
Step Nine
You will be asked to save your custom .ipsw file. Save it to your Pwnage folder you created on your Desktop.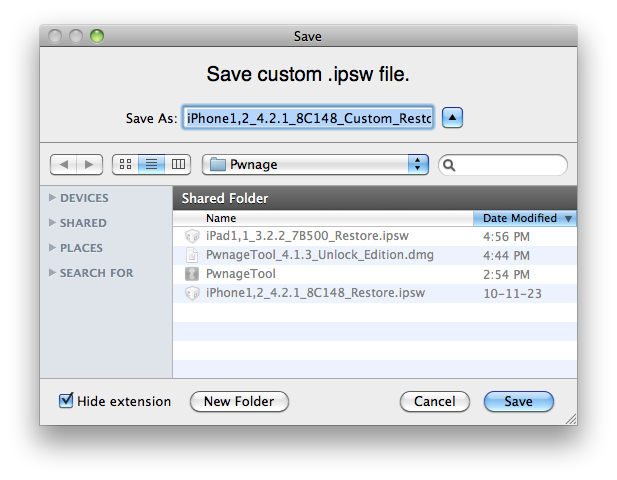
Your IPSW is now being built. Please allow up to 10 minutes.
You will be asked to enter your administrator password. Do this then click the OK button.
Step Ten
When prompted if your iPhone has been Pwned before, we clicked No. It allows for a more thorough restore.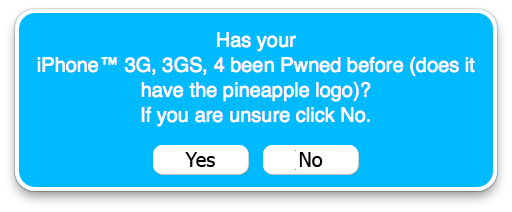
Once your ipsw has been built you will be asked to connect your iPhone to the computer. Once it detects your device PwnageTool will guide your through the steps to putting your iPhone into DFU mode.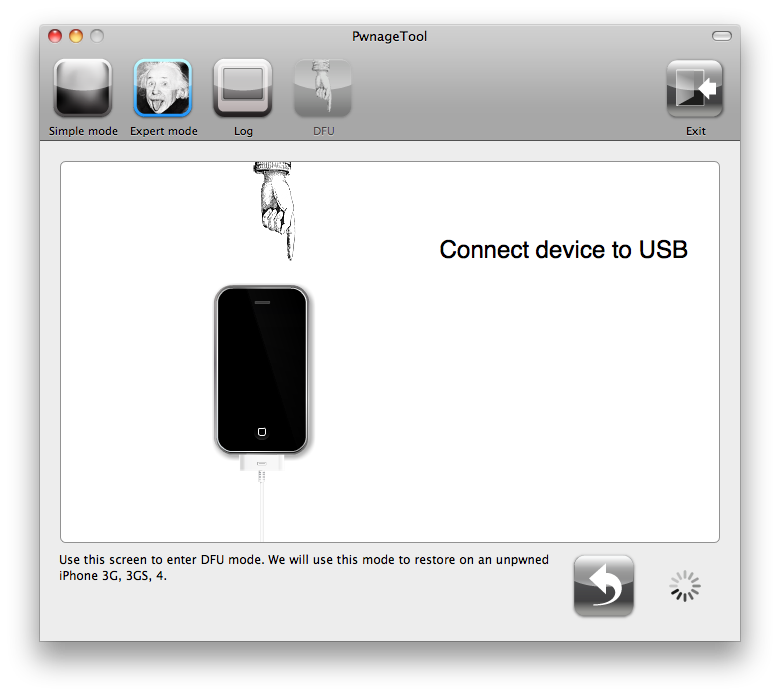
Press and hold the power and home buttons for 10 seconds.
Then release the power button and continue holding the home button for 10 seconds.
Once your iPhone is successfully in DFU mode, PwnageTool will prompt you to launch iTunes.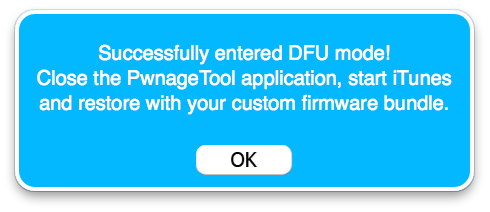
Step Eleven
Once In iTunes, hold the Alt/Option key and click Restore.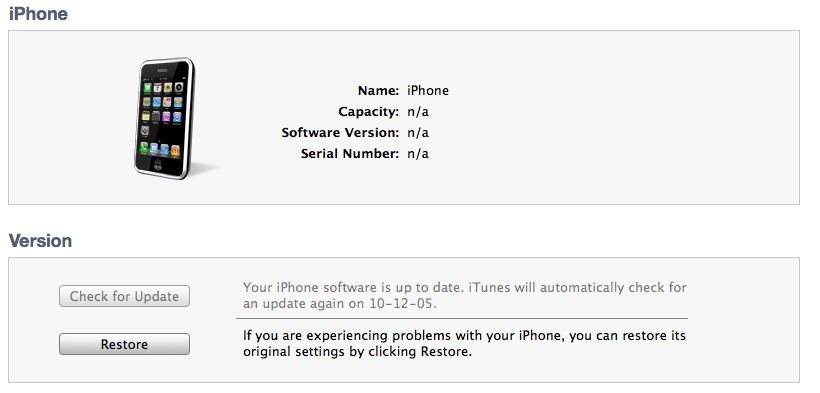
Step Twelve
Navigate to the Pwnage folder on your desktop using the dialog window that appears. Select the custom IPSW that was created and click the Choose button.
Step Thirteen
iTunes will now restore the firmware on your iPhone. This can also take up to 10 minutes. Once done you will be rebooted into jailbroken iOS 4.2.1!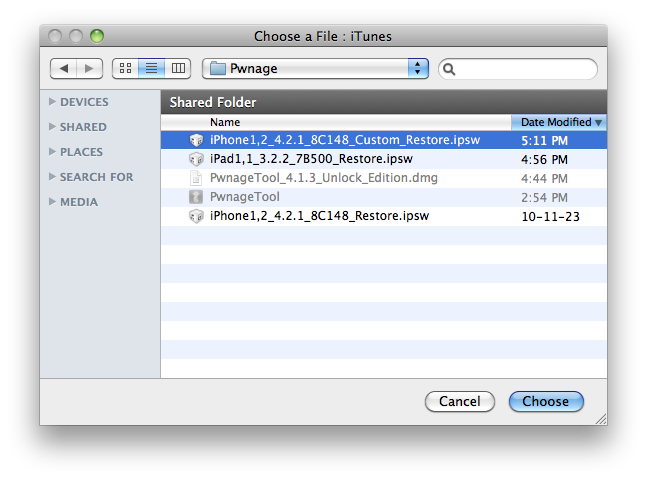
UNLOCK: You can now follow this tutorial to unlock your device.
***THANKS: Thank you to Geohot and the Dev-Teams for their hard work in making this jailbreak and tutorial possible!
Betas of Backgrounder and MultiIconMover Released for iOS 4.2.1
Nov 28th


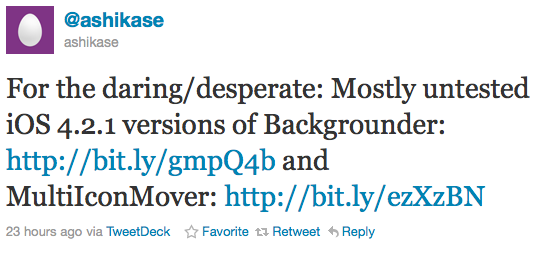
Ashikase has released beta versions of Backgrounder and MultiIconMover for those who are in urgent need of the packages.
For the daring/desperate: Mostly untested iOS 4.2.1 versions of Backgrounder: http://bit.ly/gmpQ4b and MultiIconMover: http://bit.ly/ezXzBN
Backgrounder lets you run any application in the background. MultiIconMover lets you arrange your Springboard icons more than one at a time.


Recent Comments