Mastery of the iPod Starts Here
SBSwitcher Puts Your SBSettings Toggles in the App Switcher
Dec 19th


|
SBSwitcher is a tweak by ballplayer Lindsay that puts your SBSettings toggles in the multitasking app switcher.
    |
||
Infinity Blade Save Game Editor (Win)
Dec 18th


The program can be downloaded from
Mediafire
MegaUpload
Inside the rar file contain the following.
- program to edit your own save game (You need to copy the save game file out from your idevice and put it in the same directory of the program)
- a pre-edited save game with the following stats (If you do not want to mess around with my program)
Just reload the save game back into your iDevice after you are done with the editing
Remember to chown SwordSave.bin to mobile:mobile after that
More features will be added … Stay tuned
SBSwitcher: Bring The Power Of SBSettings Toggles Into The App Switcher
Dec 16th


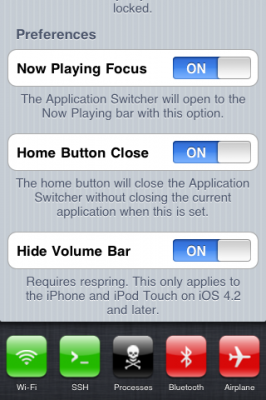
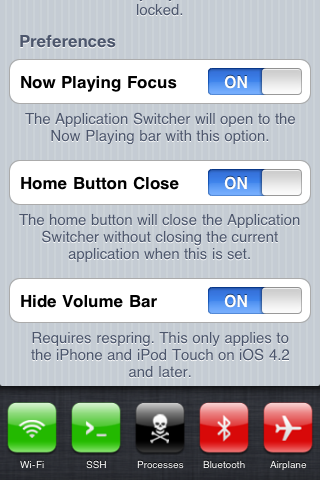
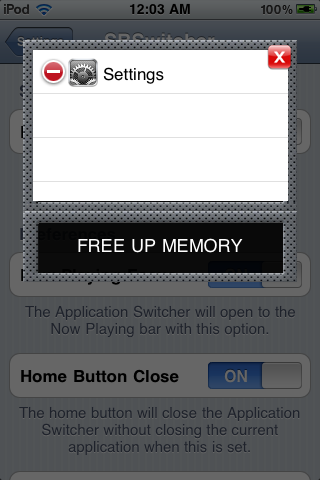
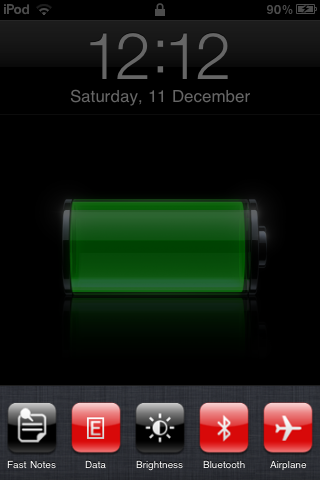
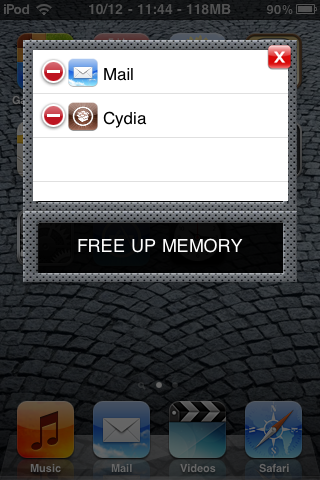
New day, new tweak in Cydia: SBSwitcher. SBSwitcher brings the power of SBSettings to the simplicity of the app switcher bar – just scroll left! With SBSwitcher, you can also access the switcher bar and all of your SBSettings toggles from the convenience of the lock screen.
SBSwitcher is compatible with the iPhone and iPod Touch on iOS 4.0 and later, and works well when combined with various other app switcher tweaks!
No new icons are added to your homescreen. You can configure options from the Settings app.
SBSwitcher is available for $2.99 in Cydia Store via BigBoss repo…
iBooks upgrade brings Collections, printing and more
Dec 16th


As expected, Apple has updated its iBooks app to version 1.2. The new version has just made its quiet debut on the AAPL servers.
What’s new?
Yep, as we exclusively revealed hereand here: better organization and printing and emailing of PDF’s. And that’s only part of the mix.
What’s New in Version 1.2
• Experience fully illustrated books, from children’s picture books to beautifully designed art books, available for download in the iBookstore.
• Organize your books and PDFs into personal Collections. Swipe left or right to jump between Collections.
• Print PDF documents and notes you’ve written in iBooks using AirPrint.
• iBooks now fits more words per page by automatically hyphenating text, available only on iOS 4.2 or later
Apple Drops iTunes 10.1.1. Jailbreakers And Unlockers Stay Away
Dec 16th


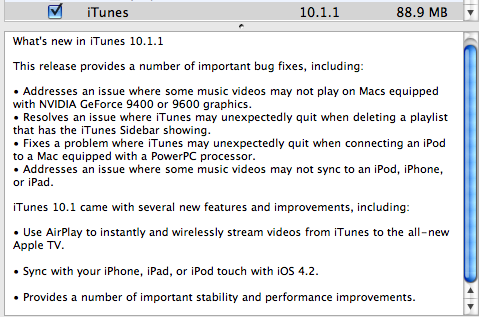
Just a quick heads-up: Apple just dropped iTunes 10.1.1.
Jailbreakers and unlockers do not updated until we can confirm it it’s safe. We will let you know.
This iTunes release provides a number of important bug fixes, including:
* Addresses an issue where some music videos may not play on Macs equipped with NVIDIA GeForce 9400 or 9600 graphics.
* Resolves an issue where iTunes may unexpectedly quit when deleting a playlist that has the iTunes Sidebar showing.
* Fixes a problem where iTunes may unexpectedly quit when connecting an iPod to a Mac equipped with a PowerPC processor.
* Addresses an issue where some music videos may not sync to an iPod, iPhone, or iPad
Apple Removes Jailbreak API From iOS 4.2
Dec 11th


Apple has removed its built in methods to help developers detect jailbroken devices from iOS 4.2, according to NetworkWorld.
This detection API let the MDM applications in effect ask the operating system if it had been compromised. Jailbreak exploits typically change a number of operating system files, and exploit one or another low-level OS features to let users directly load their own or third-party applications.
Previously, developers had created their own series of operating system checks to detect jailbreak.
“We used it when it was available, but as an adjunct,” says Joe Owen, vice president of engineering at Sybase, which offers the Afaria device management software. “I’m not sure what motivated their removing that….I’ve not had anyone [at enterprise customer sites] talk to me about this API being present or being removed.”
In July of this year the Library of Congress deemed that jailbreaking your iPhone in order to install applications not approved by Apple and/or to unlock is legal.
TinyUmbrella Update Will Bypass SHSH Checks and Restore iDevice Without iTunes
Dec 11th

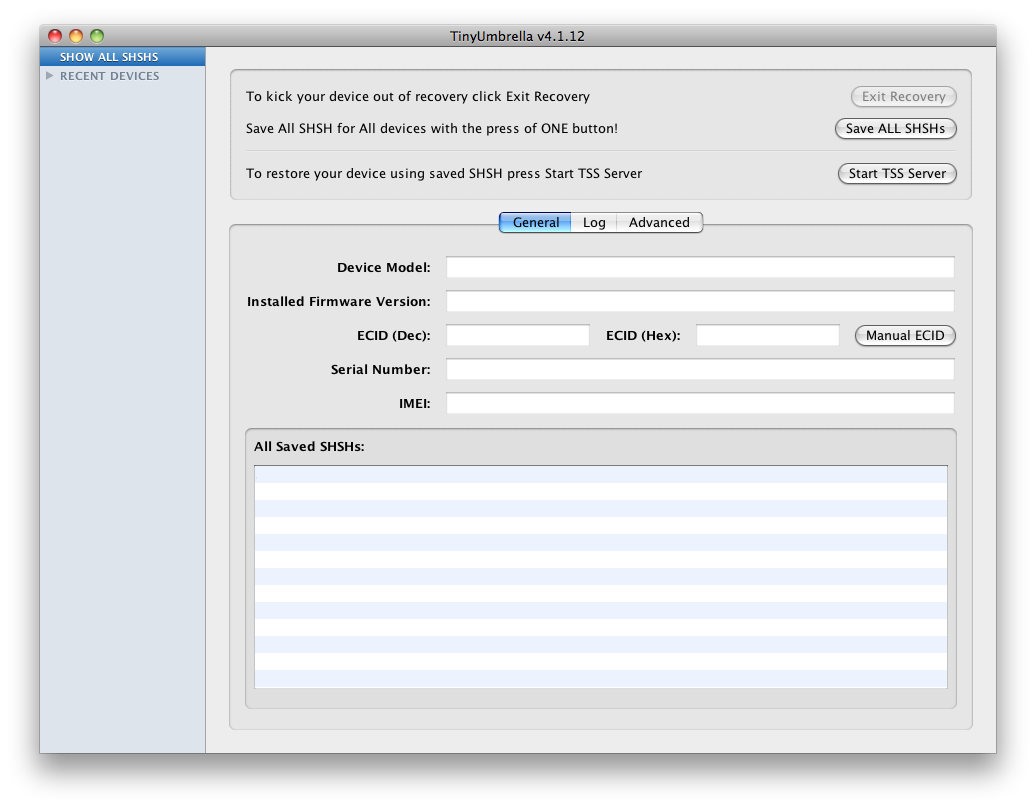
Semaphore is working on an update to TinyUmbrella that will allow users to restore their iDevices without iTunes.
I’ve been working on a new and improved version of TinyUmbrella that will, among other things, allow you to restore your iDevice without iTunes. With the holiday season and work, this will take me a bit to get working the way I want it. I appreciate your patience and your support. You guys are awesome ![]() No ETAs yet but I’ll post updates here and on twitter.
No ETAs yet but I’ll post updates here and on twitter.
Semaphore explains that this means bypassing shsh checks will be possible for devices that can be exploited by limera1n (basically all devices available now) and the steaksauce exploit for the mc 2g ipod touch.
You will always be able to install a custom firmware (or stock firmware) following these directions.
1. Enter DFU
2. Run the Exploit
3. Wait for the White Screen
4. Restore the ipsw of your choice.
Some changes to the ipsw will be required. We will post more information as it becomes available.
How to get FREE credits on Textnow – Finally, a way to call people on iTouch!!!
Dec 10th

Textnow is a great little app that lets you send unlimited SMS/Picture messages on an iPhone or iPod Touch and also gives you your own phone number. Not only that, but now you can actually make calls!!! That’s right, make calls right from your iPod touch to anyone (US & Canada) for FREE (Assuming you follow these steps correctly). There are also some extra little features like disabling the annoying ads and getting a voice mail. But these require credits. Today, i will show you how to get free credits
 .
.
AND YES, THIS DOES WORK OVER 3G
Requirements:
-Installous
-Textnow 4.3 (4.2 will also work)
-Backgrounder

Step 1: Download Textnow if you haven’t already.Since it is free, I like going to the app store rather than Installous.
———————————–UPDATE———————————–
You can no longer get Textnow 4.3 from the App Store. They upgraded to 4.3.2 which will not work for my purposes. Instead, go to Installous and get the latest version of Textnow which is currently 4.2. More info about this at the end of the post**

Step 2: Open Textnow.

Step 3: Click on the shopping cart button

Step 4: Click on the “Earn More Credits” tab. Note that I have 33 Available Credits. This is only because I already got some credits. You should have 0.

Step 5: Click on “More”.

Step 6: You should now come to a screen with a list of apps. Each app will give you a certain amount of credits if you “buy” it. Go find an app with at lest 7 credits (Less than 7 will work, but they are often free and you can redeem the credits by installing it from the app store). Once you found one, remember the name and using backgrounder, Open Installous and search for the app. Often, Installous won’t have the app. If you find the app in Installous, don’t download it yet. Switch back to Textnow and click on the app you searched in Installous. I picked Best Alarm Clock + Weather for 14 credits.

Step 7: This should bring up the app store showing the app you chose.

Step 8: Scroll down and look at the app version. Switch back to Installous.

Step 9: Note the version of the app that Installous has. If they are different, go and choose another app because this will not work. If they are the same version, download and install it.

Step 10: Go to your home screen and find the app you installed. Open it.

Step 11: Once you open it, you should get a notification saying that you got some credits for Textnow. Once you get this notification, you are safe to delete the app. You will still have the credits it gave you.

Step 12: Go to Textnow and you will see that you’ve got more credits!! Just keep doing this over and over again to get more and more credits. Have fun!!
To Make Calls:

Step 1: Enable “Call Forwarding & Voicemail”

Step 2: Now you should see a “Calling Minutes” tab. It will come with 100 minutes already and you are free to “Buy” more.
Step 3: Go to the mail page and you will see a “Messages” and “Phone” tab at the top. Congratulations, your iPod is now a fully functional phone that can make and receive calls!!!
Please post if you have any Questions/Comments
Don’t forget to thank if I helped you!!
**When you have accumulated enough credits, delete Textnow 4.2 and install the latest version from the App Store the late
antid0te: Upcoming Jailbreak Process Will Bring Enhanced Security To Jailbroken iPhones
Dec 10th

A German security analyst is about to unveil a new jailbreaking process that will make iPhones much more secure. Stefan Esser, a security consultant and application developer for SektionEins, has found a way to support Address Space Layout Randomization (ASLR) in iOS, and has developed a new jailbreak tool – to be called antid0te – to implement it, making iPhones much more resistant to malware attacks. The tool will be announced at a security conference next week and should be available soon thereafter.
Esser will be presenting antid0te at the Power of Community security conference in Korea on December 14th. “With ASLR,” the conference notes explain, “an exploit mitigation is added that is not available in factory iPhones and makes exploitation more difficult.” And according to Esser, he’s going to continue to work on further hardening the iPhone: “more mitigations and a full reactivation of the codesigning protection are planed for the next months.
”Dev Team Working on Baseband Downgrade for Easier iPhone Unlock
Dec 10th

Those of you who recently unlocked their iPhones running iOS 4.2.1 or 4.1 know that the process wasn’t as straightforward as we expected. The latest UltraSn0w unlock works for the iPhone 3G or iPhone 3GS with baseband 04.26.08, 05.11.07, 05.12.01, or 05.13.04. It also works with iPhone 4 with baseband 01.59.00. But if you’re iPhone is on a different baseband, you have to upgrade to 06.15.00, either using RedSn0w or PwnageTool.
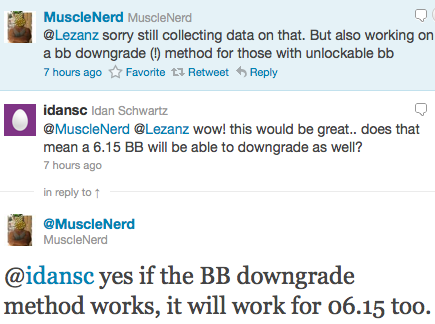
This new unlock doesn’t come without its share of issues, with battery drain for some of us, and/or GPS issues for others. Fortunately, it seems the Dev Team is working on a baseband downgrade method, which would make the unlock process easier, and safer…
From what I understand, the goal would be to allow an iPhone with the 4.2.1 baseband to be downgraded to 04.26.08, 05.11.07, 05.12.01, or 05.13.04, to then use UltraSn0w to unlock. Apparently, this baseband downgrade method might also work for baseband 06.15.00.
So it looks like iPhone 3G and 3GS users will be fine. It’s still not clear at this time if it will also be possible to downgrade the baseband of an iPhone 4 to 01.59.00, but let’s hope so.


Recent Comments