Mastery of the iPod Starts Here
Archive for October, 2009
Lockerz Unboxing iPod Touch 8GB – $200 Value – FREE
Oct 25th
ComputerHacker16 received his Free iPod Touch from Lockerz! Video below:
Get your instant invite now!!
Lockerz Invitation Request Form
[contact-form 1 "lockerz"]
More Info On Lockerz.com
Oct 23rd

Many of you have used the invite form and received your invites. If you still haven’t and its been over 24 hrs, go ahead and submit it again and I’ll resend one. Sometimes their system is down and the invites don’t get sent out. Otherwise check your SPAM FOLDER!!
Also there was an error in the amount of PTZ needed to redeem an iPod Touch 8 GB: The correct amount is 325! (not 600).
So doing the Math…
Sign Up: Instant 2 PTZ + More from Game = 10 PTZ (at least)
Get 20 ppl invited: 20 X 2 = 40 PTZ
Log In and Answer
Daily Question for 1 Month: 30 X (4+4) = 240 PTZ
Invite 9 more ppl: 9 X 4 = 36 PTZ
TOTAL: 326 PTZ => FREE iPod Touch 8 GB
That means you can get a Free iPod Touch in just 30 days! Or even less if you invite more people!
Not convinced? Check out these videos!
What are you waiting for? Join Lockerz now! Get an Invite using the form below and start collecting PTZ!
[contact-form 1 "lockerz"]
How to Jailbreak Your iPhone 3GS Using PwnageTool [Mac]
Oct 14th
This tutorial will show you how to jailbreak your iPhone 3GS using PwnageTool for Mac.
Step One
You will also need the 3.1.2 iPhone firmware.
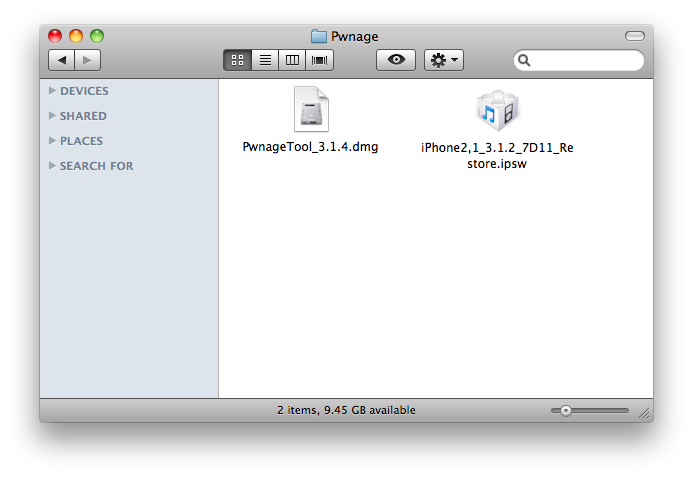
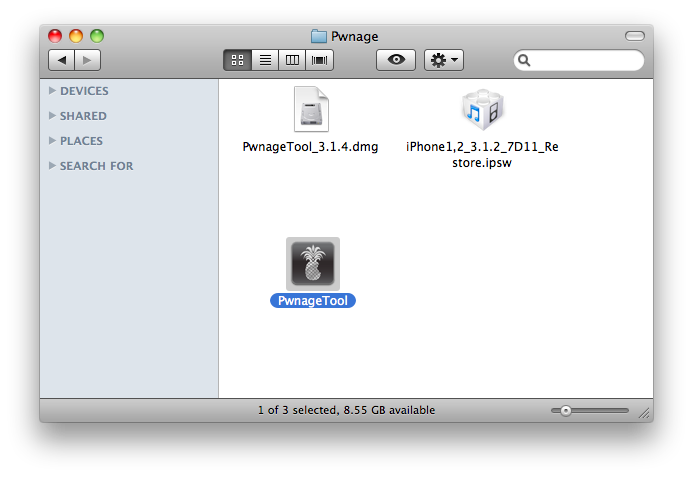
3.1.2 (3GS): iPhone2,1_3.1.2_7D11_Restore.ipsw
When downloading the IPSW file, it is best to download it with Firefox since Safari often auto extracts it!
 Step Two
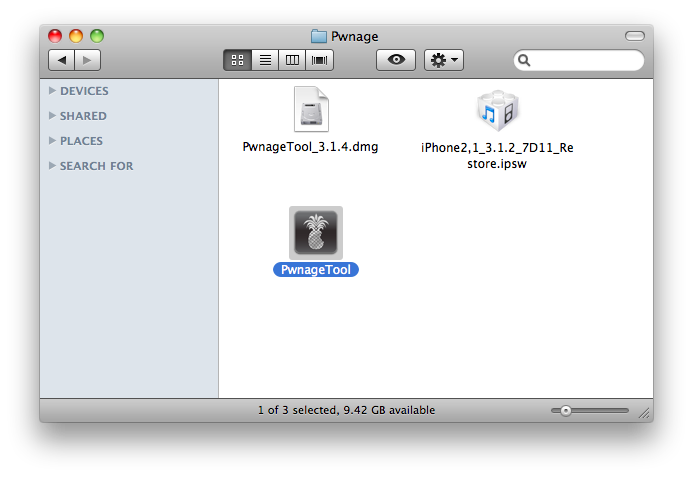
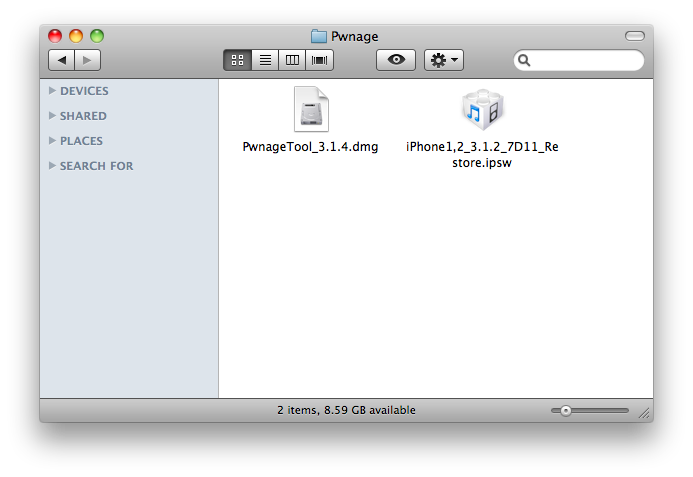
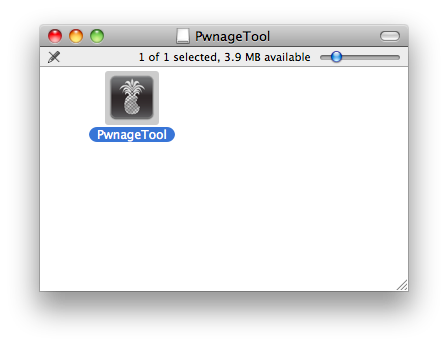
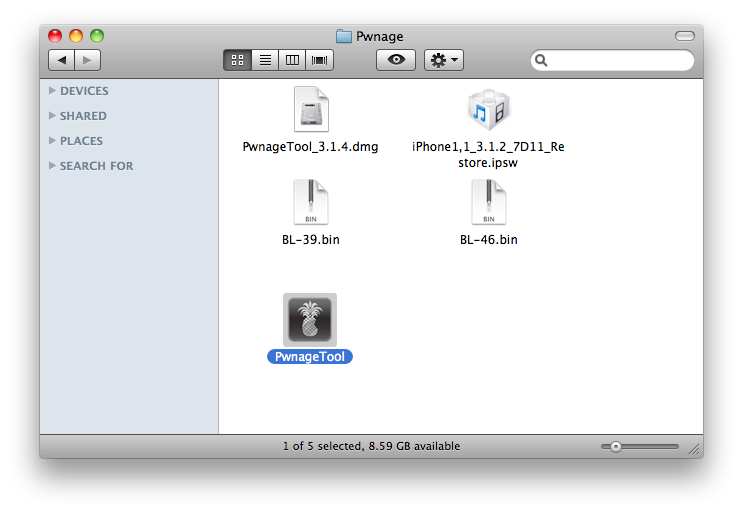
Double click to mount PwnageTool 3.1.4 then drag the PwnageTool icon into the Pwnage folder.
Step Two
Double click to mount PwnageTool 3.1.4 then drag the PwnageTool icon into the Pwnage folder.
 Then from the Pwnage folder double click to launch the PwnageTool application.
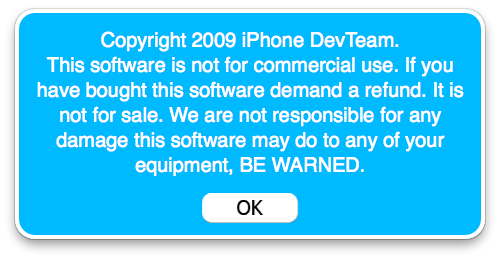
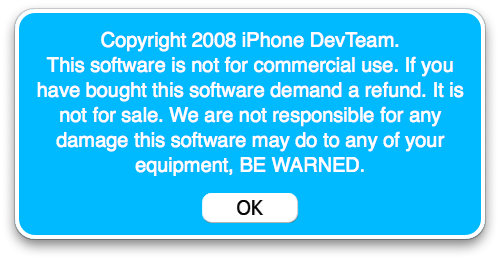
 Click Ok if presented with a warning.
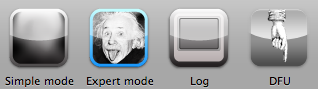
 Step Three
Click to select Expert Mode from the top menu bar
Step Three
Click to select Expert Mode from the top menu bar
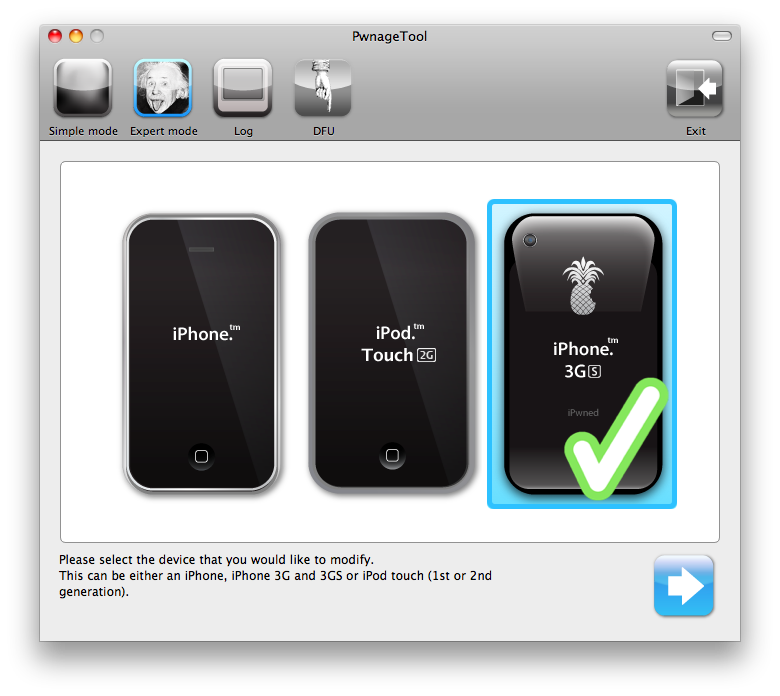
 Step Four
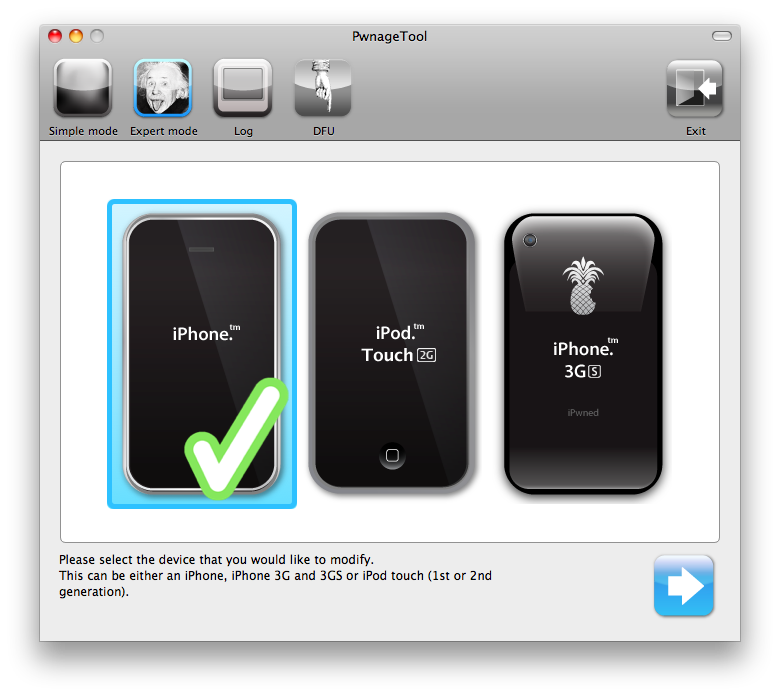
Click to select your iPhone. A check-mark will appear over the image of the phone.
Step Four
Click to select your iPhone. A check-mark will appear over the image of the phone.
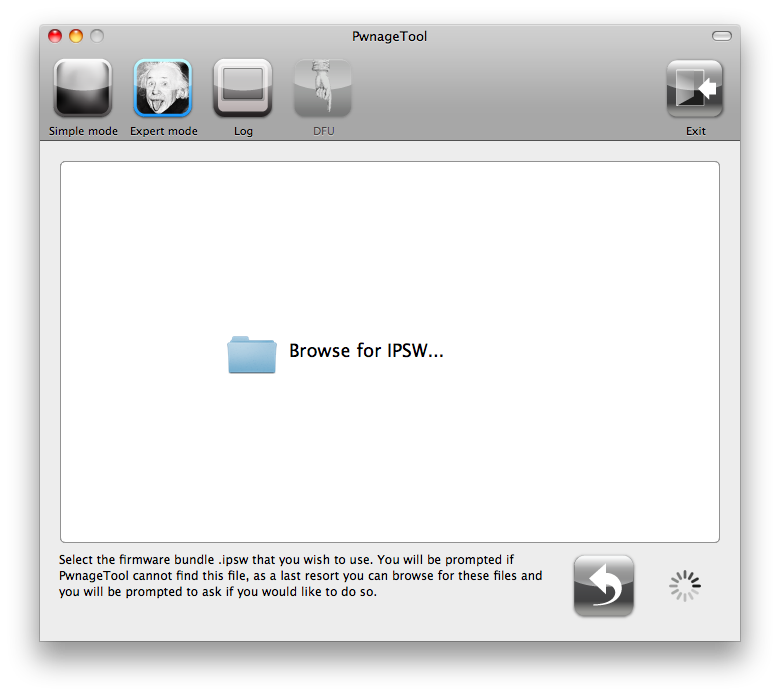
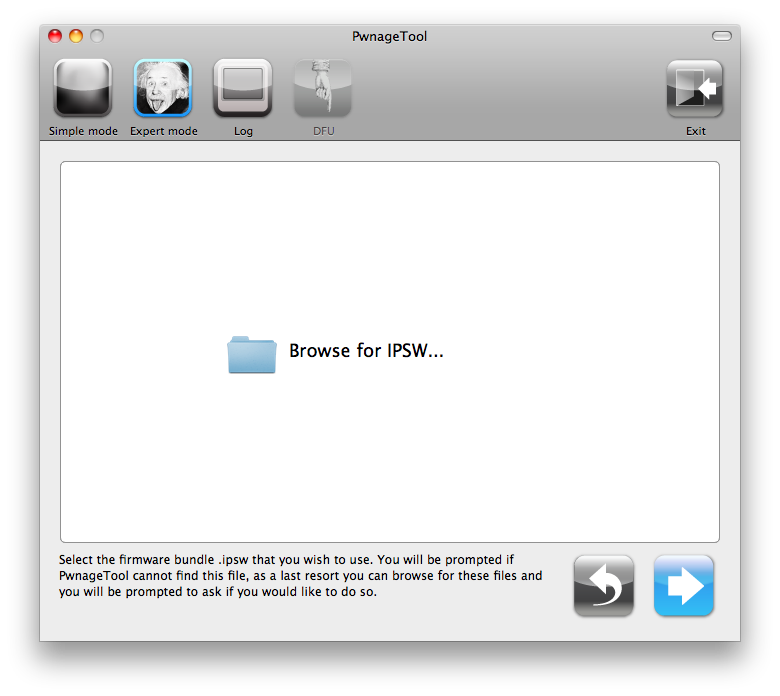
 Step Five
Click the blue arrow button to continue. You will be brought to the “Browse for IPSW” page. On my laptop, it automatically found the IPSW. If PwnageTool doesn’t automatically find the ipsw file you can click Browse for IPSW….
Step Five
Click the blue arrow button to continue. You will be brought to the “Browse for IPSW” page. On my laptop, it automatically found the IPSW. If PwnageTool doesn’t automatically find the ipsw file you can click Browse for IPSW….
 Click to select the found IPSW file, a checkmark will appear next to it. Then click the blue arrow button to continue.
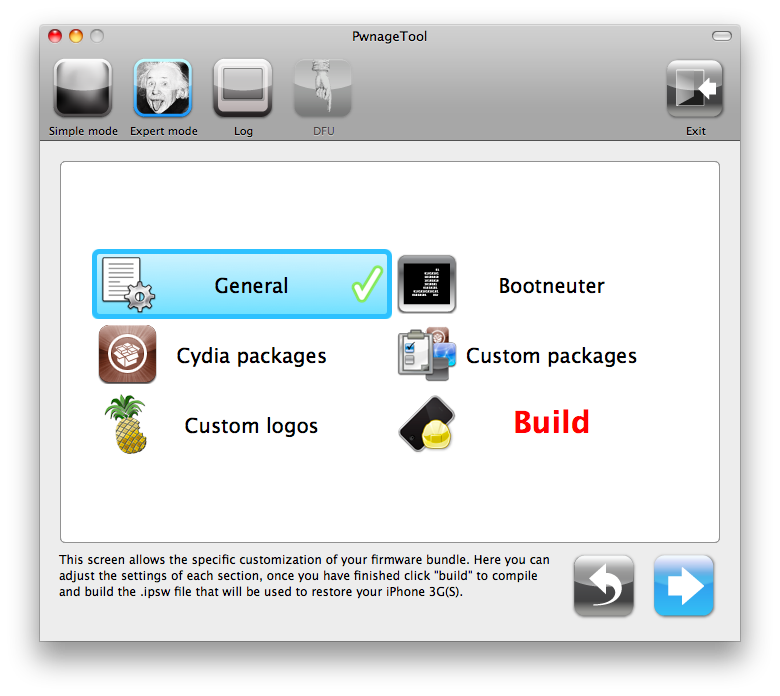
Step Six
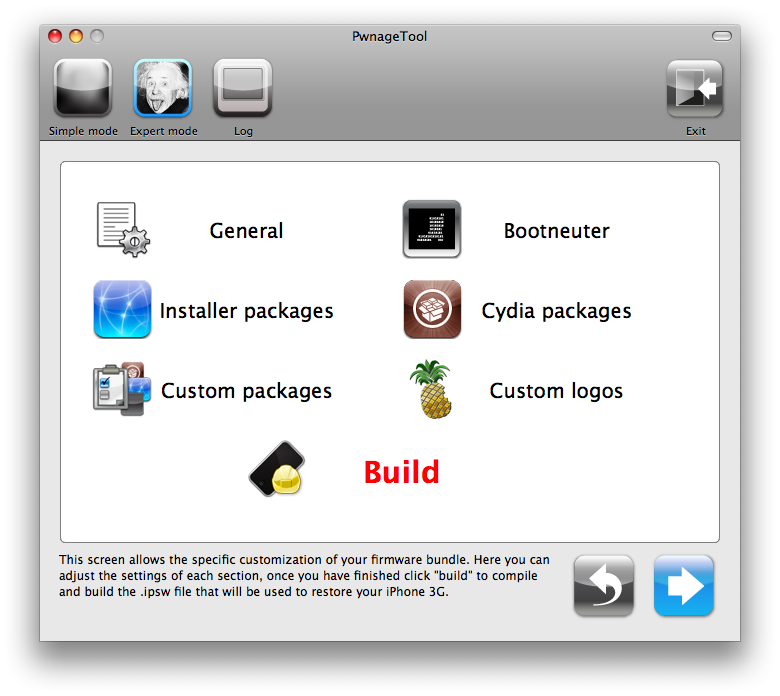
You will then be brought to a menu with 7 choices. Click to select General then click the blue arrow button.
 The General settings allows you to decide the partition size. Check Activate the phone if you are not with an official carrier then click the blue arrow button.
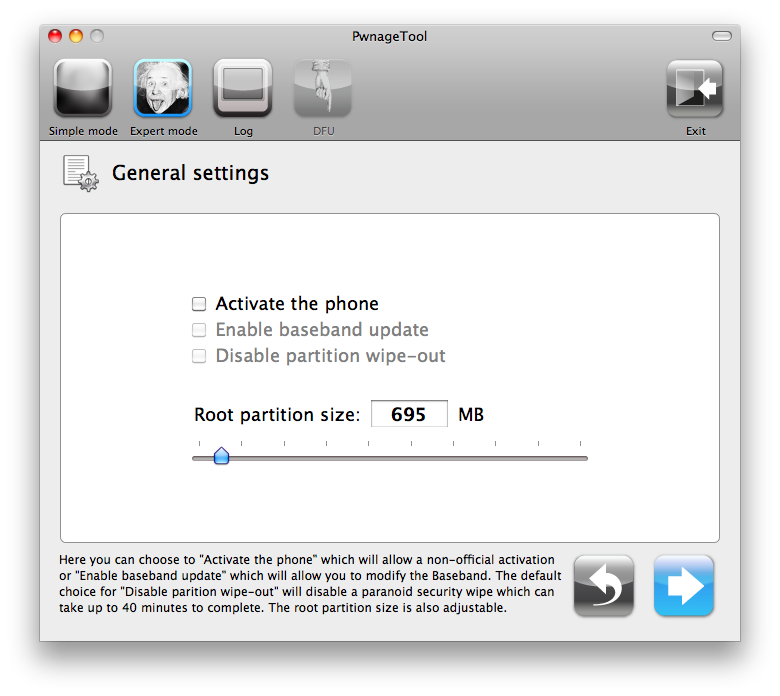 NOTE*: Deselect Activate if you have an iPhone legitimately activated on an official carrier.
NOTE*: You may need to increase the size of the root partition slightly. My first attempt failed at creating the IPSW until I increased the size to about 695 MB.
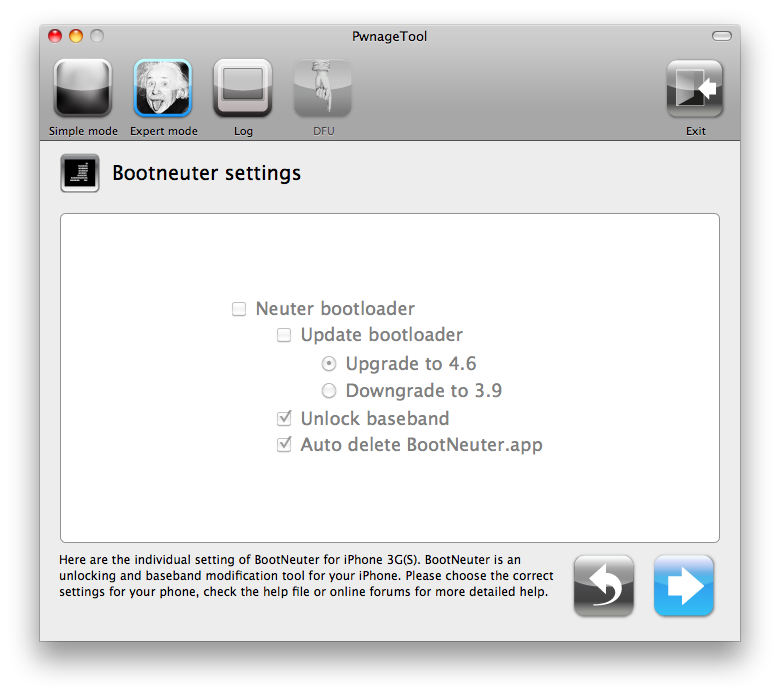
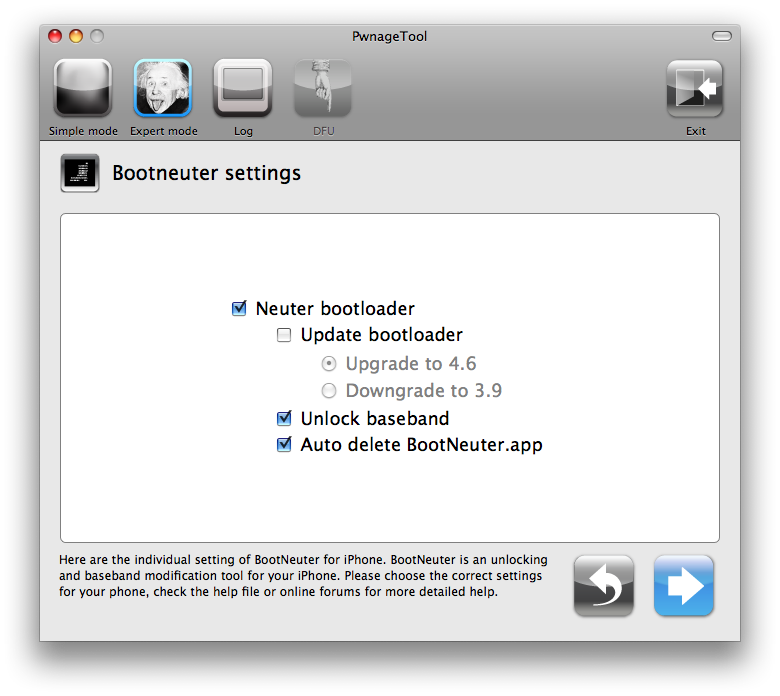
The Bootneuter settings are greyed out for the 3G iPhone. Click the blue arrow button.
NOTE*: Deselect Activate if you have an iPhone legitimately activated on an official carrier.
NOTE*: You may need to increase the size of the root partition slightly. My first attempt failed at creating the IPSW until I increased the size to about 695 MB.
The Bootneuter settings are greyed out for the 3G iPhone. Click the blue arrow button.
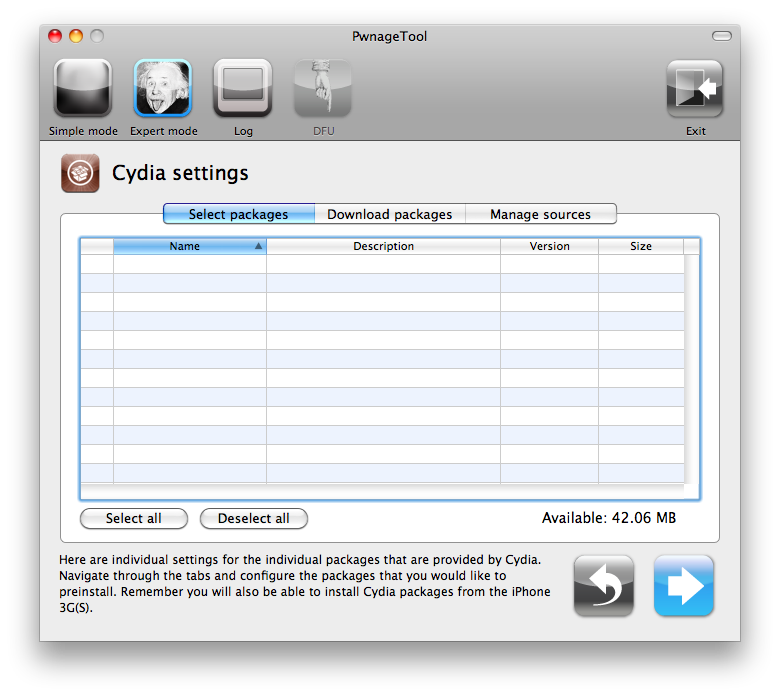
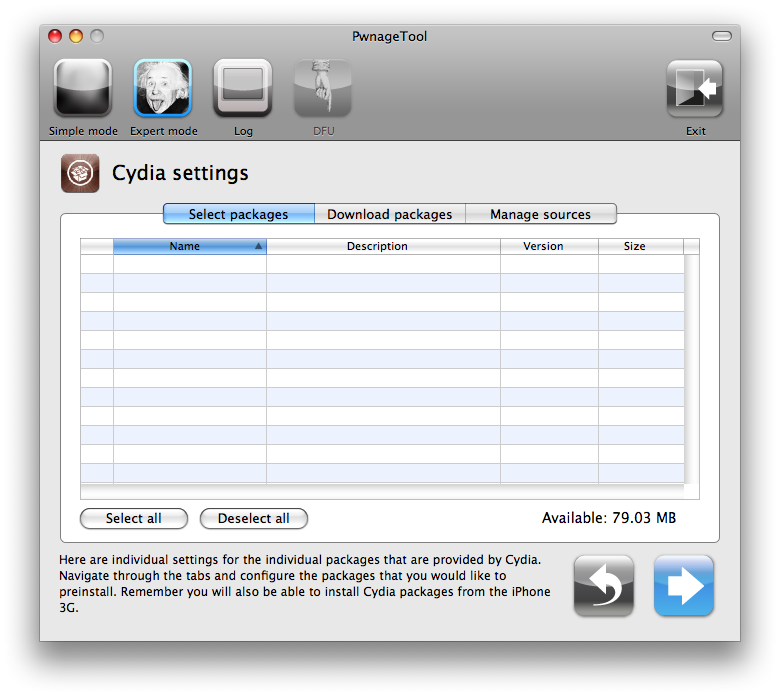
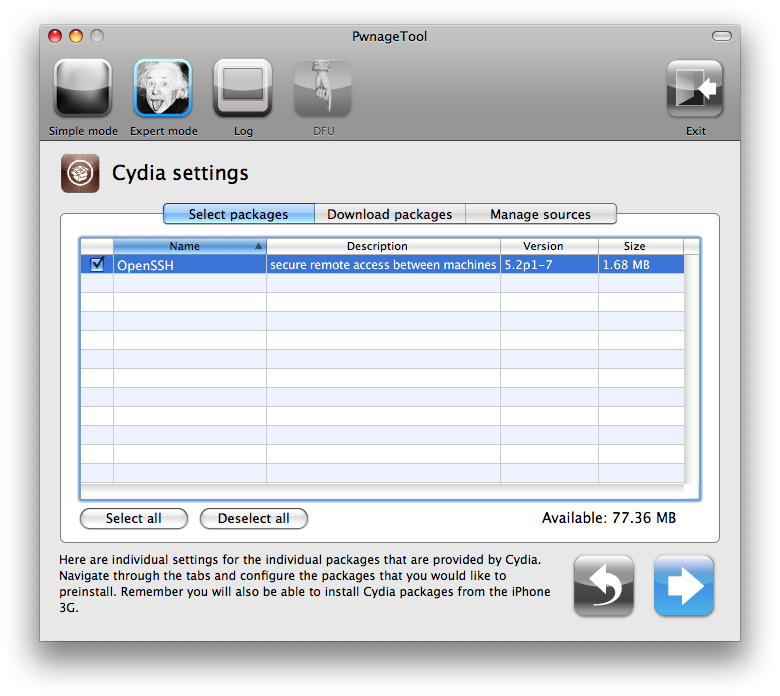
 The Cydia settings menu allows you to create custom packages so you do not have to manually install the necessary them later.
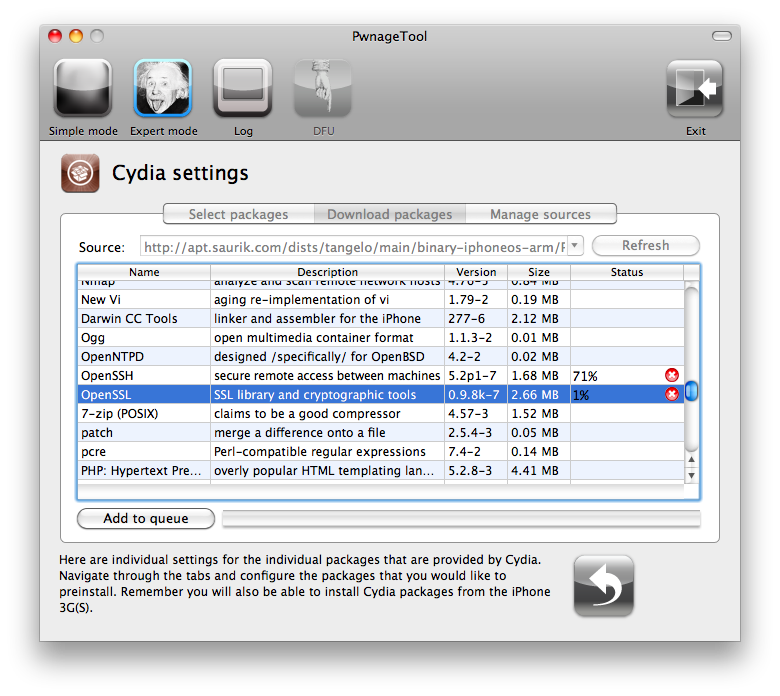
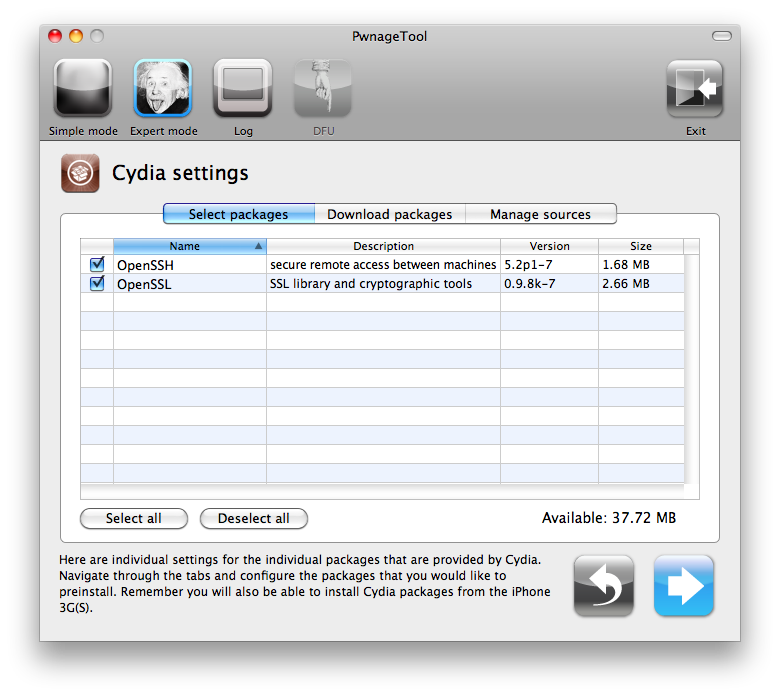
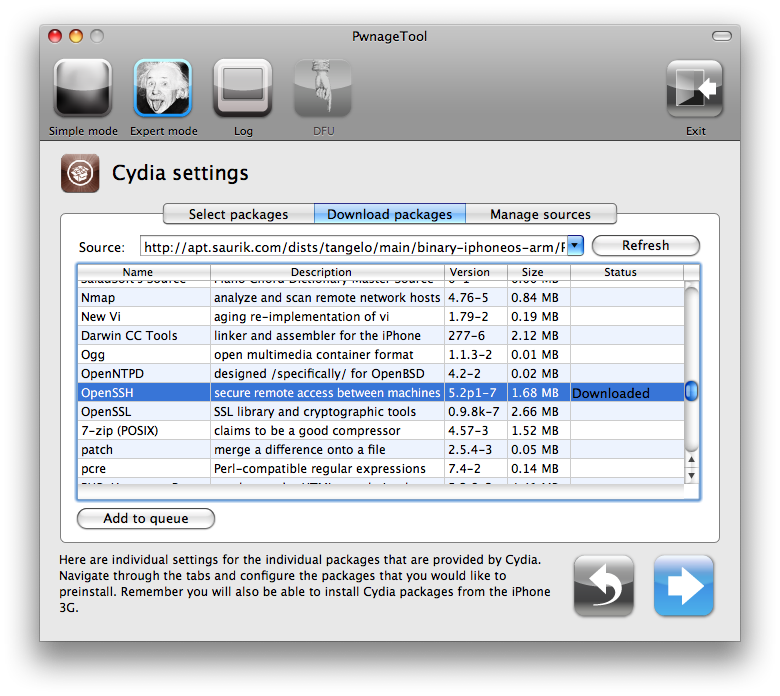
 Click to select the Download packages tab. Then click the Refresh button to display all the available packages. Double clicking the package you want will download it and make it available in the Select Packages tab.
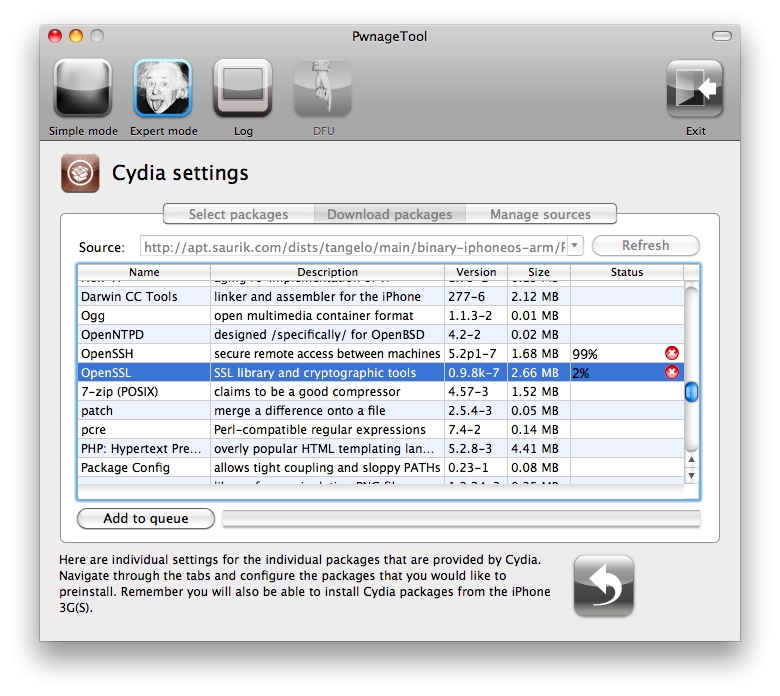 Checkmark the ones you want then Click the blue arrow button.
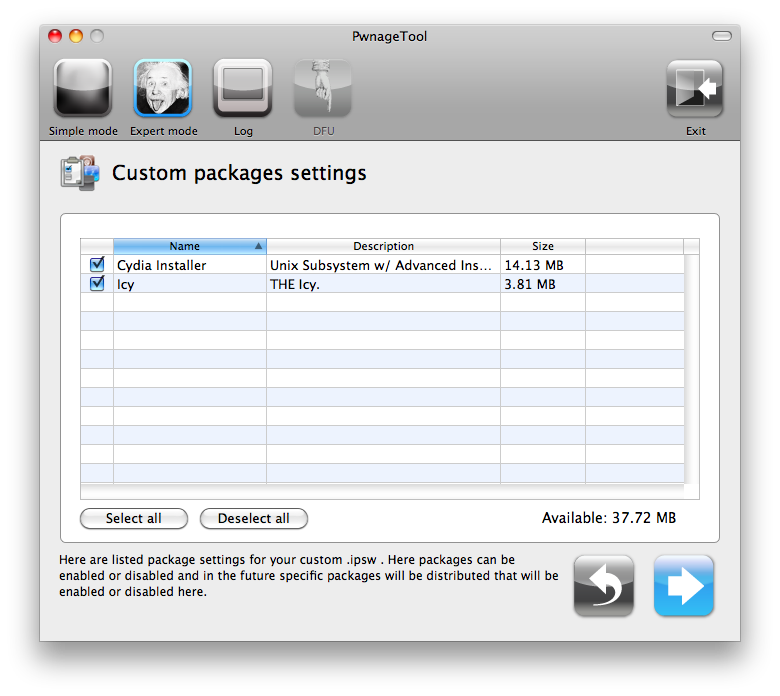
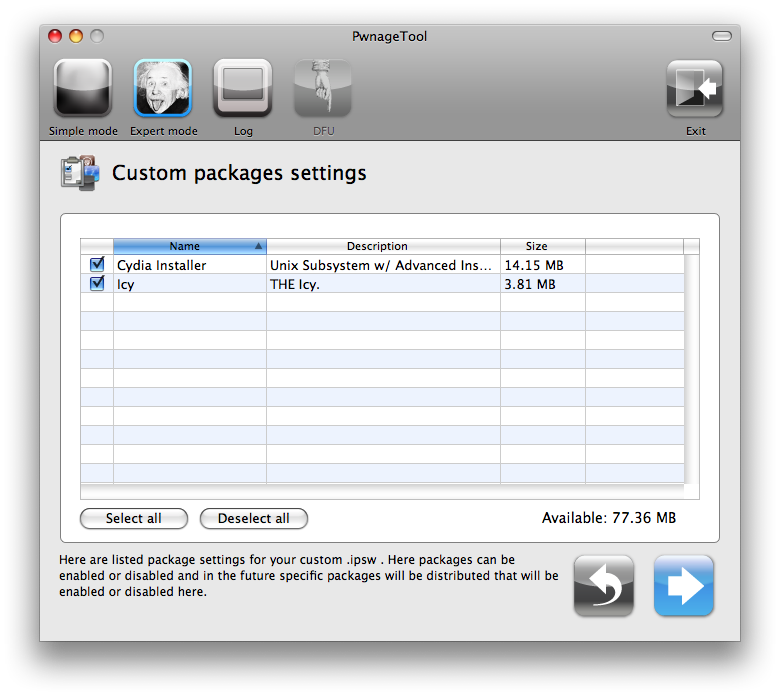
 The Custom Packages Settings menu displays listed package settings for your custom IPSW. For know leave these settings as is. Click the blue arrow button to continue.
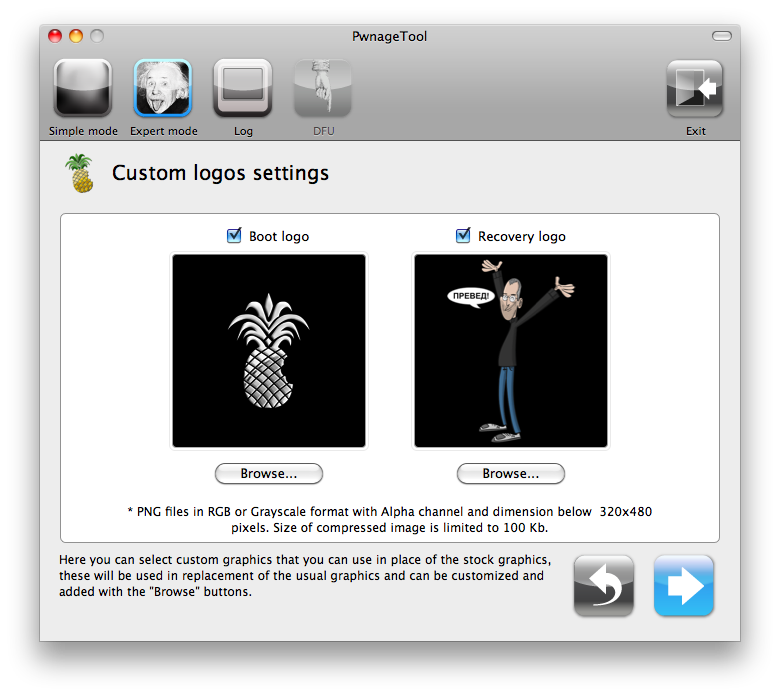
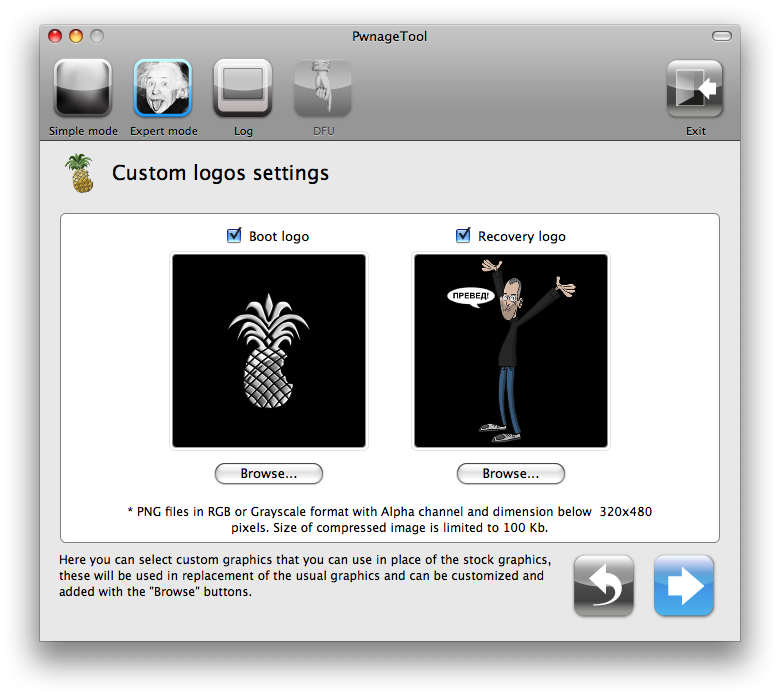
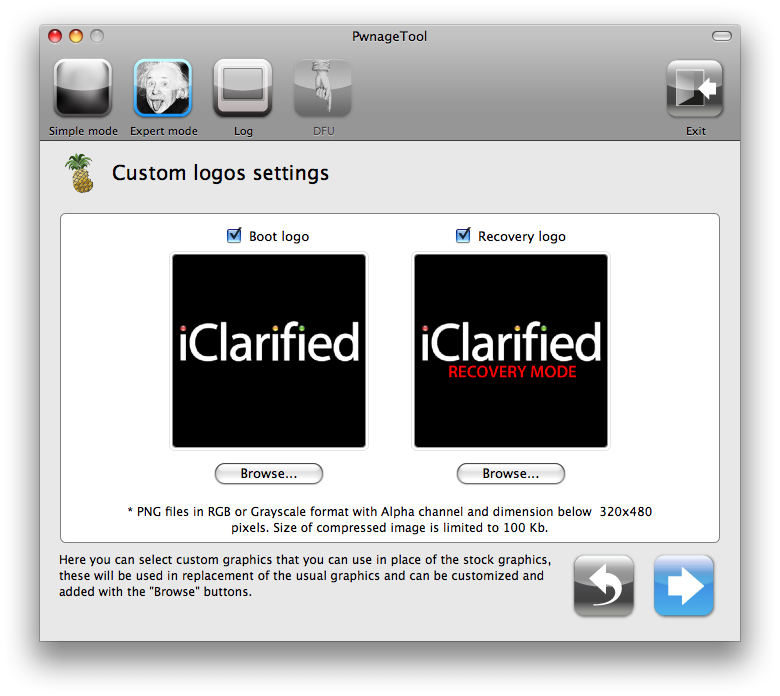
 The Custom Logos Settings menu allows you to add your own images as boot logos. Click the Browse button to select your Boot logo and Recovery logo. If you would like to use the iClarified ones they can be found here:Boot Logo, Recovery Logo
 Remember the rules for them: RGB or Grayscale format with Alpha channel and dimensions below 320×480…
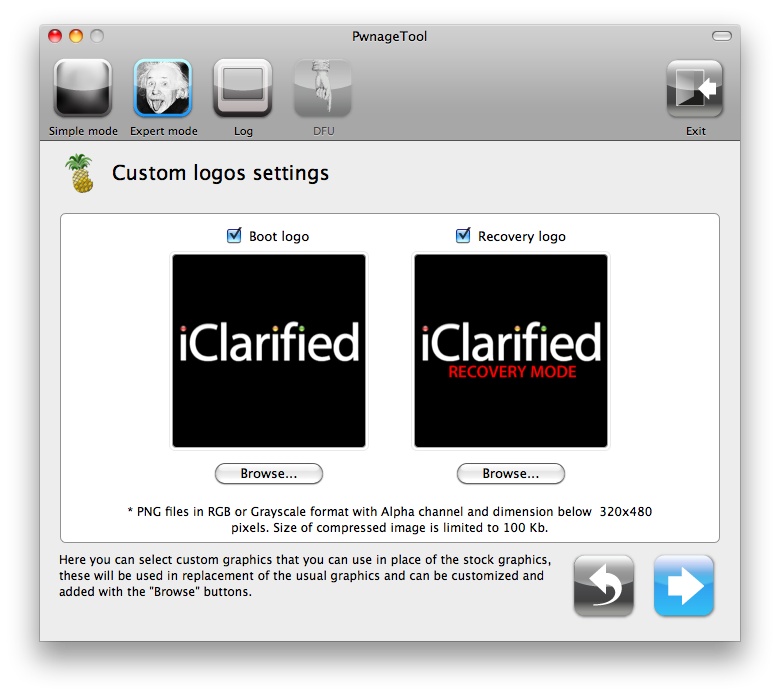 Click the blue arrow button to continue.
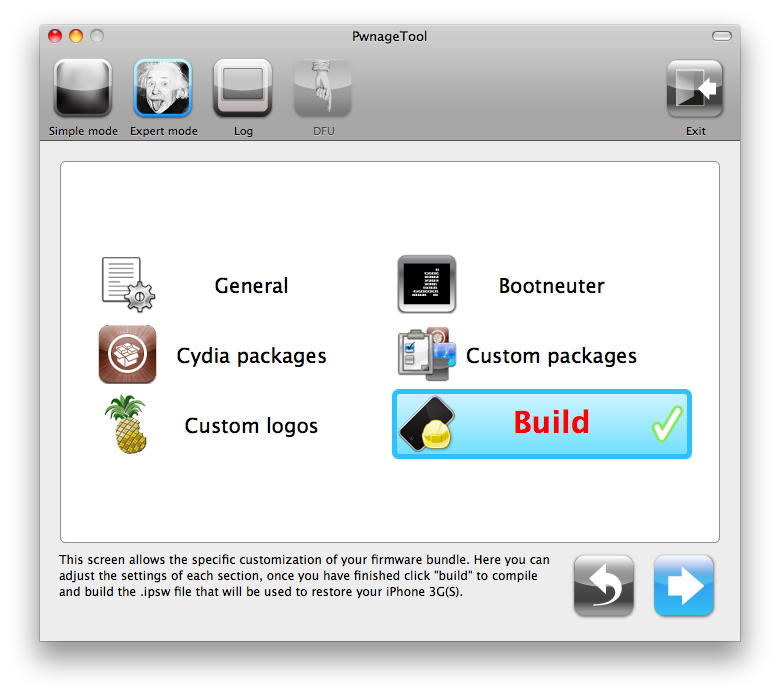
Step Seven
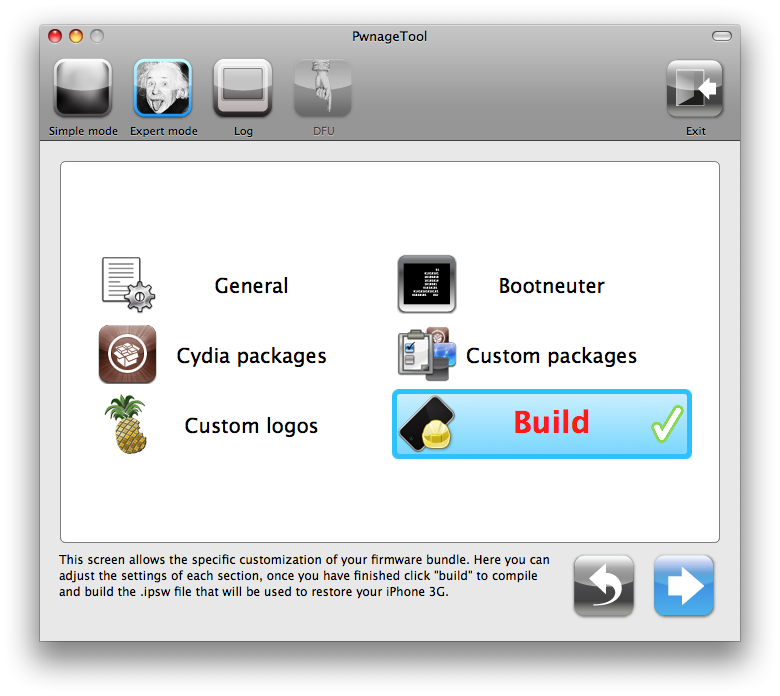
You are now ready to begin the pwnage process! Click the Build button to select it then click the Blue arrow button to begin.
Click the blue arrow button to continue.
Step Seven
You are now ready to begin the pwnage process! Click the Build button to select it then click the Blue arrow button to begin.
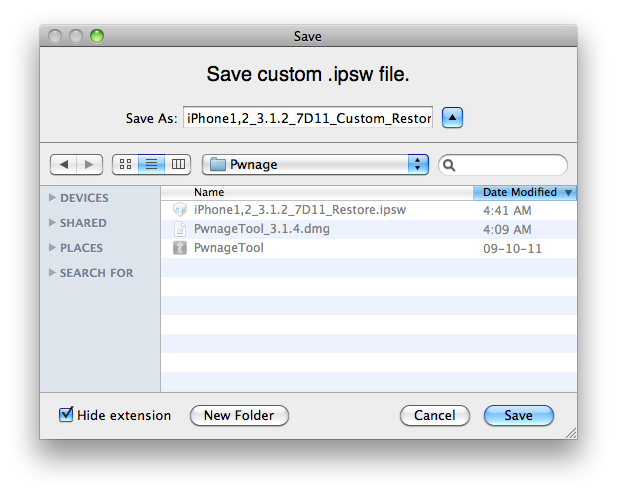
 Step Eight
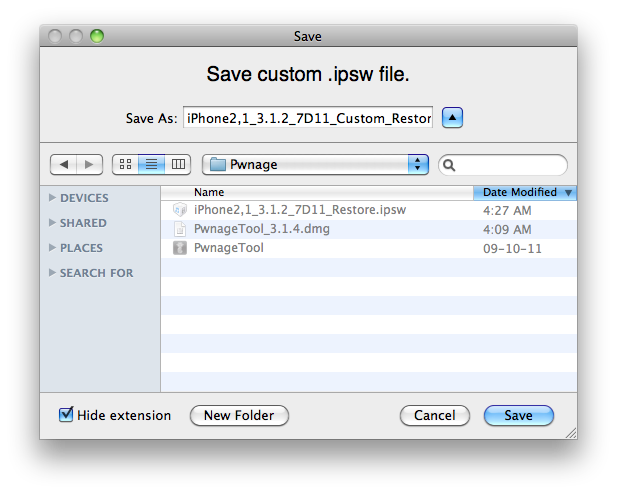
You will be asked to save your custom .ipsw file. Save it to your Pwnage folder you created on your Desktop.
Step Eight
You will be asked to save your custom .ipsw file. Save it to your Pwnage folder you created on your Desktop.
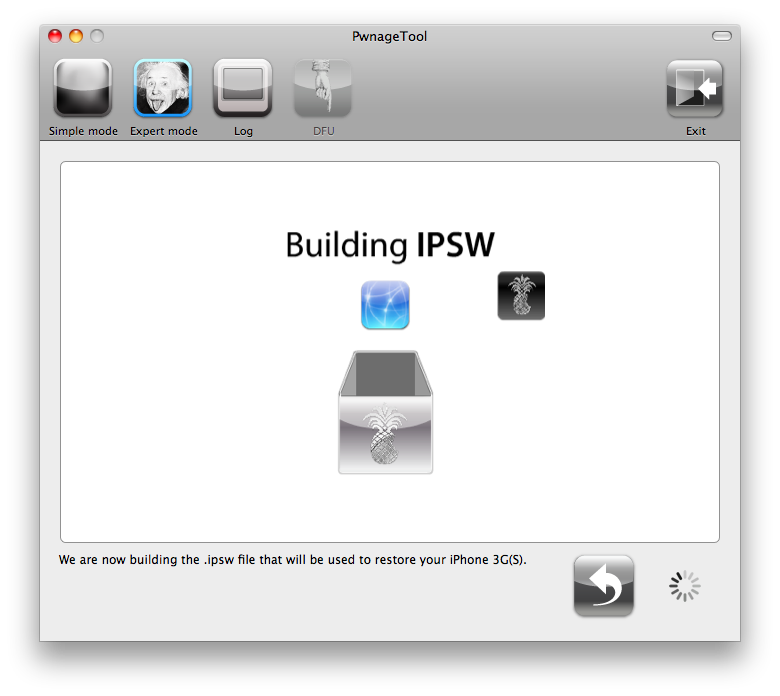
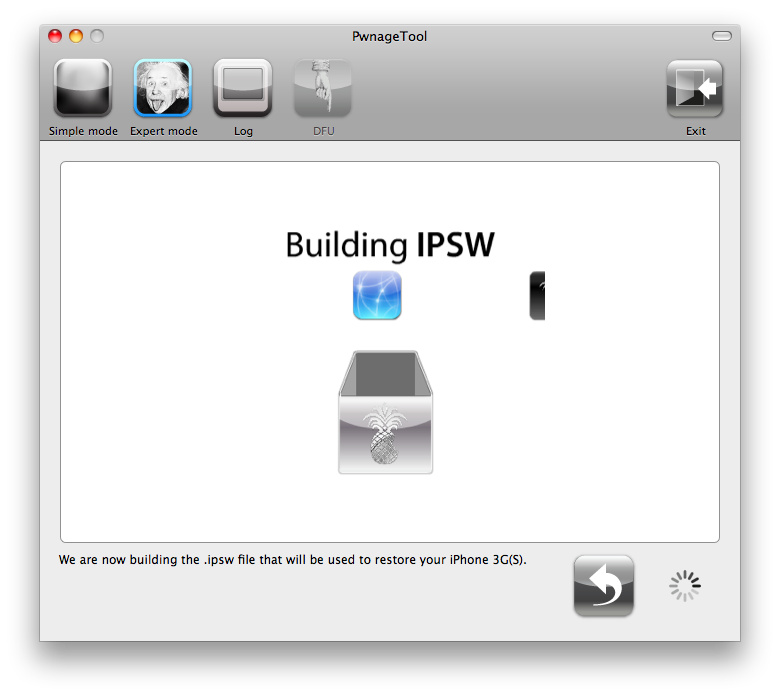
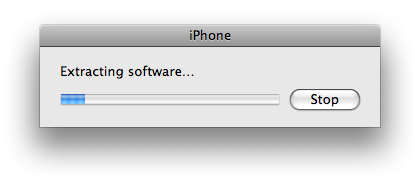
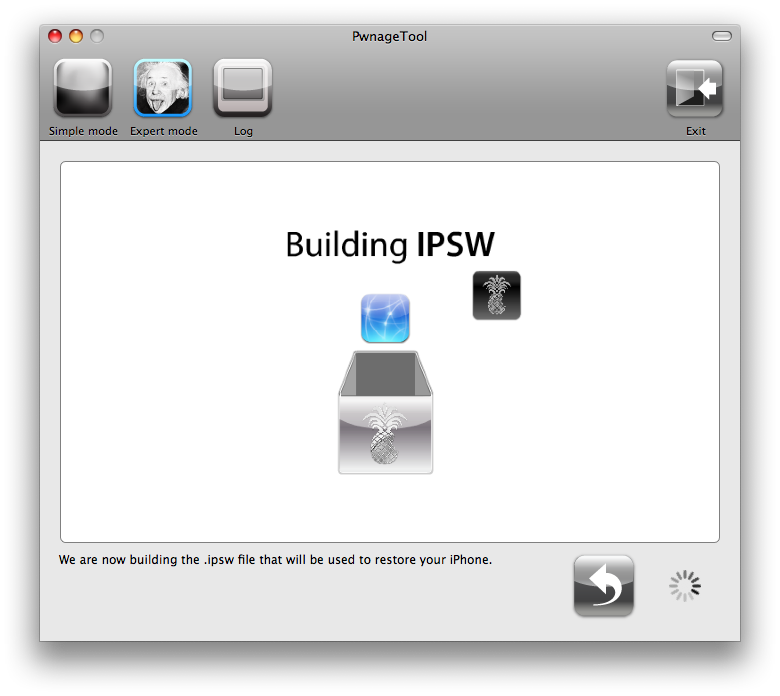
 Your IPSW is now being built. Please allow up to 10 minutes.
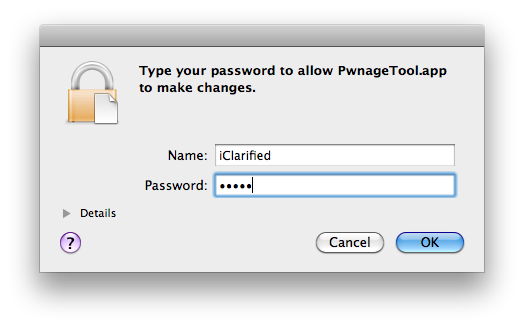
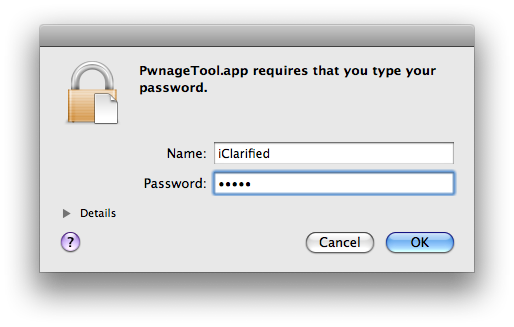
 You will be asked to enter your administrator password. Do this then click the OK button.
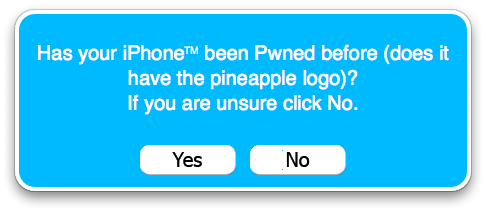
 You will be asked if your iPhone has been pwned before. If unsure click the NO button.
 Step Nine
If your iPhone isn’t already connected to the computer connect it now.
Step Nine
If your iPhone isn’t already connected to the computer connect it now.
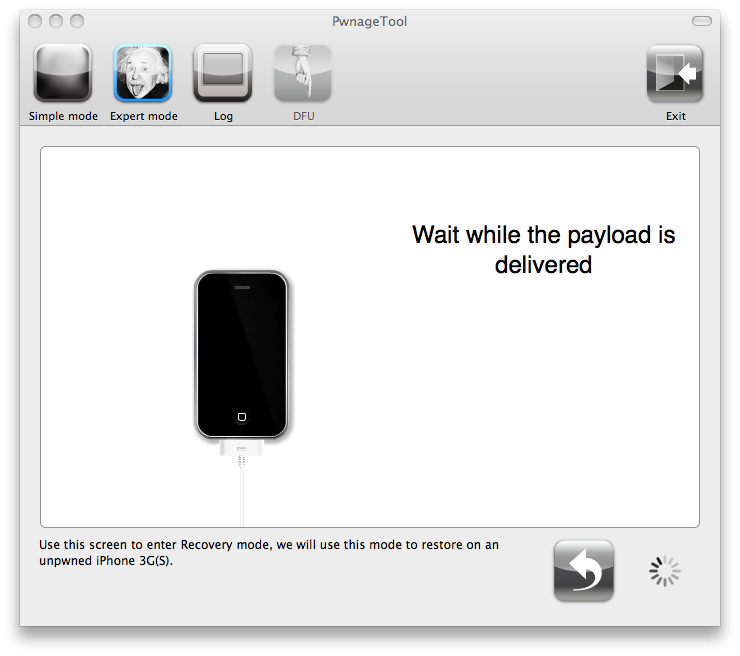
 After delivering the payload PwnageTool will have placed your iPhone in recovery mode. Click OK to close the popup message telling you this.
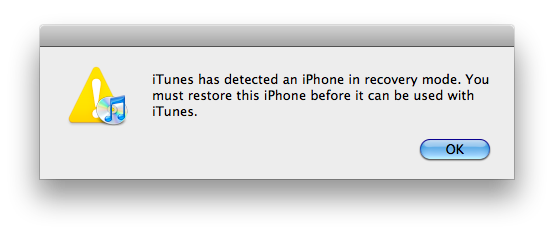
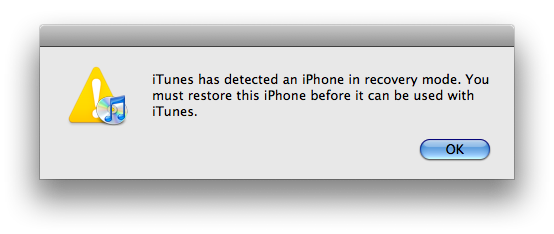
 iTunes will also pop-up saying it has detected an iPhone in recovery mode.

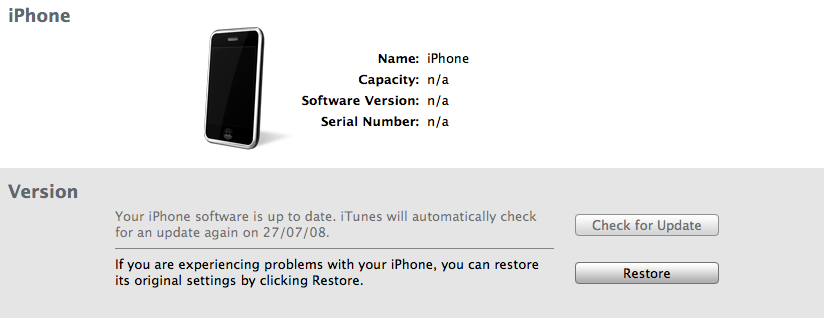
 Step Ten
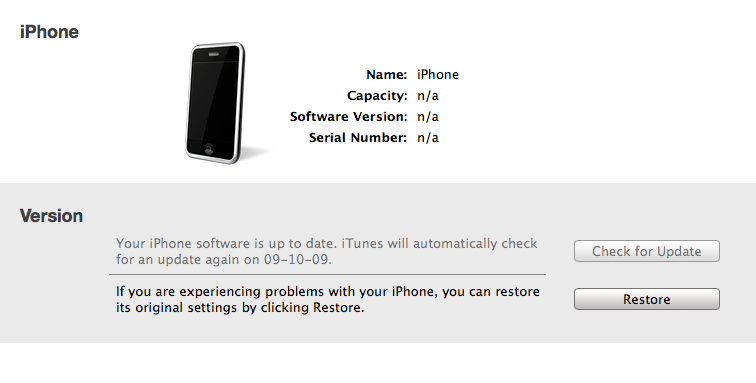
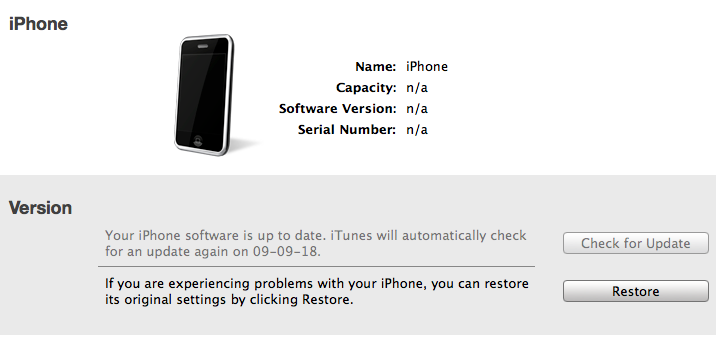
In iTunes, hold the Alt/Option key and click Restore.
Step Ten
In iTunes, hold the Alt/Option key and click Restore.
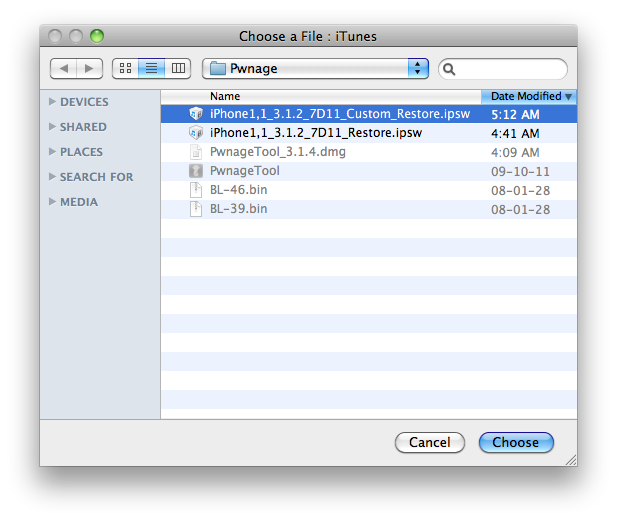
 Step Eleven
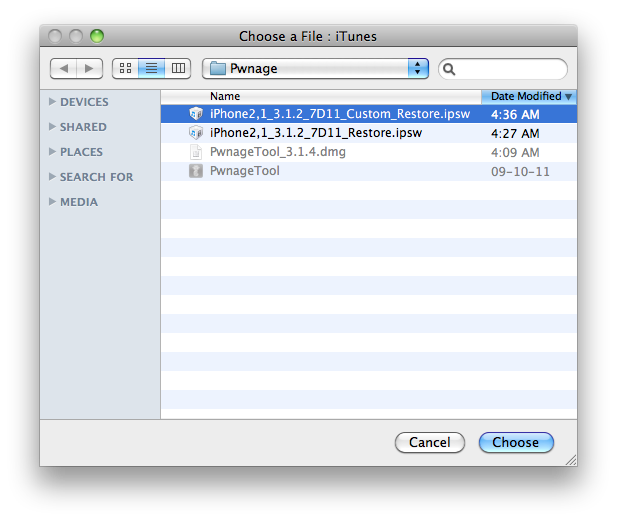
Navigate to the Pwnage folder on your desktop using the dialog window that appears. Select the custom IPSW that was created (iPhone2,1_3.1.2_7D11_Custom_Restore.ipsw) and click the Open button.
Step Eleven
Navigate to the Pwnage folder on your desktop using the dialog window that appears. Select the custom IPSW that was created (iPhone2,1_3.1.2_7D11_Custom_Restore.ipsw) and click the Open button.
 Step Twelve
iTunes will now restore the firmware on your iPhone. This can also take up to 10 minutes. Once done you will be rebooted into jailbroken iPhone OS 3.1.2!
***THANKS: Thank you to the Dev-Team for their hard work in making this jailbreak and tutorial possible!
Step Twelve
iTunes will now restore the firmware on your iPhone. This can also take up to 10 minutes. Once done you will be rebooted into jailbroken iPhone OS 3.1.2!
***THANKS: Thank you to the Dev-Team for their hard work in making this jailbreak and tutorial possible!
How to Jailbreak Your iPhone 3G on OS 3.1.2 Using PwnageTool (Mac)
Oct 14th
|
This tutorial will show you how to jailbreak your 3G iPhone by creating a custom ipsw that can automatically jailbreak, install applications, and add your own boot logos. To learn how to use PwnageTool to unlock/jailbreak a 2G iPhone you can use the tutorial which is here Watch the Video! Watch the Video!For your convenience this tutorial is available in video format also. Click the Watch It button to view the tutorial!
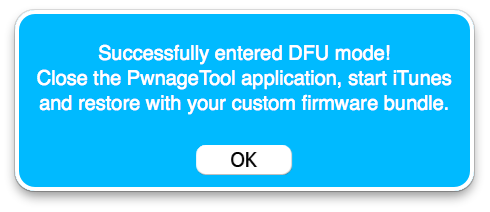
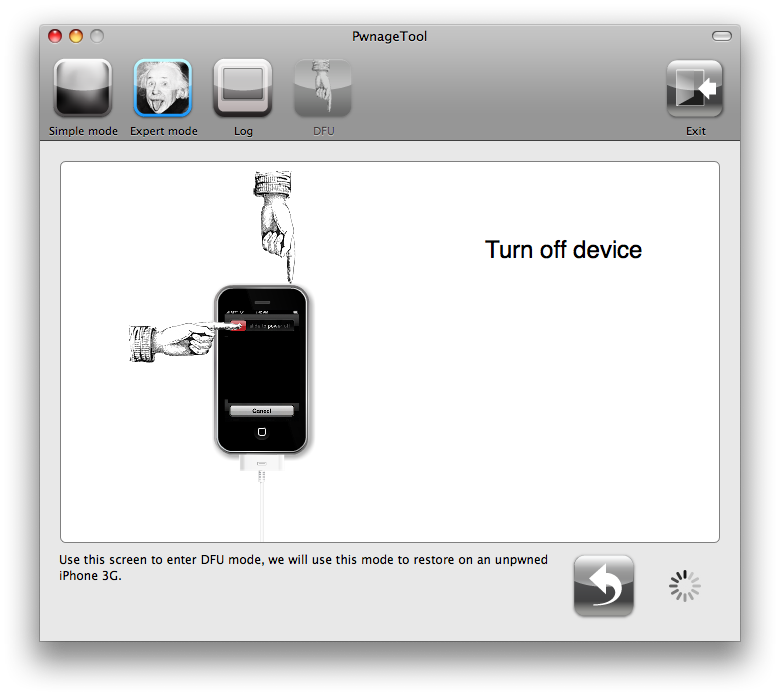
Step One You will also need the 3.1.2 iPhone firmware. When downloading the IPSW file, it is best to download it with Firefox since Safari often auto extracts it! Step Two Then from the Pwnage folder double click to launch the PwnageTool application. Click Ok if presented with a warning. Step Three Step Four Step Five Click to select the found IPSW file, a checkmark will appear next to it. Then click the blue arrow button to continue. Step Six The General settings allows you to decide the partition size. Check Activate the phone if you are not with an official carrier then click the blue arrow button. NOTE*: Deselect Activate if you have an iPhone legitimately activated on an official carrier. The Bootneuter settings are greyed out for the 3G iPhone. Click the blue arrow button. The Cydia settings menu allows you to create custom packages so you do not have to manually install the necessary them later. Click to select the Download packages tab. Then click the Refresh button to display all the available packages. Double clicking the package you want will download it and make it available in the Select Packages tab. Checkmark the ones you want then Click the blue arrow button. The Custom Packages Settings menu displays listed package settings for your custom IPSW. For know leave these settings as is. Click the blue arrow button to continue. The Custom Logos Settings menu allows you to add your own images as boot logos. Click the Browse button to select your Boot logo and Recovery logo. If you would like to use the iClarified ones they can be found here:Boot Logo, Recovery Logo Remember the rules for them: RGB or Grayscale format with Alpha channel and dimension bellow 320×480… Click the blue arrow button to continue. Step Seven Step Eight Your IPSW is not being built. Please allow up to 10 minutes. You will be asked to enter your administrator password. Do this then click the OK button. When prompted if your iPhone has been Pwned before, we clicked No. It allows for a more thorough restore. You will be asked to turn off the device. Make sure it is connected to the USB port. Step Nine If you fail, it will show you a message. Click Yes. Unplug the iPhone from the USB. Turn it off, then turn it back on. Plug it back into the USB and turn off the iPhone when prompted. When done correctly, PwnageTool will display a message telling your that it successfully entered DFU mode. iTunes will also pop-up.
Step Ten Step Eleven Step Twelve If you so desire you may restore from a previous backup to keep all your settings or set your iPhone up fresh. Step Thirteen
|
||


How to Unlock/Jailbreak Your iPhone 2G on OS 3.1.2 Using PwnageTool (Mac)
Oct 14th
This tutorial will show you how to jailbreak and unlock your 2G iPhone on the 3.1.2 iPhone firmware.
You can find the 3G version of this tutorial: here.
Unfortunately PwnageTool is not available for Windows yet.

Watch the Video!
For your convenience this tutorial is available in video format also. Click the Watch It button to view the tutorial!
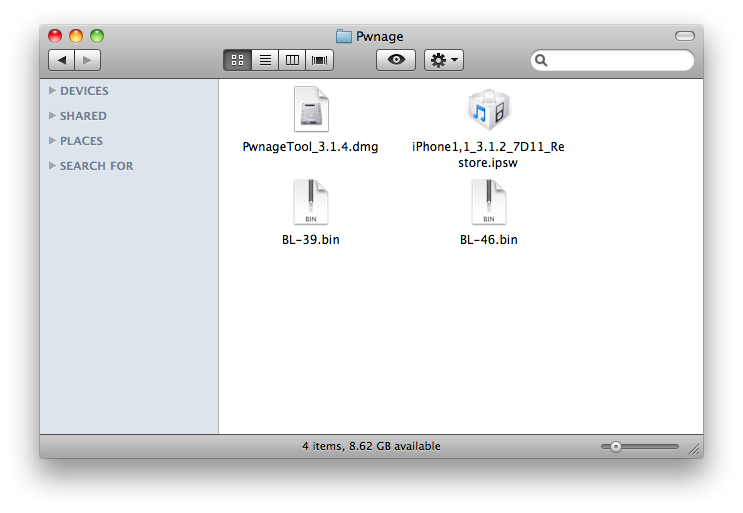
Alright, first make a folder on the desktop. In it, you will need a couple of things. The two bootloader files:
- BL 3.9
- BL 4.6
You will also need the 3.1.2 iPhone firmware.
3.1.2 (2G): iPhone1,1_3.1.2_7D11_Restore.ipsw
When downloading the IPSW file, it is best to download it with Firefox!
Step One
Create a folder on your desktop with all the required files listed above.
Step Two
Double click to mount the PwnageTool dmg.
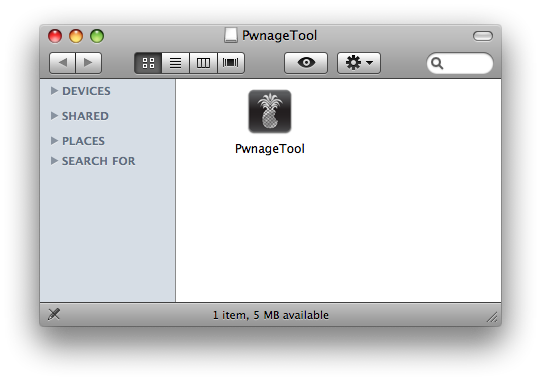
Drag the PwnageTool icon to the Pwnage folder then launch it.
Click Ok if presented with a warning.
Step Three
Make sure you click Expert Mode from the top menu.

Step Four
Select your iPhone or iPod from the three devices shown. Notice a large checkmark appears over the selected device. Then click the blue arrow button at the bottom right.
Step Five
You will be brought to the “Browse for IPSW” page. On my laptop, it automatically found the IPSW. If PwnageTool doesn’t automatically find the ipsw file you can click Browse for IPSW… button.

Click to select the found IPSW file, a checkmark will appear next to it. Then click the blue arrow button to continue.
Step Six
You will then be brought to a menu with 7 choices. Click to select General then click the blue arrow button.
The General settings allows you to decide the partition size. Check Activate the phone and Enabled baseband update. Click the blue arrow button.
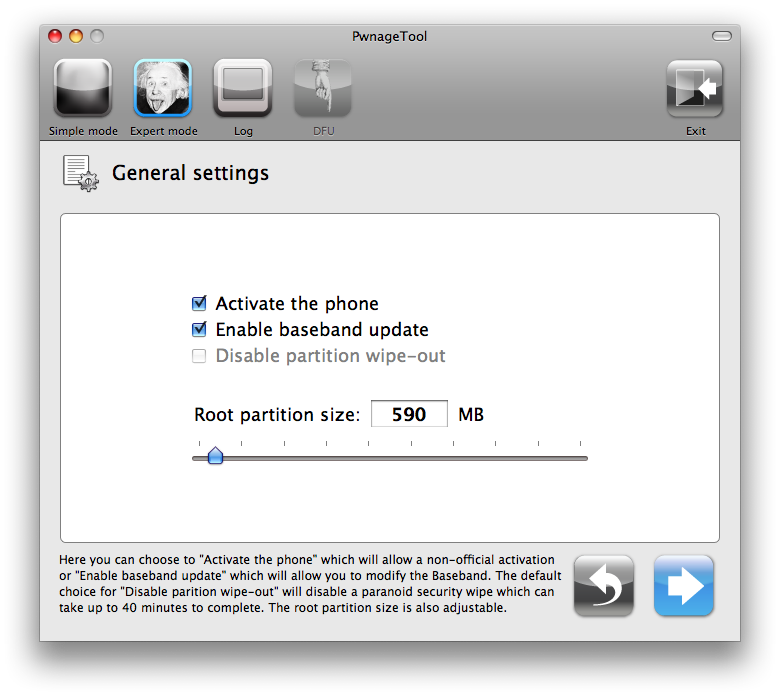
***If the Enable Baseband checkbox is not greyed out, checkmark it. This will allow the unlock to occur!***
***For the 3.0 firmware you may have to increase the size of your root partition slightly for the IPSW build to be successful. 590MB worked just fine for me***
In the Bootneuter settings, click Neuter bootloader, Unlock baseband, and Auto-Delete BootNeuter.app. It is not necessary to upgrade the bootloader unless you are really feeling the need to be on 4.6. Click the blue arrow button to continue.
The Cydia settings menu allows you to create custom packages so you do not have to manually install the necessary them later.
Click to select the Download packages tab. Then click the Refresh button to display all the available packages. Double clicking the package you want will download it and make it available in the Select Packages tab.
Checkmark the ones you want then Click the blue arrow button.
The Custom Packages Settings menu displays listed package settings for your custom IPSW. For know leave these settings as is. Click the blue arrow button to continue.
The Custom Logos Settings menu allows you to add your own images as boot logos. Click the Browse button to select your Boot logo and Recovery logo.
Remember the rules for them: RGB or Grayscale format with Alpha channel and dimension bellow 320×480. If you would like to use the iClarified ones they can be found here: Boot Logo, Recovery Logo
Click the blue arrow button to continue.
Step Seven
You are now ready to build your custom firmware. Click the build button to select it, then click the blue arrow button.
Step Eight
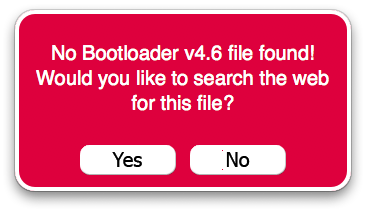
If this is the first time doing this, you will be asked to upload the 3.9 and 4.6 BL files. When prompted to search the web, click no.

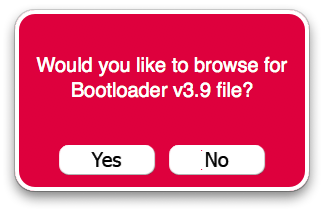
You will prompted to browse for the 3.9BL file. Click Yes then select the file(BL-39.bin) from the Pwnage folder you created on your desktop and click the Open button.
Select the file in the Pwnage folder on your desktop and click the Open button.
Do the same for 4.6.

***: After loading the 4.6 BL you may be asked if you’re a legit user. If you legally have ATT or an iPhone plan in a different country, clicking yes will not unlock the iPhone and activate it as your legal plan already activates it and there is no need for an unlock. However if you wish to keep the iPhone unlocked, when asked if you’re a legit iPhone user, click no
Step Nine
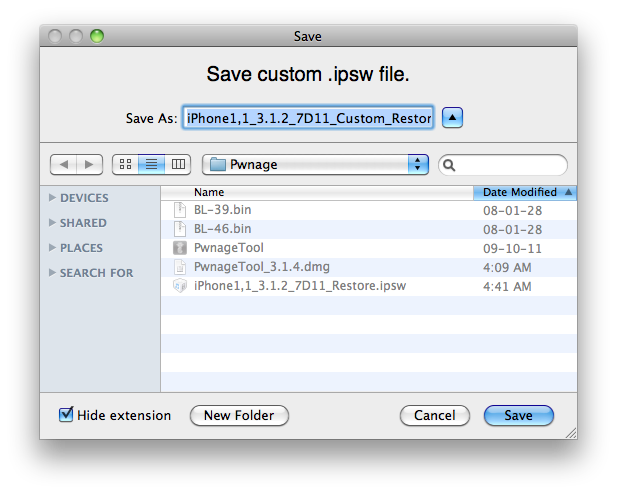
After both are found. You will be asked to save your custom .ipsw file. Save it to your Pwnage folder on the desktop.
Step Ten
Your custom IPSW is now being built. Please allow up to 10 minutes.
If prompted enter your Administrator password and click the OK button.
When prompted if your iPhone has been Pwned before, we clicked No. It allows for a more thorough restore.
You will be asked to turn off the device. Make sure it is connected to the USB port.
Step Eleven
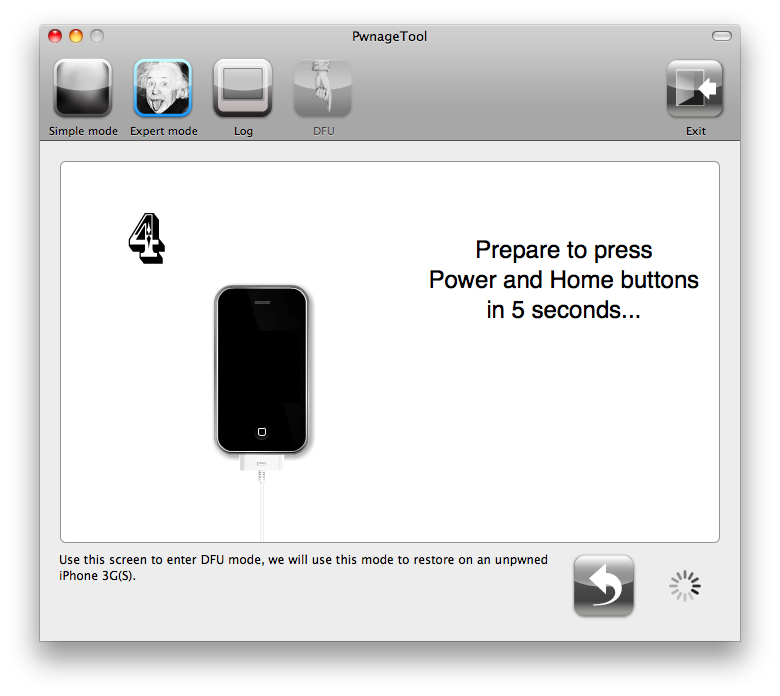
Be ready to follow directions now. It will ask you to hold the home button and the power button for 10 seconds. Then, you will have to release the power button and hold the home button for 10 seconds to enter DFU.
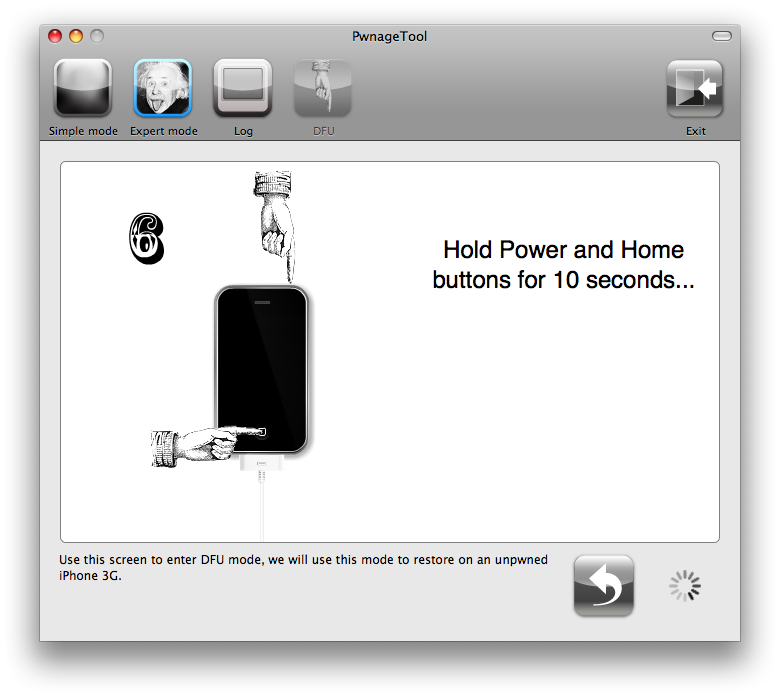

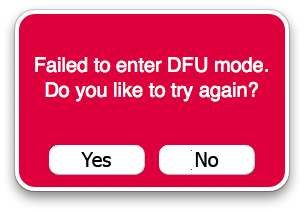
If you fail, it will show you a message. Click Yes. Unplug the iPhone from the USB. Turn it off, then turn it back on. Plug it back into the USB and turn off the iPhone when prompted.
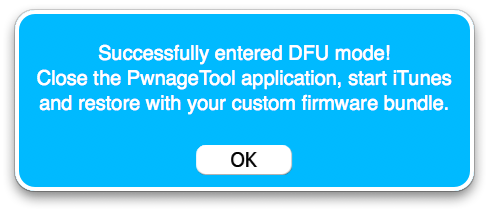
When done correctly, Pwnage 3.1.4 will display a message telling your that it successfully entered DFU mode. iTunes will also pop-up.
Step Twelve
In iTunes, hold the Alt/Option key and click Restore.
Step Thirteen
Navigate to the Pwnage folder on your desktop using the dialog window that appears. Select the custom IPSW that was created (iPhone1,1_3.1.2_7D11_Restore.ipsw_Custom_Restore.ipsw) and click the Open button.
Step Fourteen
Once the restore has completed, it will restart your iPhone. The phone will then launch BootNeuter.app to unlock your device.
Please allow 5 minutes for this to complete. Your iPhone will restart once completed.
How to Jailbreak Your iPhone, iPod Using BlackRa1n [Mac]
Oct 14th
These are instructions on how to jailbreak your iPhone and iPod touch using BlackRa1n for Mac.
The BlackRa1n jailbreak will work with the latest 3.1.2 firmware; however, it will not hacktivate your iPhone. This means that if you are not on an official Apple approved carrier BlackRa1n cannot activate it.
For those with the new iPod touch, BlackRa1n only supports a tethered jailbreak. This means that once jailbroken you should not let your battery die. If it does die you will need to reconnect it to the computer and use BlackRa1n to boot it.
WARNING: Even though the GeoHot jailbreak supports 3.1.2 do not update if you are on iPhone OS 3.0.1 or 3.0. You will lose your unlock. Use PwnageTool to safely update to 3.1 without performing a baseband update. If you really must have 3.1.2 then wait for the next version of PwnageTool. If you have already updated to 3.1 or 3.1.2 without using PwnageTool then you’ve lost the ability to unlock for the time being. You can now use BlackRa1n to at least regain your jailbreak
![]() Ok lets begin…
Step One
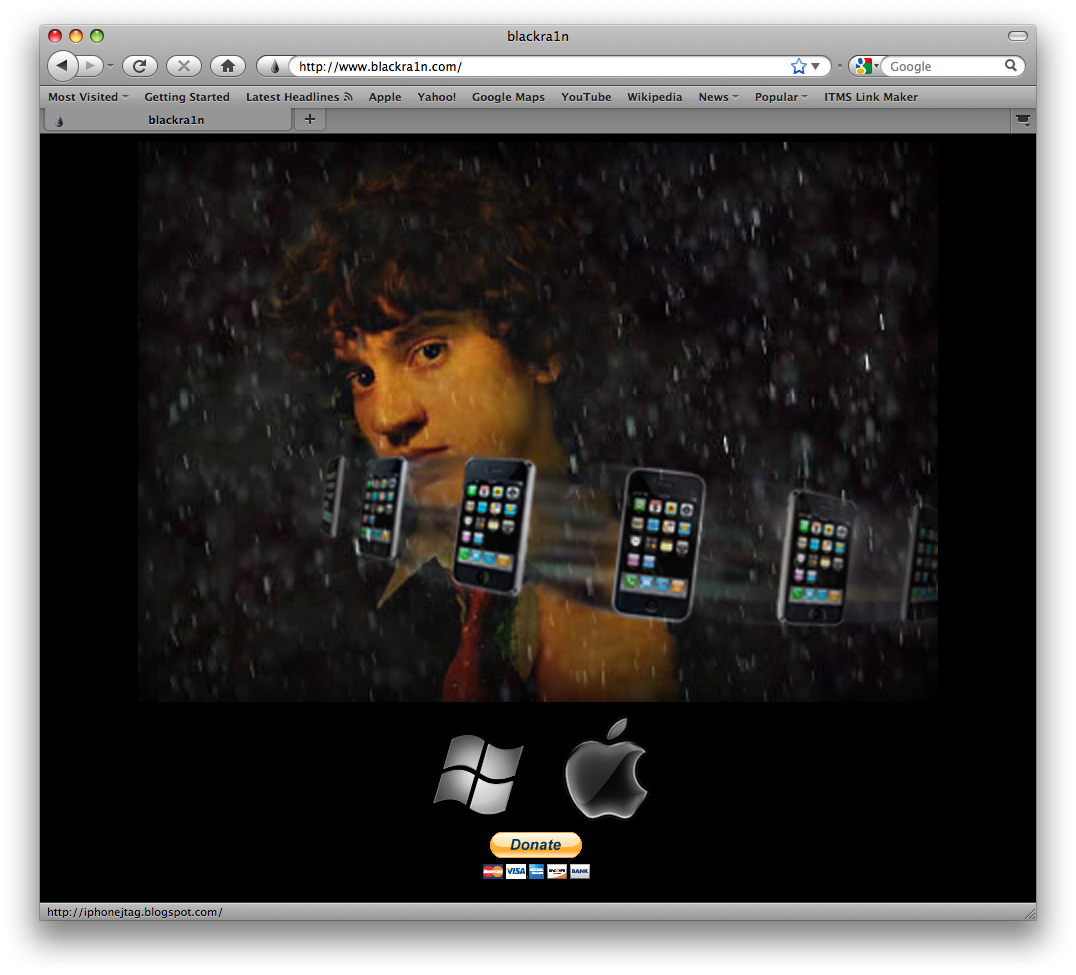
Open your web browser of choice and navigate to http://www.blackra1n.com. Click the Apple logo at the bottom of the screen.
Ok lets begin…
Step One
Open your web browser of choice and navigate to http://www.blackra1n.com. Click the Apple logo at the bottom of the screen.
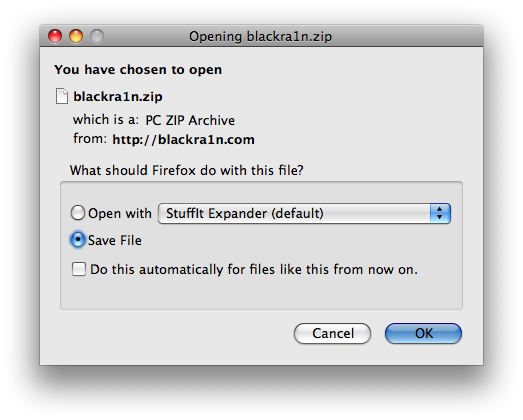
 Step Two
When prompted save the download to your desktop
Step Two
When prompted save the download to your desktop
 Step Three
Then double click the downloaded blackra1n zip file to extract the application, then double click the application icon to launch the program
Step Three
Then double click the downloaded blackra1n zip file to extract the application, then double click the application icon to launch the program
 Step Four
Make sure your iPhone or iPod is connected to the computer then click the large make it ra1n button
Step Four
Make sure your iPhone or iPod is connected to the computer then click the large make it ra1n button
 Step Five
You iPhone will now be placed in recovery mode.
Step Five
You iPhone will now be placed in recovery mode.
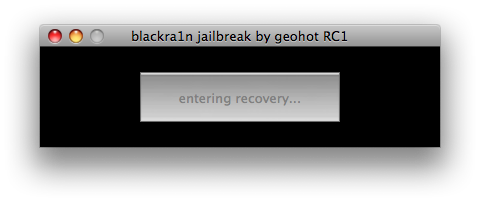 You will see a picture of GeoHot that replaces the regular recovery mode screen on your device.
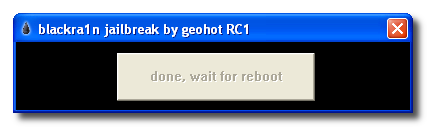
 blackra1n will run and then your device will reboot.
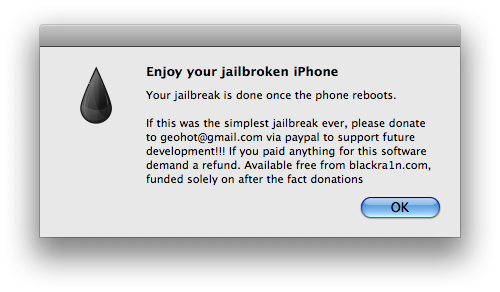
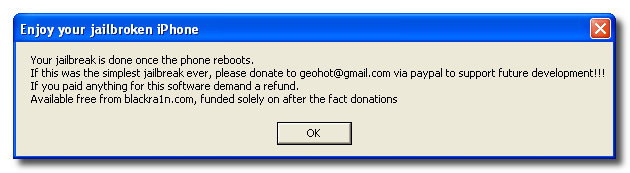
A popup message will appear informing you that BlackRa1n is free software and if you appreciate it you can donate to GeoHot at [email protected].
blackra1n will run and then your device will reboot.
A popup message will appear informing you that BlackRa1n is free software and if you appreciate it you can donate to GeoHot at [email protected].
 Step Six
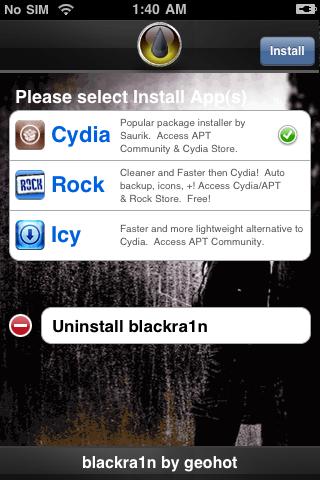
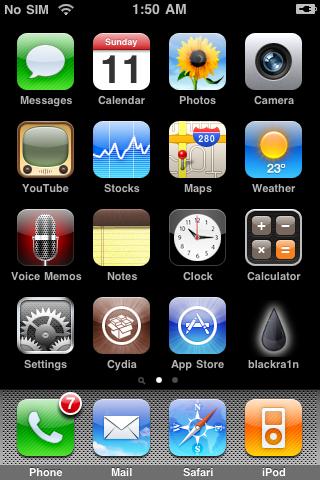
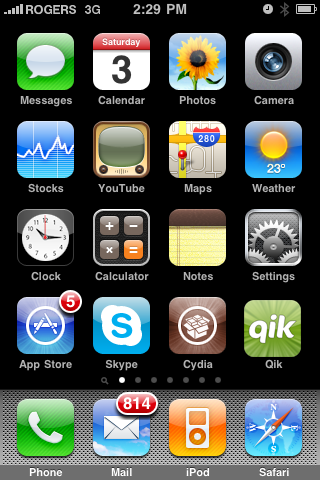
Once your device reboots it will be jailbroken and you will notice a blackra1n icon on the desktop. Make sure you have an internet connection and press to launch the application.
Step Six
Once your device reboots it will be jailbroken and you will notice a blackra1n icon on the desktop. Make sure you have an internet connection and press to launch the application.
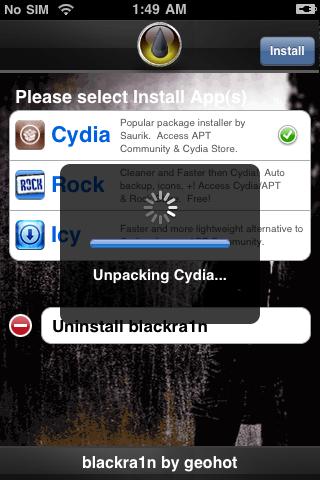
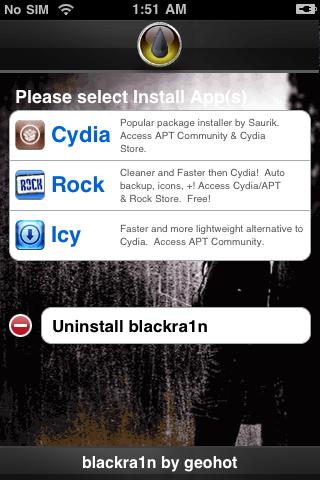
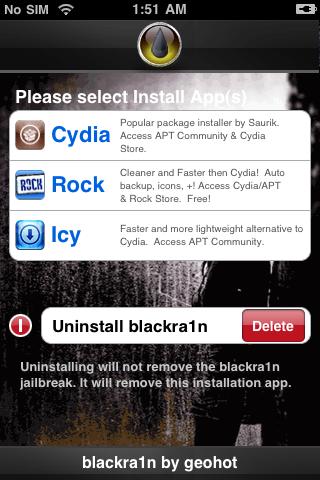
 Choose the installer application of your choice then press the Install button at the top right of the screen

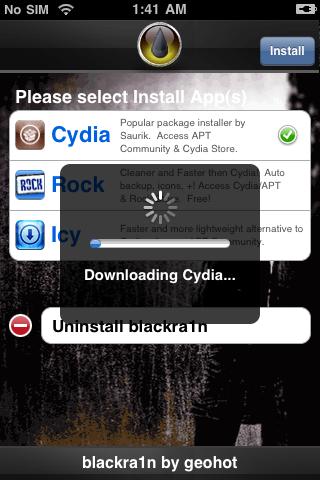
 BlackRa1n will begin to download and install the package you selected.
 Step Seven
Once complete BlackRa1n will respring your iPhone and you will find the installer package of your choice on the Springboard.
Step Seven
Once complete BlackRa1n will respring your iPhone and you will find the installer package of your choice on the Springboard.
 Step Eight
Once you have confirmed your installer package is working correctly you may use the Uninstall blackra1nbutton inside the BlackRa1n app to remove it from your springboard.
Step Eight
Once you have confirmed your installer package is working correctly you may use the Uninstall blackra1nbutton inside the BlackRa1n app to remove it from your springboard.

 ***THANKS: A big thanks to Geohot for making this jailbreak possible. Also thanks to those who contributed to making it a success.
How to Jailbreak Your iPhone, iPod Using BlackRa1n [Windows]
Oct 11th
These are instructions on how to jailbreak your iPhone and iPod touch using BlackRa1n for Windows.
The BlackRa1n jailbreak will work with the latest 3.1.2 firmware; however, it will not hacktivate your iPhone. This means that if you are not on an official Apple approved carrier BlackRa1n cannot activate it.
For those with the new iPod touch, BlackRa1n only supports a tethered jailbreak. This means that once jailbroken you should not let your battery die. If it does die you will need to reconnect it to the computer and use BlackRa1n to boot it.
WARNING: Even though the GeoHot jailbreak supports 3.1.2 do not update if you are on iPhone OS 3.0.1 or 3.0. You will lose your unlock. Use PwnageTool to safely update to 3.1 without performing a baseband update. If you really must have 3.1.2 then wait for the next version of PwnageTool. If you have already updated to 3.1 or 3.1.2 without using PwnageTool then you’ve lost the ability to unlock for the time being. You can now use BlackRa1n to at least regain your jailbreak
![]() Ok lets begin…
Step One
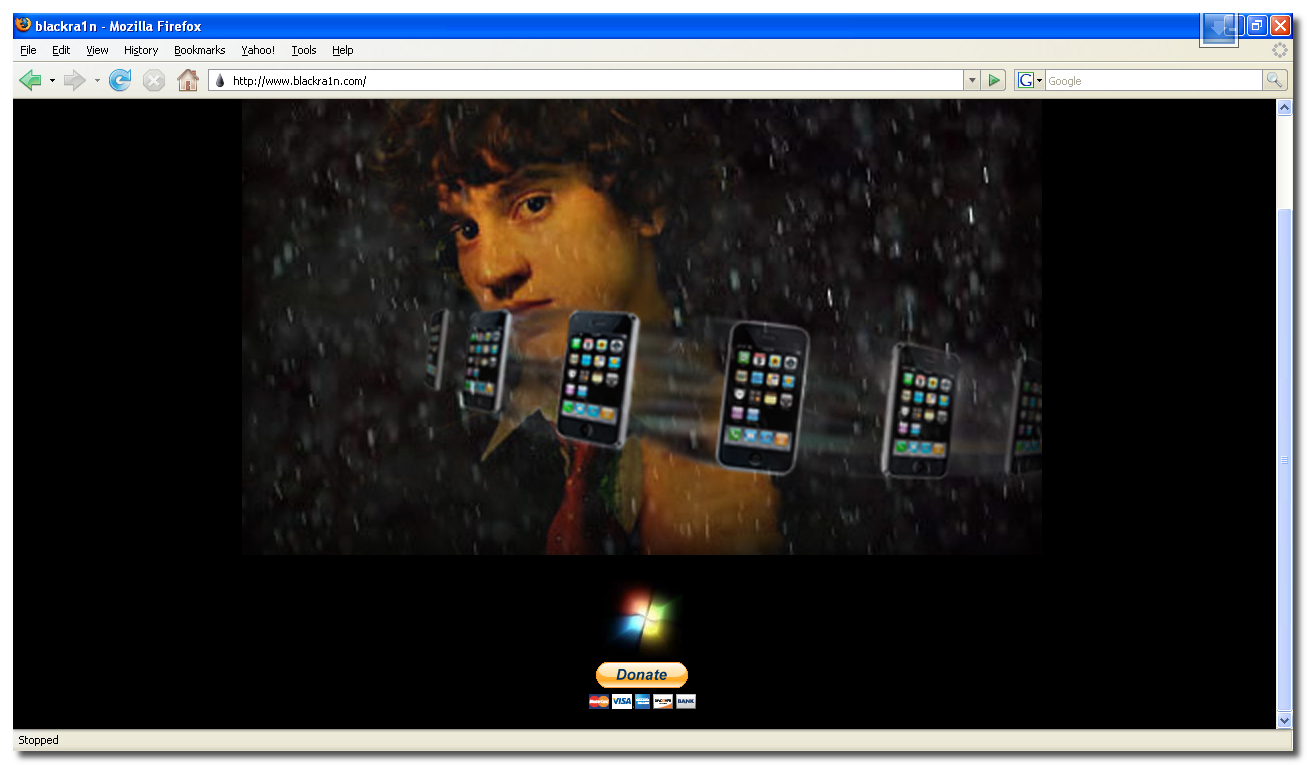
Open your web browser of choice and navigate to http://www.blackra1n.com. Click the Windows logo at the bottom of the screen.
Ok lets begin…
Step One
Open your web browser of choice and navigate to http://www.blackra1n.com. Click the Windows logo at the bottom of the screen.
 Step Two
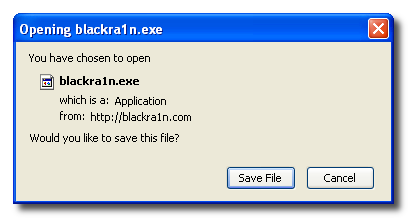
When prompted save the download to your desktop
Step Two
When prompted save the download to your desktop
 Step Three
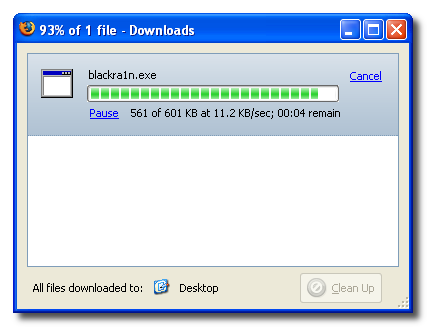
Then double click the blackra1n executable file from the desktop to launch the program
Step Three
Then double click the blackra1n executable file from the desktop to launch the program
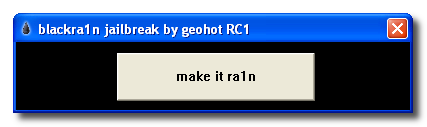
 Step Four
Make sure your iPhone or iPod is connected to the computer then click the large make it ra1n button
Step Four
Make sure your iPhone or iPod is connected to the computer then click the large make it ra1n button
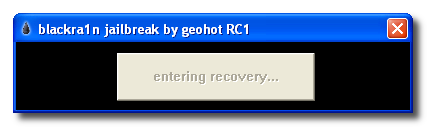
 Step Five
You iPhone will now be placed in recovery mode.
Step Five
You iPhone will now be placed in recovery mode.
 You will see a picture of GeoHot that replaces the regular recovery mode screen on your device.
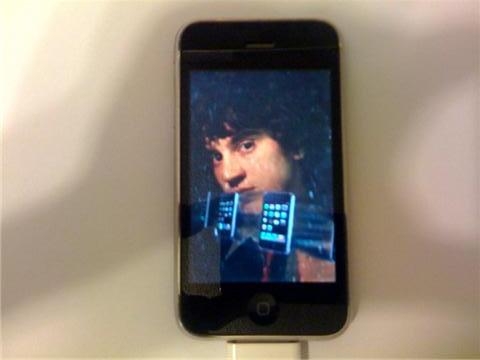 blackra1n will run and then your device will reboot.

 A popup message will appear informing you that BlackRa1n is free software and if you appreciate it you can donate to GeoHot at [email protected].
 Step Six
Once your device reboots it will be jailbroken and you will notice a blackra1n icon on the desktop. Make sure you have an internet connection and press to launch the application.
Step Six
Once your device reboots it will be jailbroken and you will notice a blackra1n icon on the desktop. Make sure you have an internet connection and press to launch the application.
 Choose the installer application of your choice then press the Install button at the top right of the screen

 BlackRa1n will begin to download and install the package you selected.

 Step Seven
Once complete BlackRa1n will respring your iPhone and you will find the installer package of your choice on the Springboard.
Step Seven
Once complete BlackRa1n will respring your iPhone and you will find the installer package of your choice on the Springboard.
 Step Eight
Once you have confirmed your installer package is working correctly you may use the Uninstall blackra1nbutton inside the BlackRa1n app to remove it from your springboard.
Step Eight
Once you have confirmed your installer package is working correctly you may use the Uninstall blackra1nbutton inside the BlackRa1n app to remove it from your springboard.
 ***THANKS: A big thanks to Geohot for making this jailbreak possible. Also thanks to those who contributed to making it a success.
Downtime
Oct 11th
Hey, sorry for the downtime. We’ve switched hosts, and hopefully everyone will run a lot more smoothly.
-iPodTouchMaster Webmaster
How to Use Your iPhone as a USB Drive
Oct 3rd
These are instructions on how to use your iPhone as a USB stick / USB flash drive without needing to install software on your computer.
Step One
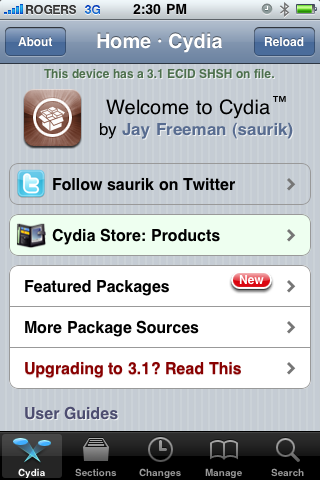
Press to launch Cydia from your iPhone Springboard.
 Step Two
Press to select Manage from the tabs at the bottom
Step Two
Press to select Manage from the tabs at the bottom
 Step Three
Press the large Sources button.
Step Three
Press the large Sources button.
 Step Four
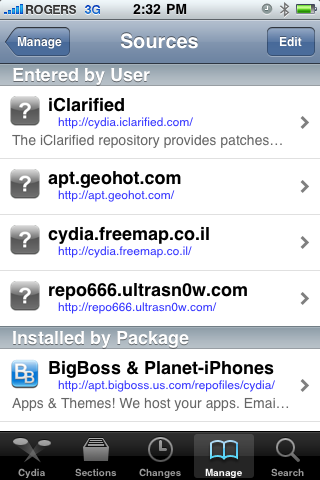
Press the Edit button at the top right of the sources list.
Step Four
Press the Edit button at the top right of the sources list.
 Step Five
Press the Add button that appears at the top left.
Step Five
Press the Add button that appears at the top left.
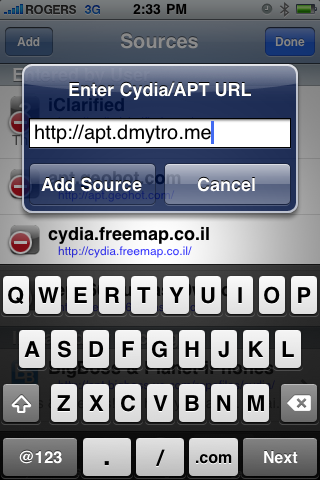
 Step Six
Enter http://apt.dmytro.me as the Cydia/APT URL then press the Add Source button.
Step Six
Enter http://apt.dmytro.me as the Cydia/APT URL then press the Add Source button.
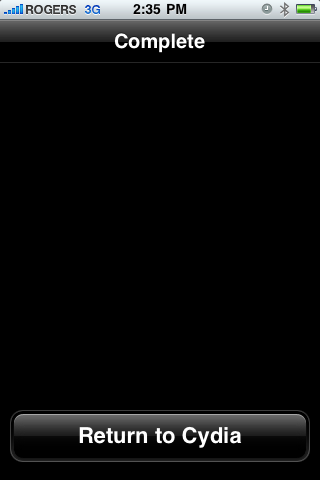
 Step Seven
Cydia will now update your sources. Press the large Return to Cydia button when finished.
Step Seven
Cydia will now update your sources. Press the large Return to Cydia button when finished.
 Step Eight
Press the Done button at the top right of the sources list.
Step Eight
Press the Done button at the top right of the sources list.
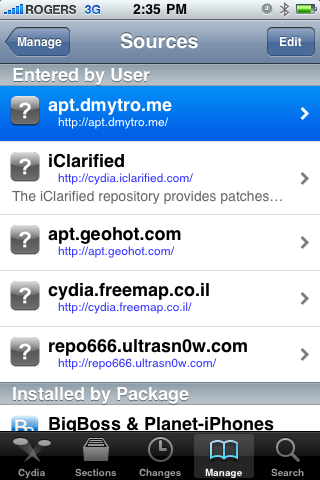
 Step Nine
Press to select the apt.dmytro.me source we just added
Step Nine
Press to select the apt.dmytro.me source we just added
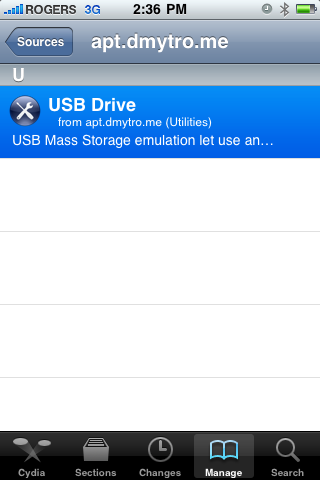
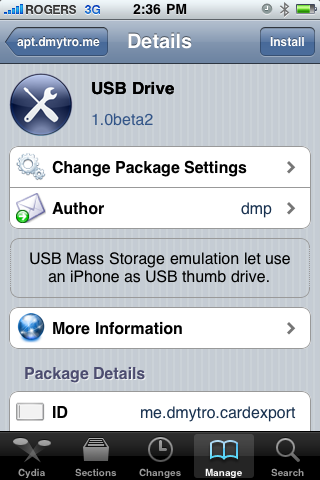
 Step Ten
Tap to select the USB Drive package from the list of packages
Step Ten
Tap to select the USB Drive package from the list of packages
 Step Eleven
Press the Install button at the top right of the screen.
Step Eleven
Press the Install button at the top right of the screen.
 Step Twelve
Press the Confirm button at the top right of the screen
Step Twelve
Press the Confirm button at the top right of the screen
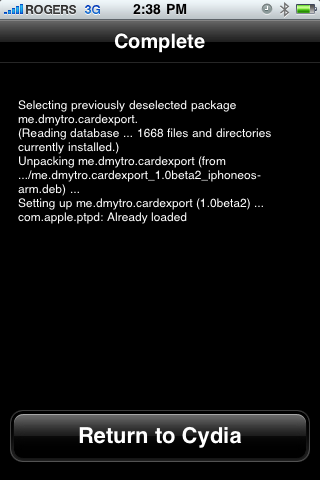
 Step Thirteen
Cydia will now install your package. When it has completed successfully, press the large Return to Cydiabutton.
Step Thirteen
Cydia will now install your package. When it has completed successfully, press the large Return to Cydiabutton.
 Step Fourteen
Press the Home Button to return to your Springboard then press to launch USB Drive from your list of applications.
Step Fourteen
Press the Home Button to return to your Springboard then press to launch USB Drive from your list of applications.
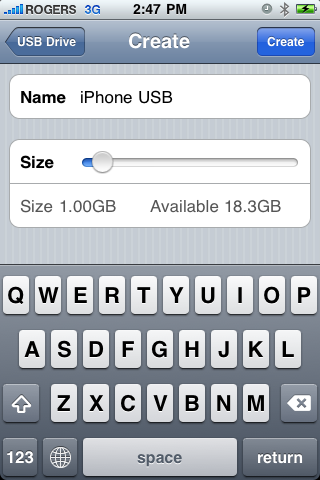
 Step Fifteen
First we must create a Virtual Disk on the iPhone. Press the Create Disk… button to continue.
Step Fifteen
First we must create a Virtual Disk on the iPhone. Press the Create Disk… button to continue.
 Enter a name for your virtual disk and use the slider to specify how much space you would like to allocate it. When done click the Create button at the top right of the screen.
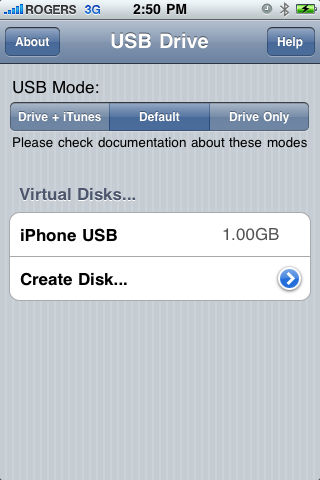
 Step Sixteen
Now that we have created a disk to access we must specify the USB Mode. You have three choices:
Drive + iTunes:
In this mode USB Drive replaces Picture Transfer Protocol (PTP) interface with Mass Storage interface and lets you use the iPhone as a USB Drive. At the same time you can perform iTunes synchronization, developers can use XCode debugger ,etc. In this mode USB Mass Storage will not work on Windows with iTunes or Apple USB Drivers installed.
Default:
This is the iPhone default mode. USB Drive doesn’t install daemon application nor modify any USB settings. Picture Transfer Protocol (PTP) is active as well as iTunes synchronization and tethering over USB.
Drive Only:
This mode is to resolve compatibility issues with Windows and iTunes. In this mode USB Drive changes the iPhone’s USB product ID. This will prevent iTunes synchronization, but USB Mass Storage will work on Windows (and other operating systems). Switch to the Default or Drive + iTunes mode will restore iTunes sync.
Press to select the mode of your choice. We chose Drive + iTunes because we rarely need Windows compatibility.
Step Sixteen
Now that we have created a disk to access we must specify the USB Mode. You have three choices:
Drive + iTunes:
In this mode USB Drive replaces Picture Transfer Protocol (PTP) interface with Mass Storage interface and lets you use the iPhone as a USB Drive. At the same time you can perform iTunes synchronization, developers can use XCode debugger ,etc. In this mode USB Mass Storage will not work on Windows with iTunes or Apple USB Drivers installed.
Default:
This is the iPhone default mode. USB Drive doesn’t install daemon application nor modify any USB settings. Picture Transfer Protocol (PTP) is active as well as iTunes synchronization and tethering over USB.
Drive Only:
This mode is to resolve compatibility issues with Windows and iTunes. In this mode USB Drive changes the iPhone’s USB product ID. This will prevent iTunes synchronization, but USB Mass Storage will work on Windows (and other operating systems). Switch to the Default or Drive + iTunes mode will restore iTunes sync.
Press to select the mode of your choice. We chose Drive + iTunes because we rarely need Windows compatibility.
 A popup will appear asking you to reboot to apply the changes. Press the large Reboot button.
 Step Seventeen
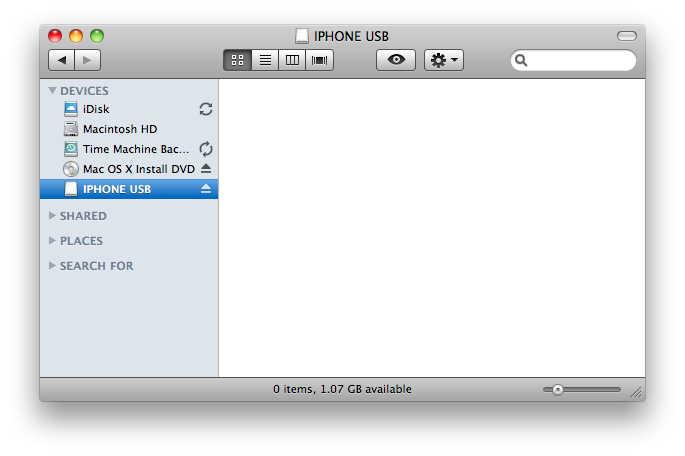
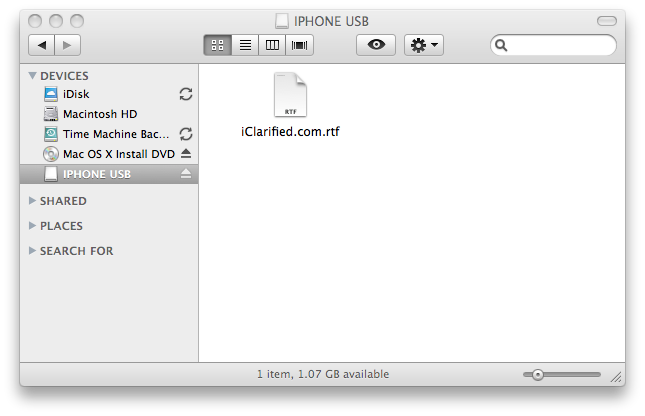
Once your iPhone reboots you will now be able to access the virtual disk you created using USB Drive.
Step Seventeen
Once your iPhone reboots you will now be able to access the virtual disk you created using USB Drive.
 ***THANKS: This is one of the most useful iPhone utilities we have ever seen. A big thanks goes to dmp for creating this app!
How to Upgrade Your Jailbroken iPhone 3GS to OS 3.1
Oct 3rd
This tutorial will show you how to upgrade your jailbroken iPhone 3GS from OS 3.0.x to OS 3.1 using PwnageTool for Mac.
Step One
You will also need the 3.1 iPhone firmware.
3.1.0 (3GS): iPhone2,1_3.1_7C144_Restore.ipsw
When downloading the IPSW file, it is best to download it with Firefox since Safari often auto extracts it!
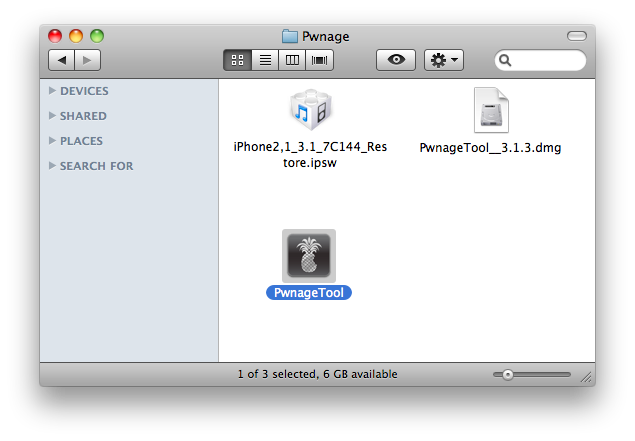
 Step Two
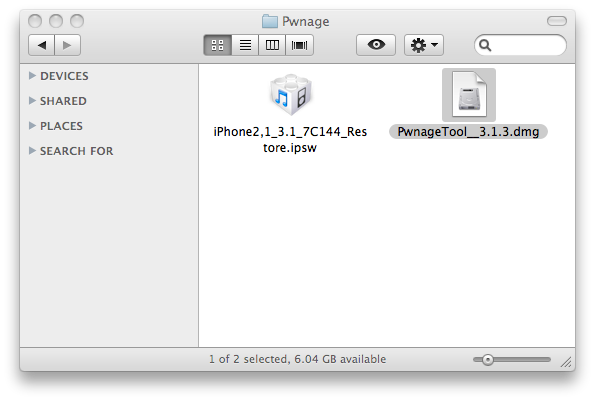
Double click to mount PwnageTool 3.1.3 then drag the PwnageTool icon into the Pwnage folder.
Step Two
Double click to mount PwnageTool 3.1.3 then drag the PwnageTool icon into the Pwnage folder.
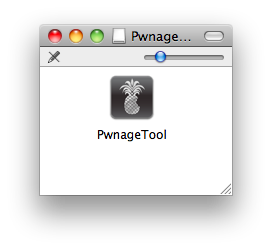 Then from the Pwnage folder double click to launch the PwnageTool application.
 Click Ok if presented with a warning.
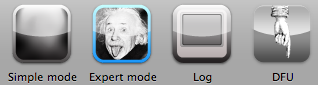
Step Three
Click to select Expert Mode from the top menu bar
Click Ok if presented with a warning.
Step Three
Click to select Expert Mode from the top menu bar
 Step Four
Click to select your iPhone. A check-mark will appear over the image of the phone.
Step Five
Click the blue arrow button to continue. You will be brought to the “Browse for IPSW” page. On my laptop, it automatically found the IPSW. If PwnageTool doesn’t automatically find the ipsw file you can click Browse for IPSW….
Step Four
Click to select your iPhone. A check-mark will appear over the image of the phone.
Step Five
Click the blue arrow button to continue. You will be brought to the “Browse for IPSW” page. On my laptop, it automatically found the IPSW. If PwnageTool doesn’t automatically find the ipsw file you can click Browse for IPSW….
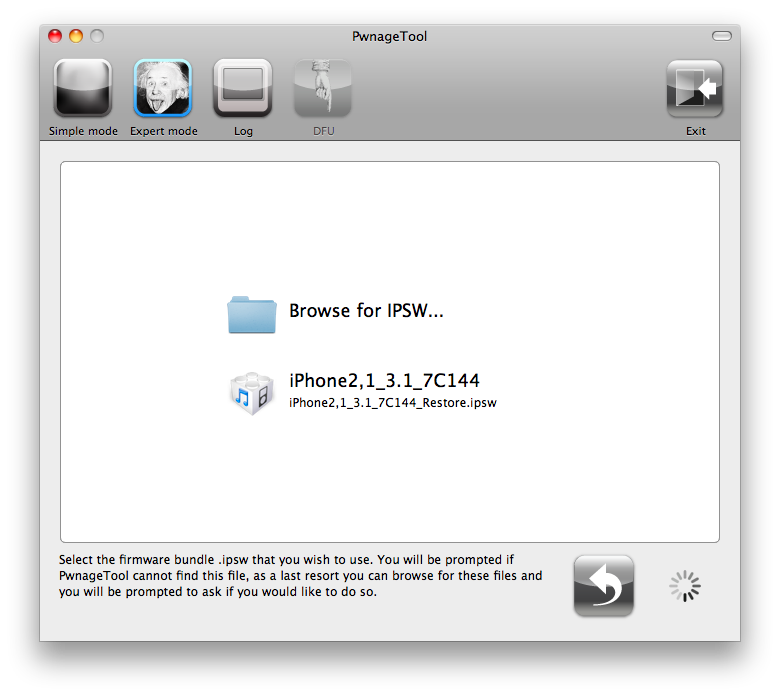 Click to select the found IPSW file, a checkmark will appear next to it. Then click the blue arrow button to continue.
 Step Six
You will then be brought to a menu with 7 choices. Click to select General then click the blue arrow button.
The General settings allows you to decide the partition size. Check Activate the phone if you are not with an official carrier then click the blue arrow button.
NOTE*: Deselect Activate if you have an iPhone legitimately activated on an official carrier.
NOTE*: You may need to increase the size of the root partition slightly. My first attempt failed at creating the IPSW until I increased the size to about 695 MB.
The Bootneuter settings are greyed out for the 3G iPhone. Click the blue arrow button.
The Cydia settings menu allows you to create custom packages so you do not have to manually install the necessary them later.
Click to select the Download packages tab. Then click the Refresh button to display all the available packages. Double clicking the package you want will download it and make it available in the Select Packages tab.
Checkmark the ones you want then Click the blue arrow button.
The Custom Packages Settings menu displays listed package settings for your custom IPSW. For know leave these settings as is. Click the blue arrow button to continue.
The Custom Logos Settings menu allows you to add your own images as boot logos. Click the Browse button to select your Boot logo and Recovery logo. If you would like to use the iClarified ones they can be found here:Boot Logo, Recovery Logo
Remember the rules for them: RGB or Grayscale format with Alpha channel and dimensions below 320×480…
Click the blue arrow button to continue.
Step Seven
You are now ready to begin the pwnage process! Click the Build button to select it then click the Blue arrow button to begin.
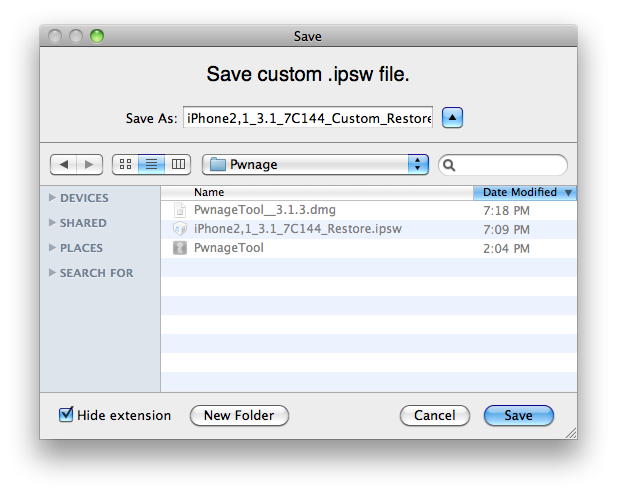
Step Eight
You will be asked to save your custom .ipsw file. Save it to your Pwnage folder you created on your Desktop.
Step Six
You will then be brought to a menu with 7 choices. Click to select General then click the blue arrow button.
The General settings allows you to decide the partition size. Check Activate the phone if you are not with an official carrier then click the blue arrow button.
NOTE*: Deselect Activate if you have an iPhone legitimately activated on an official carrier.
NOTE*: You may need to increase the size of the root partition slightly. My first attempt failed at creating the IPSW until I increased the size to about 695 MB.
The Bootneuter settings are greyed out for the 3G iPhone. Click the blue arrow button.
The Cydia settings menu allows you to create custom packages so you do not have to manually install the necessary them later.
Click to select the Download packages tab. Then click the Refresh button to display all the available packages. Double clicking the package you want will download it and make it available in the Select Packages tab.
Checkmark the ones you want then Click the blue arrow button.
The Custom Packages Settings menu displays listed package settings for your custom IPSW. For know leave these settings as is. Click the blue arrow button to continue.
The Custom Logos Settings menu allows you to add your own images as boot logos. Click the Browse button to select your Boot logo and Recovery logo. If you would like to use the iClarified ones they can be found here:Boot Logo, Recovery Logo
Remember the rules for them: RGB or Grayscale format with Alpha channel and dimensions below 320×480…
Click the blue arrow button to continue.
Step Seven
You are now ready to begin the pwnage process! Click the Build button to select it then click the Blue arrow button to begin.
Step Eight
You will be asked to save your custom .ipsw file. Save it to your Pwnage folder you created on your Desktop.
 Your IPSW is now being built. Please allow up to 10 minutes.
You will be asked to enter your administrator password. Do this then click the OK button.
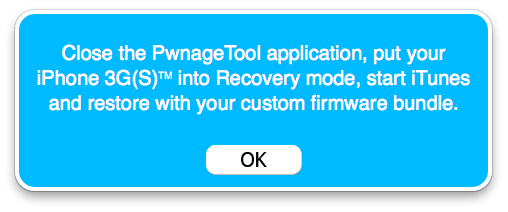
You will be prompted to close the PwnageTool application then put your iPhone into recovery mode. Click theOK button.
Your IPSW is now being built. Please allow up to 10 minutes.
You will be asked to enter your administrator password. Do this then click the OK button.
You will be prompted to close the PwnageTool application then put your iPhone into recovery mode. Click theOK button.
 Step Nine
Make sure your iPhone is connected to the computer then follow these instructions to put your iPhone into recovery mode.
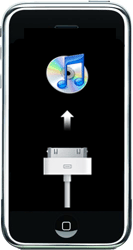
When done correctly your iPhone will display an image of the iTunes logo and a usb cable. iTunes will also pop-up saying it has detected an iPhone in recovery mode.
Step Nine
Make sure your iPhone is connected to the computer then follow these instructions to put your iPhone into recovery mode.
When done correctly your iPhone will display an image of the iTunes logo and a usb cable. iTunes will also pop-up saying it has detected an iPhone in recovery mode.
 Step Ten
In iTunes, hold the Alt/Option key and click Restore.
Step Eleven
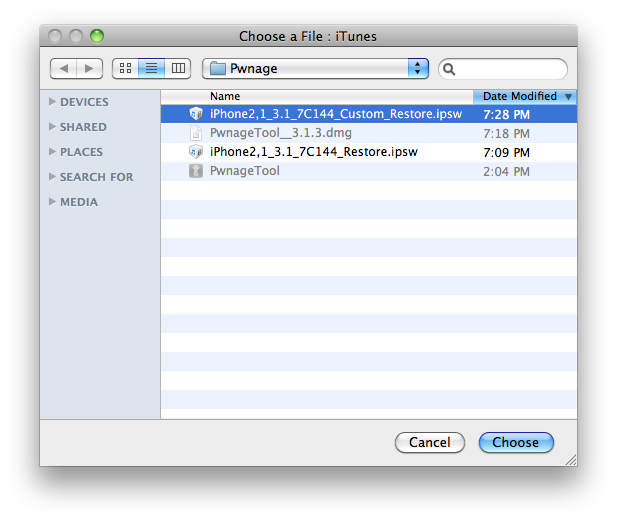
Navigate to the Pwnage folder on your desktop using the dialog window that appears. Select the custom IPSW that was created (iPhone2,1_3.1_7C144_Custom_Restore.ipsw) and click the Open button.
Step Ten
In iTunes, hold the Alt/Option key and click Restore.
Step Eleven
Navigate to the Pwnage folder on your desktop using the dialog window that appears. Select the custom IPSW that was created (iPhone2,1_3.1_7C144_Custom_Restore.ipsw) and click the Open button.
 Step Twelve
iTunes will now restore the firmware on your iPhone. This can also take up to 10 minutes. Once done you will be rebooted into jailbroken iPhone OS 3.1!
***THANKS: Thank you to the Dev-Team for their hard work in making this jailbreak and tutorial possible!
Step Twelve
iTunes will now restore the firmware on your iPhone. This can also take up to 10 minutes. Once done you will be rebooted into jailbroken iPhone OS 3.1!
***THANKS: Thank you to the Dev-Team for their hard work in making this jailbreak and tutorial possible!


Recent Comments