Mastery of the iPod Starts Here
Archive for July, 2010
Whited00r: Modded 3.1.3 Firmware To Replicate iOS 4 On iPhone 3G
Jul 31st


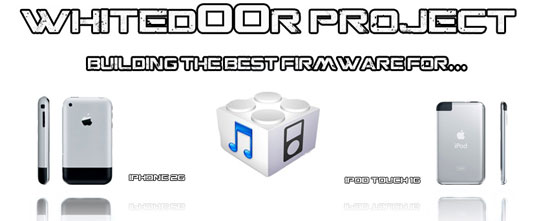
About 2 months ago we told you about whited00r, a project that brings custom jailbreaking tools, which we can use to create custom 3.1.3 firmwares that will replicate iOS 4. The initial idea was to create a 3.1.3 FW that replicates iOS 4 for iPhone 2G And iPod Touch 1G because Apple stopped updating those devices.
But, since everybody is complaining about iOS 4?s speeds on the iPhone 3G , the guys behind whited00r just released another tool specially made for the iPhone 3G.
This is not an actual iOS 4, running on an iPhone 3G, but a modded 3.1.3 FW which brings the following functions:
- Jailbreak
- Hacktivation
- native MMS enabled
- native USB Tethering enabled
- native Bluetooth Tethering enabled
- native Battery Percentage enabled
- 3GS’s Tap To Focus enabled (fake)
- emojii enabled everywhere
- Voice Control Vocalia
- Voice Control Home Button Double Click
- fake Compass to fast-respring
- 4.0 System Version
- 27 Wallpapers from iOS4
- semi-trasparentdock form iOS4
- icons from iOS4
- reflective dock toggle
- springboard backgorund
- sms background
- no Winterboard or BossPaper
For more info and downloads ( for iPhone 2G/3G and iPod Touch 1G ) , check out whited00r….
Notified: Notifications The Way Apple Should Have Made Them
Jul 31st

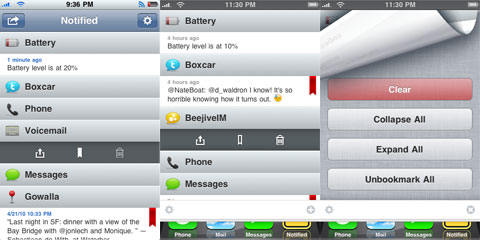
New day, new app in Cydia: Notified. Notified app adds an Android like notification system to your iPhone, but in true Apple style:
- Logs notifications allowing for offline viewing
- Support for several notification types
- Bookmarking, to keep important notifications
- Beautifully designed and coded
You can find Notified for free in Cydia, via ModMyi repo….
NOTE: It seems that a pro version will be released soon that will cost $2.99 , and an iPad version as well.
SpringFlash: First iPhone 4 Only Cydia App
Jul 31st


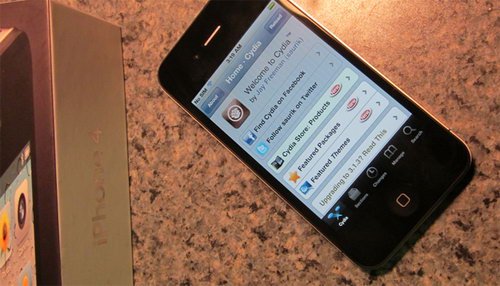
New day, new … well soon to be new app in Cydia: SpringFlash. Since the jailbreak is due very soon, BigBoss developed SpringFlash, the first iPhone 4 only Cydia app. SpringFlash is a springboard activator based LED flashlight for your iPhone 4. In short, you can have a touch of a button for a bright LED flashlight without hassling with unlocking your iPhone, closing your app, or even turning on your screen.
To use this you will have to: jailbreak ( when the jailbreak will be released ) , install the app, go to settings app, activator pane, pick the activation method of your choice, and select the Flashlight.
Like all apps BigBoss writes, you will find SpringFlash for free in Cydia.
A New Open iPhone App Store Which Doesn’t Require Jailbreak
Jul 30th

While there are many third-party iPhone App Stores like Cydia around, the problem with them is that they all require jailbreaking of iPhone, which even though has gone 100 percent legal isn’t something which every iPhone user will do. Comes in OpenAppMkt, a new web-based third-party app store for all iOS based devices which consists of apps, completely written in HTML format. OpenAppMkt runs in browser and installation of apps simply require a simple tap on: “add to home” button.
This is how it looks like:

and here is video, showing OpenAppMkt in action on the iPhone.
Simply head over to http://www.openappmkt.com/ to try it out,
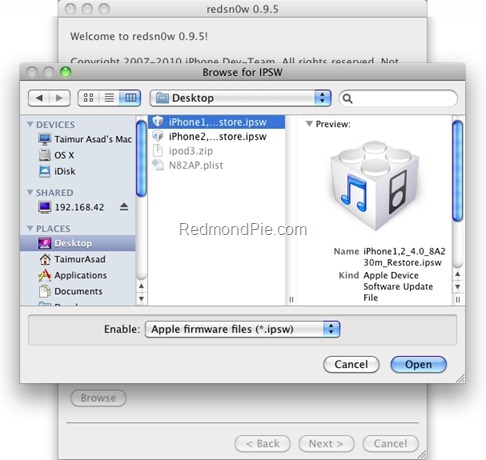
How To Jailbreak iOS 4.1 Beta 2 on iPhone 3G Using Redsn0w[Windows/Mac]
Jul 30th


This is strictly for iPhone 3G and iPod Touch 2G (non-MC model) only. If your iPhone 3G relies on an unlock, DO NOT update to iOS 4.1 Beta 2 now as the current version of ultrasn0w cannot unlock this new firmware and its baseband.(05.14.01)
Please Note that this is only for Developers
you can find the tutorial to Jailbreak iOS 4.1 Beta 1 here
If you have iPhone 3G (which doesn’t rely on an unlock), or an iPod Touch 2G (non-MC model), then simply follow this guide
Step 1:
Download iOS 4.1 Beta 2 for your version of iPhone and iPod touch.
Step 2:
Update to this latest firmware using the IPSW file you just downloaded via iTunes 9.2
Step 3:
Start Redsn0w 0.9.5b5-5 (download link given below) and point it to iOS 4.0 (Final Version), and not iOS 4.1 firmware file to proceed with the jailbreak.
Redsn0w 0.9.5b5-5 (Windows)
-
Redsn0w 0.9.5b5-5 (Mac)
Step 4:
Now select “Install Cydia” and click “Next”.

Step 5:
Now make sure your device is both OFF and PLUGGED IN to the computer before you click “Next”.
Step 6:
Connect your device in recovery mode by pressing the Power and buttons continuously.
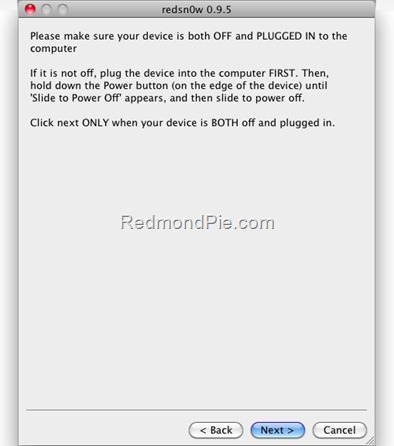
At this stage you will be presented with a screen where you will have to quickly hold “Power” button and then while holding the “Power” button, you will now have to hold “Home” button too. Now after few seconds release “Power” button but keep holding “Home” button until installation begins.
Step 7:
Once done, your iPhone will restart automatically and you will find it jailbroken on the latest iOS 4.1 Beta 2 firmware.
**Thanks to the iPhone Dev Team for making this jailbreak possible.
Apple Drops iOS 4.1 Beta 2 For Developers
Jul 29th

Apple Drops iOS 4.1 Beta 2 For Developers
Wed, Jul 28, 2010

Just a quick heads-up: Apple just dropped iOS 4.1 beta 2. Not much changed in the new beta but some. Apple added GKvoice which is VoIP for Game Kit and some simple address book changes. If we find something interesting we will write about it. Stay tuned…
Baseband 05.14.01+ Makes Ultrasn0w 0.93 Exploit Obsolete
Jul 29th


Just a quick heads-up: Sherif Hashim confirmed that baseband 05.14.01 ( and above ) makes ultrasn0w 0.93?s exploit obsolete. iPhone 3G and 3Gs users should stay on iOS 4.0 or 4.0.1 and do not update to future iOS releases, otherwise you won’t be able to unlock your iPhone.
Probably ultrasn0w will be updated in the future or, who knows, new unlocking tools will be released. But for now, just stay away from that update button.
How To Jailbreak iPhone 3GS on iOS 4.0.1 Using PwnageTool Bundles[Mac]
Jul 24th


PwnageTool bundle to jailbreak iOS 4.0.1 on iPhone 3GS has been released. You can use this bundle with existing version of PwnageTool to create custom firmware files which are jailbroken and hacktivated for iPhone 3GS. The best thing about this bundle is that it supports both the ultrasn0w unlock and hacktivation. But as always, this bundle is meant for iPhone 3GS with old bootrom only. Those of you who are with new bootrom will have to wait for Comex’s new Spirit like jailbreak tool which should be released real soon.
Simply Download the the PwnageTool bundle and then follow the step by step instructions for patching PwnageTool 4.0.1 for iOS 4.0.1. Once you are done with the jailbreak, you can then unlock it using Ultrasn0w 0.93 on any baseband (including 05.13.04 and 05.12.01)
Once again, perform the instructions at your own risk only. I am not responsible if you end up bricking or locking your phone. Only proceed if you are an advanced user, and know what you are doing. Otherwise, wait for the new official tools which would be out soon.
Step 1:
Download PwnageTool 3.1.5 from the download link given here.
Step 2:
Download the latest version of PwnageTool Bundles from msft.guy here and then extract it to your Desktop.
Step 3:
Download iOS 4.0.1 for iPhone 3GS, and iTunes 9.2 for Mac.
Step 4:
Download the updated Cydia bits (data.tar file) from here.
Step 5:
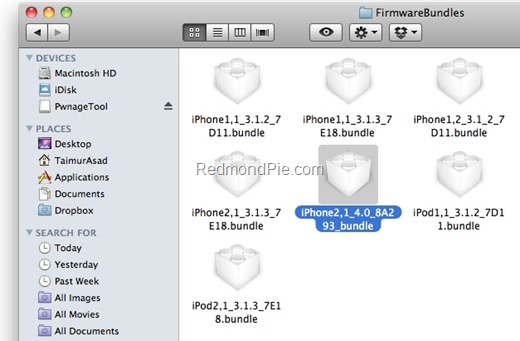
Copy PwnageTool that you downloaded in Step 1 to your desktop. Right click, and then click on “Show Package Contents” as shown in the screenshot below.

Step 6:
Navigate to Contents/Resources/FirmwareBundles/ and pasteiPhone2,1_4.0.1_8A293_bundle.bundle file in this location and then simply close this folder.
Step 7:
Now navigate again to Contents/Resources/CustomPackages/CydiaInstaller.bundle/files/ and paste data.tar file (for Cydia) that you downloaded in Step 4.
Step 8:
Start “Terminal” program on your Mac and run the following commands:
cd desktop
cd PwnageTool.app/Contents/Resources/CustomPackages/CydiaInstaller.bundle/files/
tar -xPvf data.tar
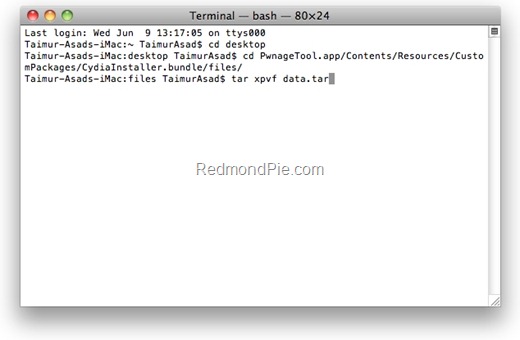
once you are done, close all the open windows.
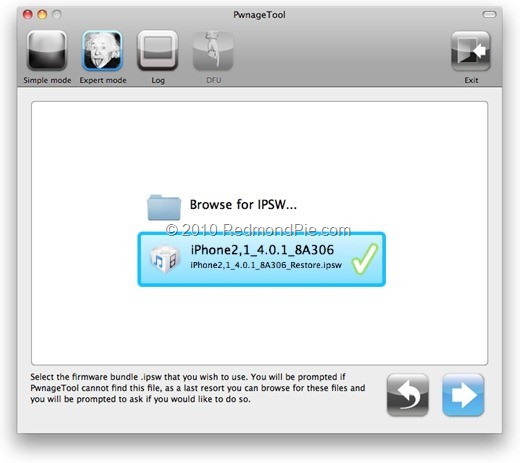
Step 9:
Now start this patched version of PwnageTool, Select iPhone 3GS as your device and you will now notice that PwnageTool will automatically detect iOS 4.0.1 firmware file as shown in the screenshot below.
Step 10:
Simply follow the steps to create a custom-cooked iOS 4.0.1 firmware file which will preserve your old baseband.
Step 11:
Once the .ipsw file has been created, you will now have to restore your iPhone to this custom firmware 4.0 that you just cooked using PwnageTool 3.1.5 for your iPhone 3GS. Start iTunes 9.2 Click on your phone icon from the sidebar in iTunes. Now press and hold left “alt” (option) button on the keyboard and then click on “Restore” (Not “Update” or “Check for Update”) button in the iTunes and then release this button.
This will make iTunes prompt you to select the location for your custom firmware 4.0.1 Select that custom .ipsw file and click on “Open”.
Step 12:
This will involve a series of automated steps. Be patient at this stage and don’t do anything silly. Just wait while iTunes installs the new firmware 4.0.1 on your iPhone. Your iPhone screen at this point will be showing a progress bar indicating installation progress. After the installation is done, iPhone will restart automatically and you should now have a fully jailbroken iPhone 3GS running on iOS 4.0.1
How to Use iMovie on the iPhone 4
Jul 23rd


These are instructions on how to use iMovie on the iPhone 4 to edit your video footage and create a custom movie.


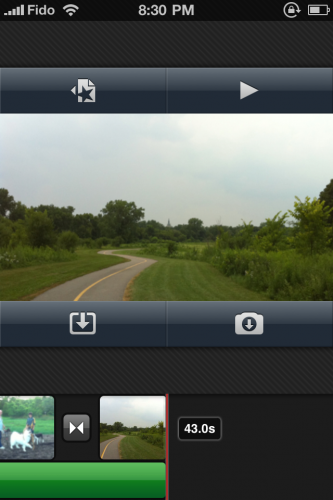


Step One
Press to launch

Step Two
Press the
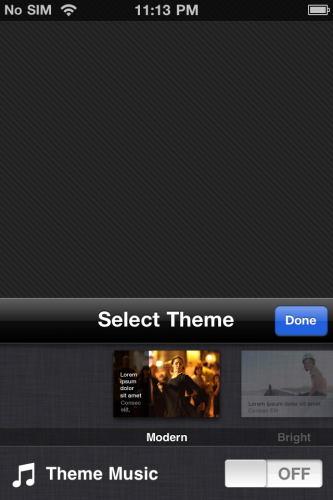
Step Three
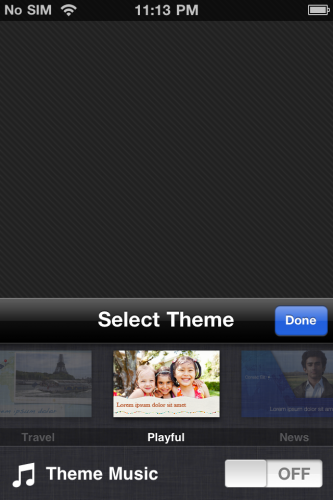
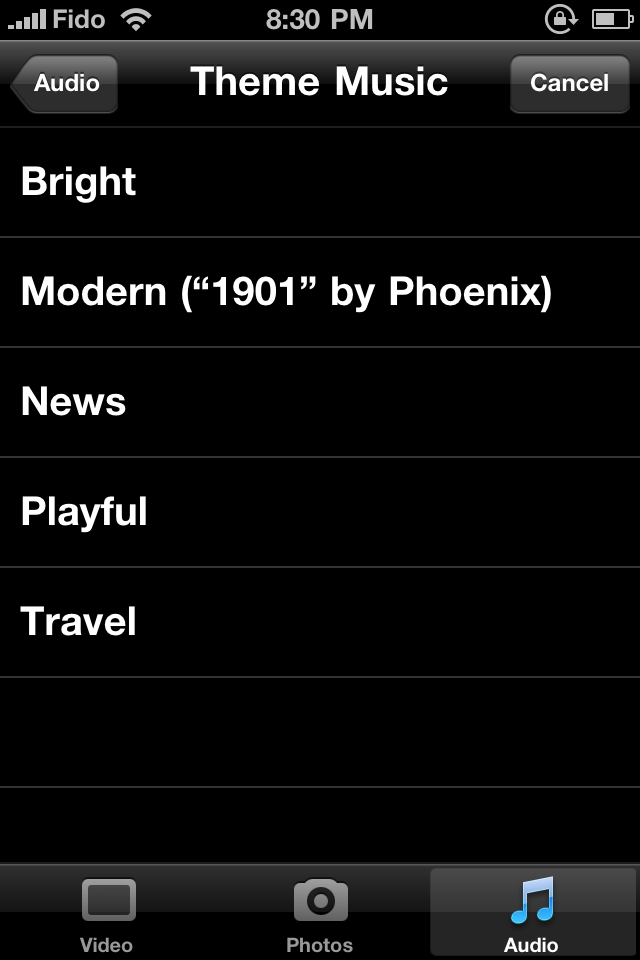
Swipe to select a theme for your video. If you would like to use the theme’s music you can flip the


Step Four
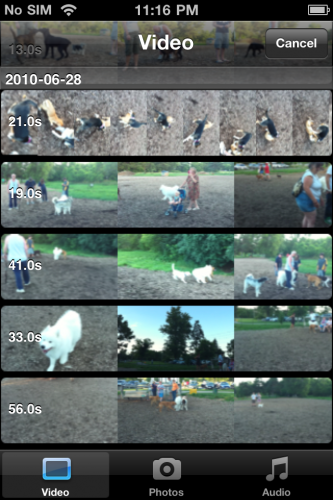
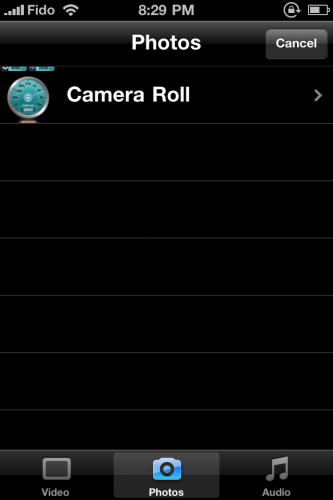
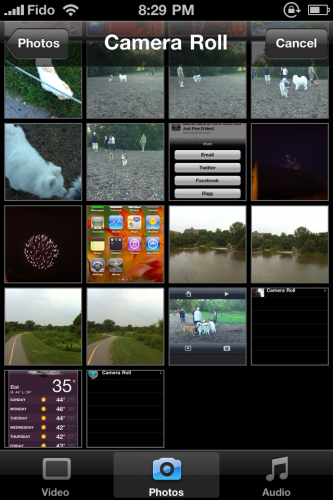
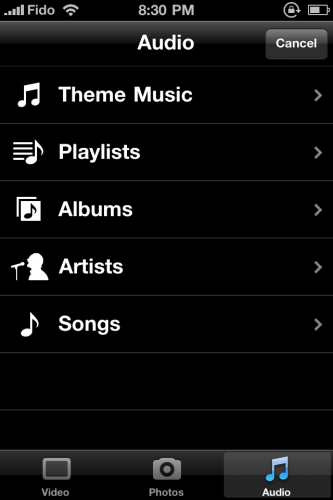
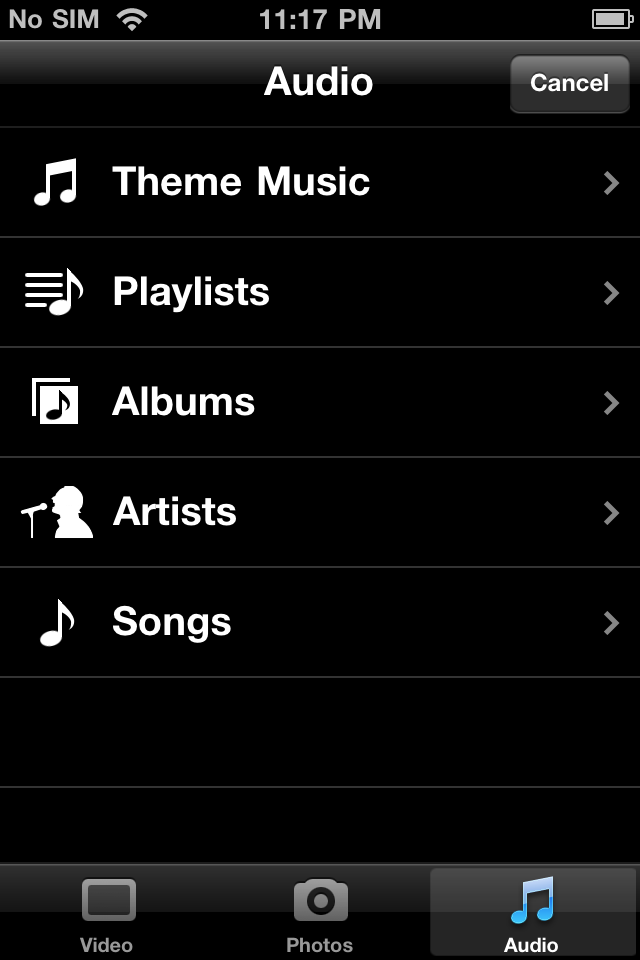
Tap to import media from either your media library or directly from the camera.
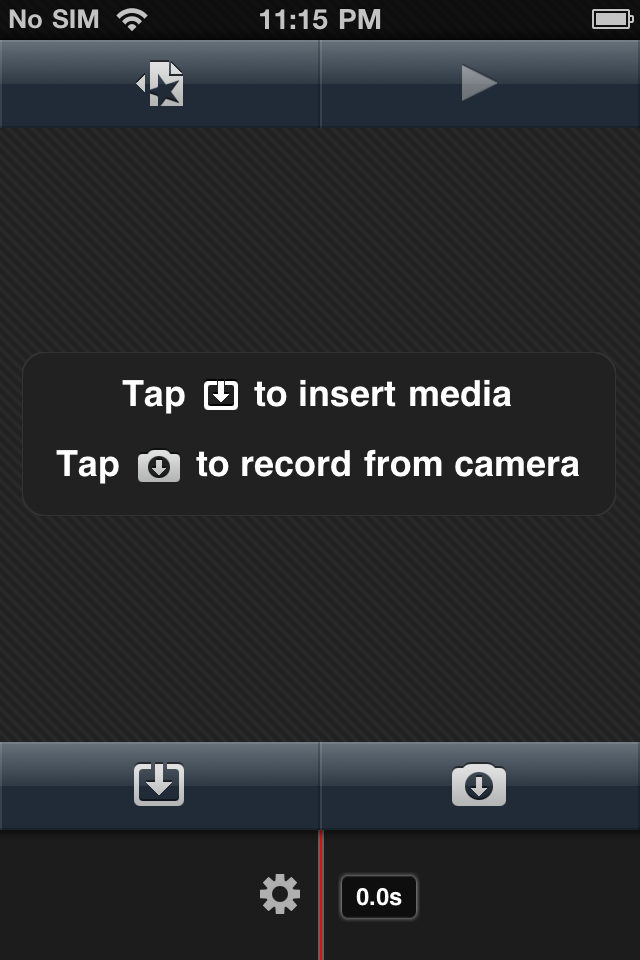
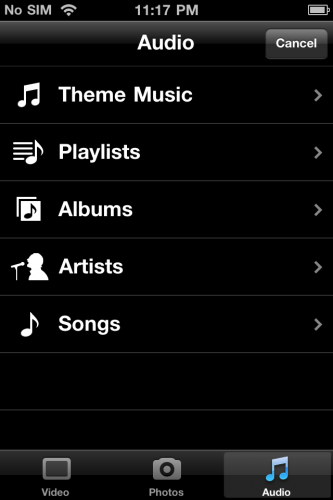
If you tapped to import from the media library a window will appear that allows to select from video, photo, and audio tabs.

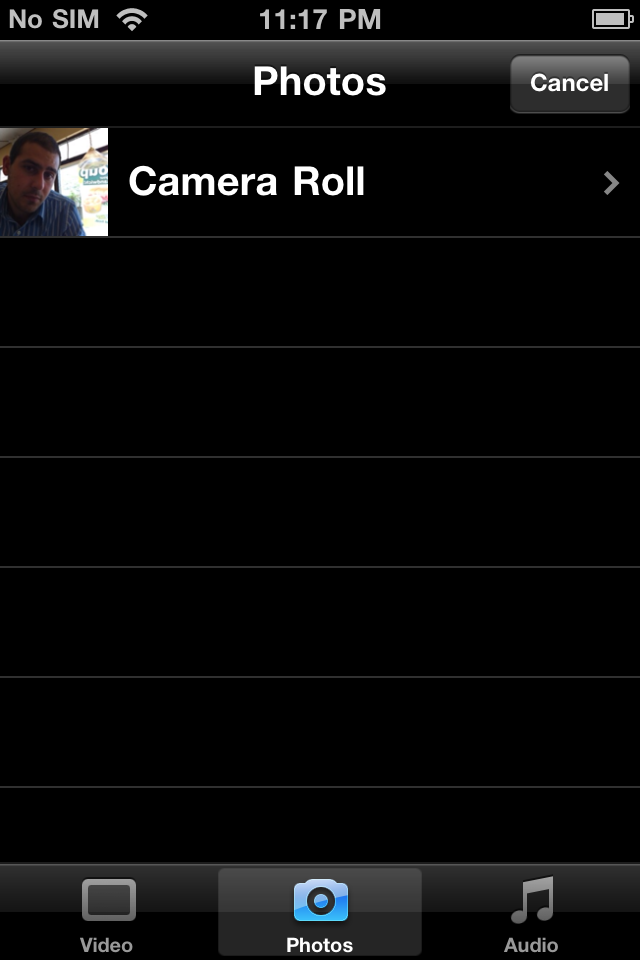
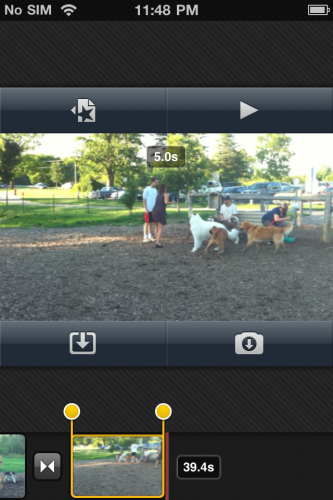
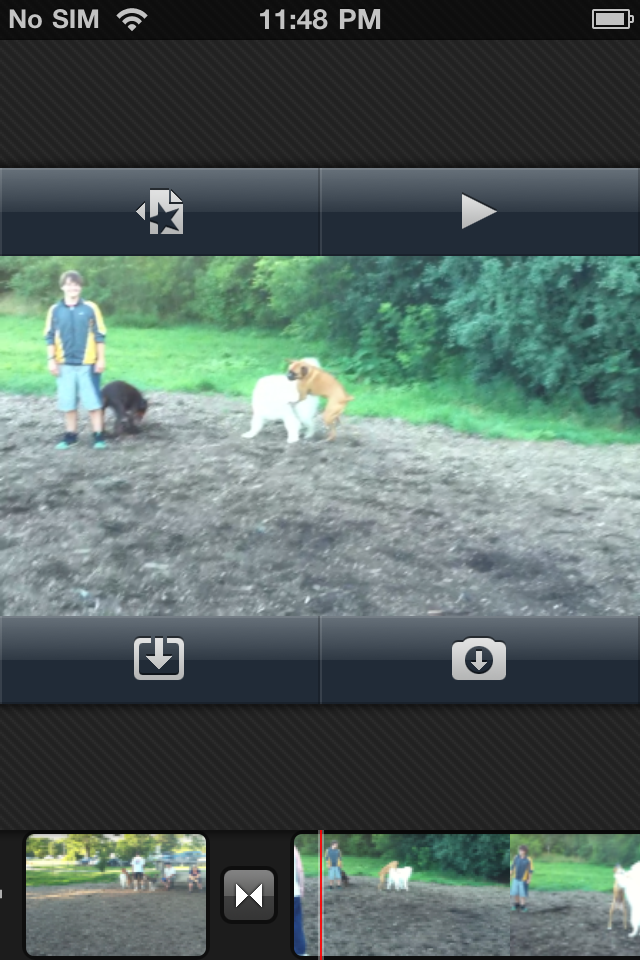
Select a video clip and it will be inserted into your timeline.

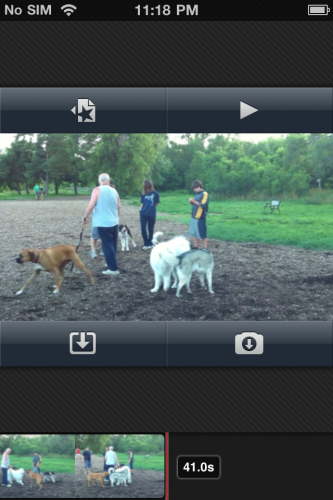
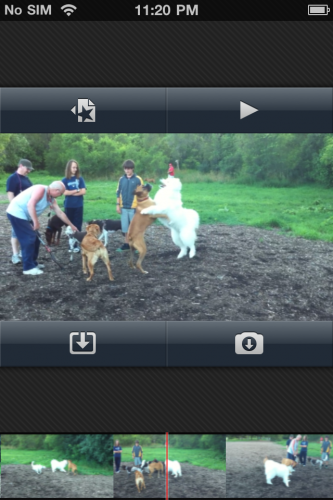
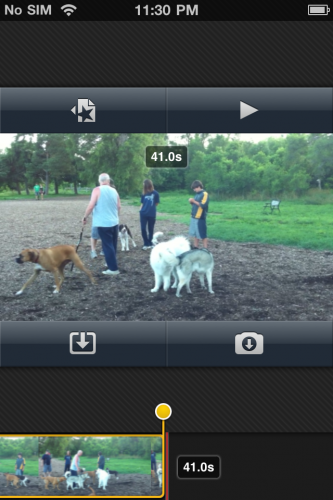
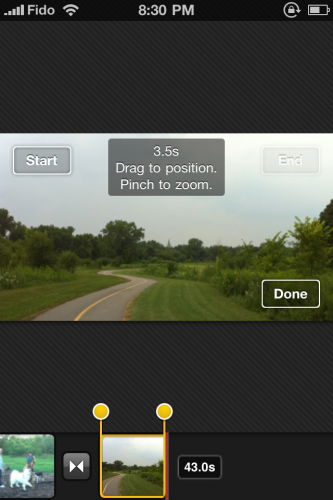
You can then swipe the video along the bottom of the screen to move back and forward in time.
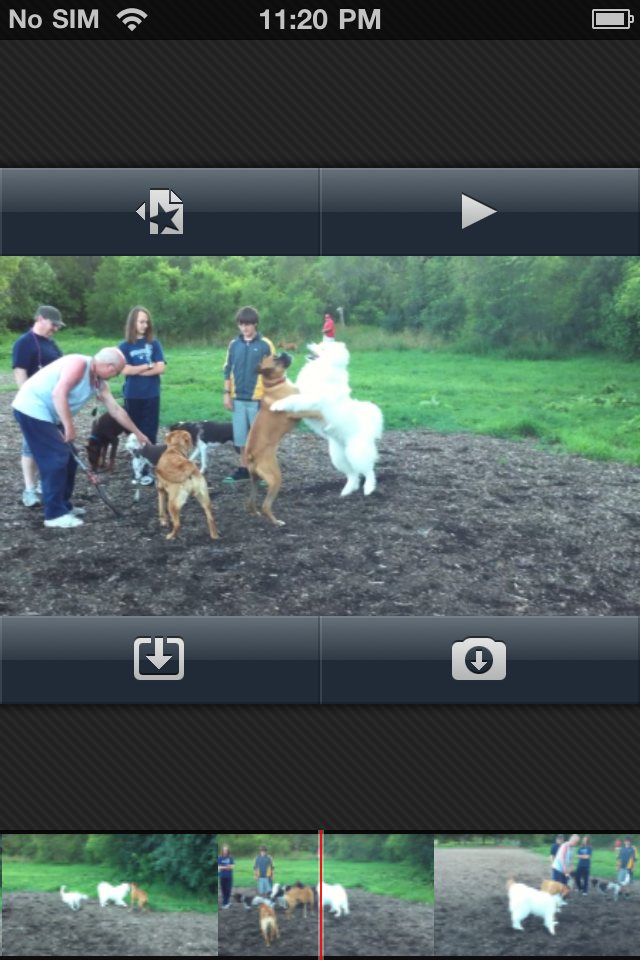
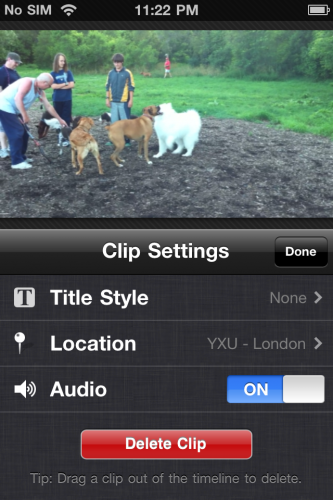
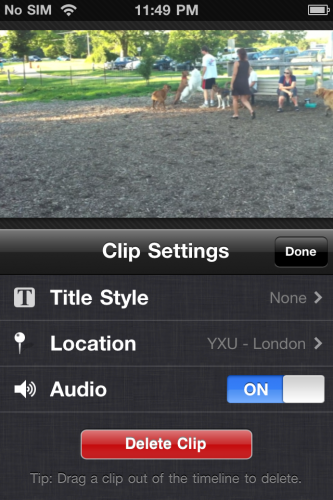
Double tap the clip to set the Title Style and Location. You can also enable or disable audio and delete the clip from here.

For now press
Done then swipe to the beginning or end of the clip. Tap the clip once and you will bring up an orange handle. You can drag this handle to trim the clip to your desired length.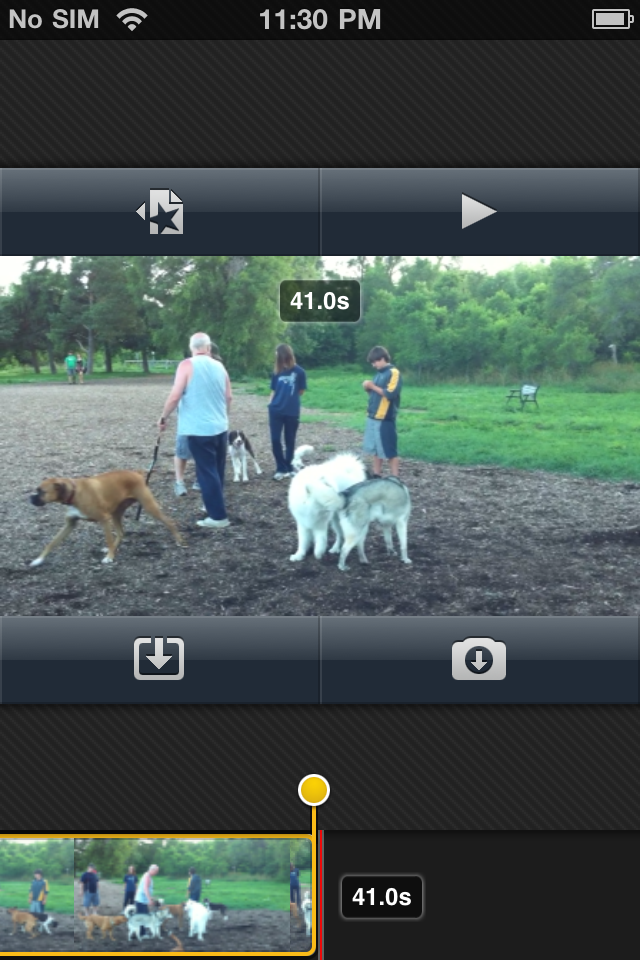
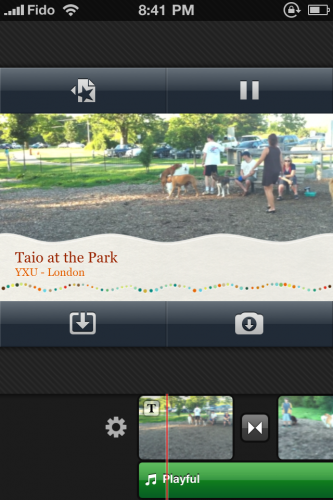
Step Five
Press the

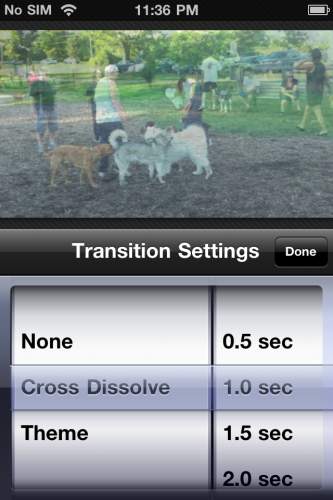
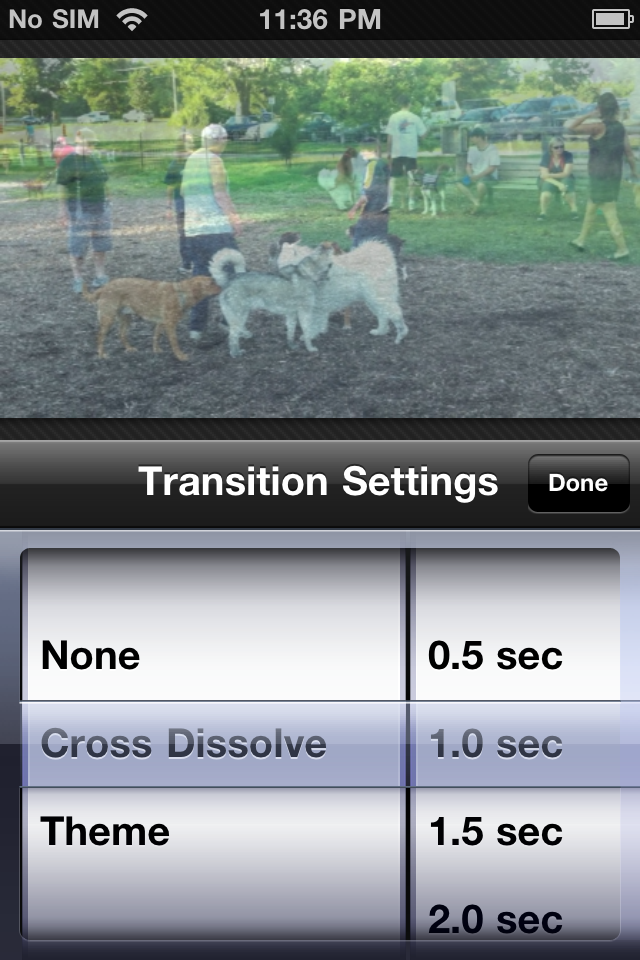
Notice that you now get a small button in between the first and second clip. Double tap this button to edit the transition between the two. You can set both the time and type for the transition.
Now lets try to tap the video then drag the orange handle to shorten the clip. Once its the desired length drag it along the timeline and make it the starting clip.

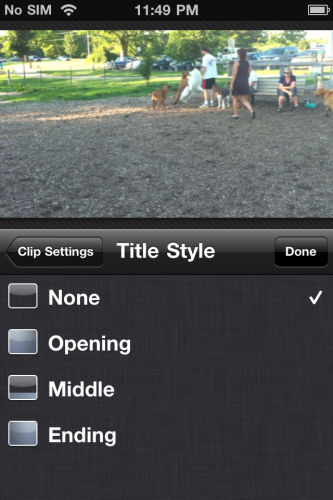
Double tap the clip and press
Title Style. Here you can choose between Opening, Middle, and Ending title styles. Choose Opening and press the Done button.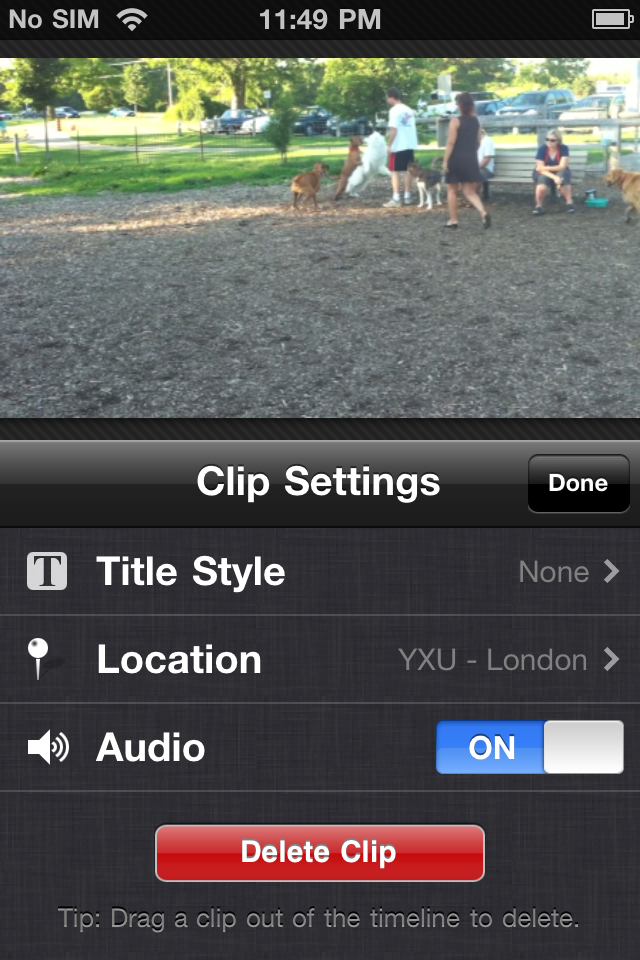

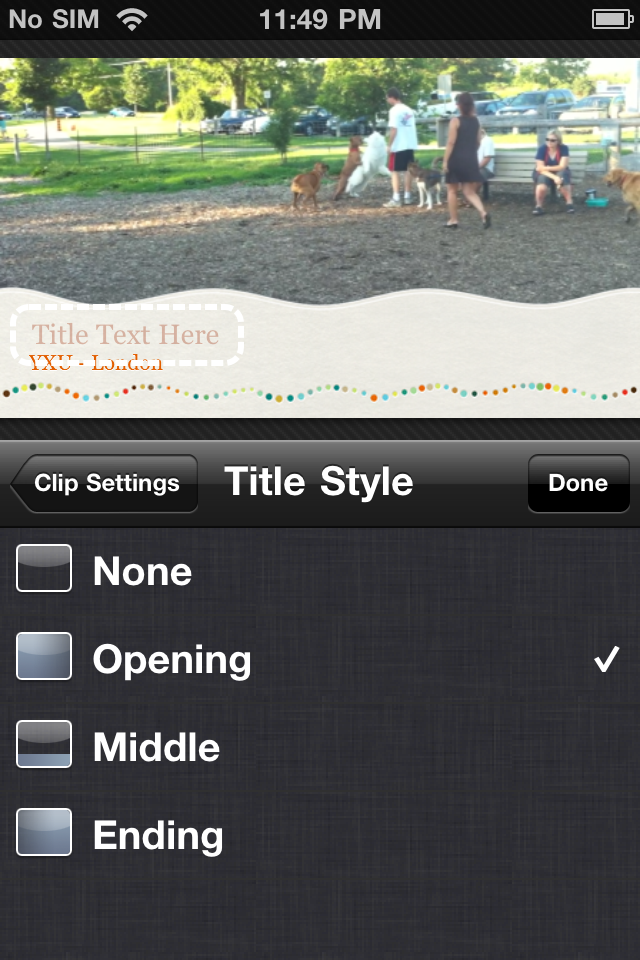
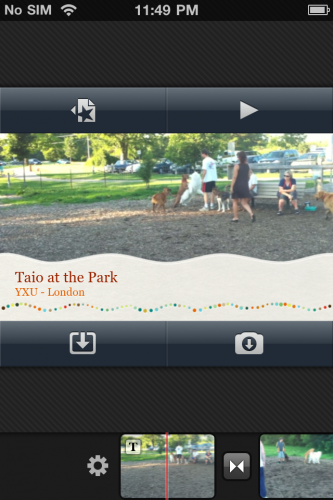
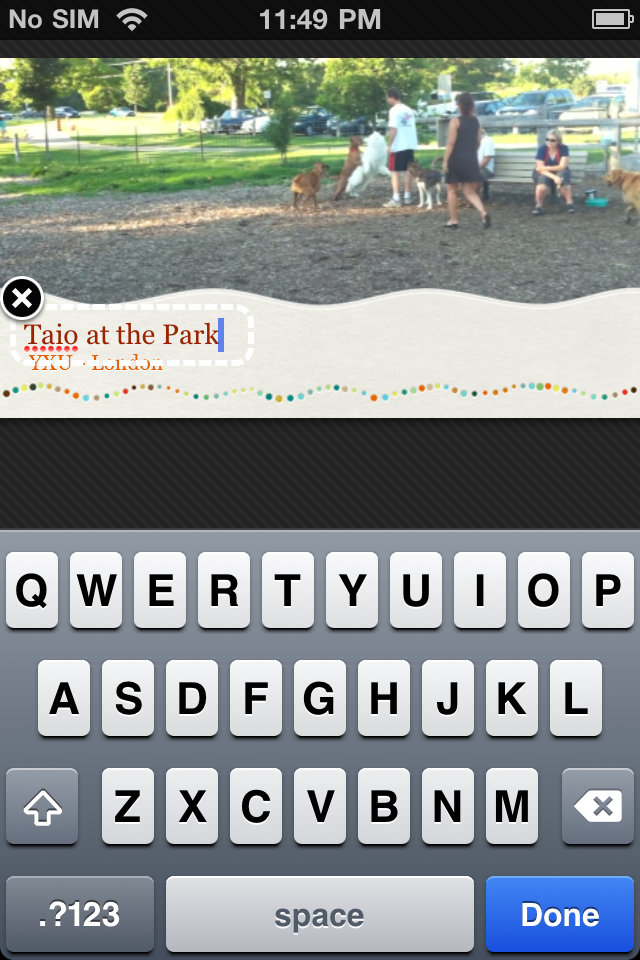
Your theme will now be overlayed on the video clip selected. Press the
Title entryfield, type a name for your movie, then press the Done button to save your changes.

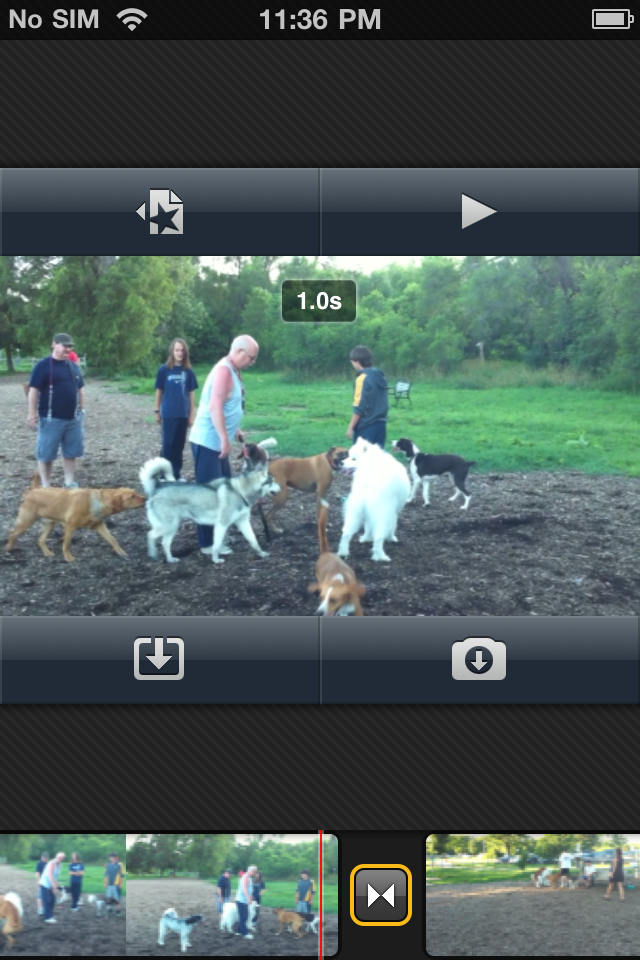
Step Six
Press the


Notice the image is added to the timeline. Tap the image once to select it. You can then pinch the image to zoom and drag the orange handles to change the duration of the clip. Press the
Done button once you’ve made your changes.
Step Eight
Now lets try to add some audio. Press the

Notice that a green strip will appear under your video timeline denoting the audio.

Step Nine
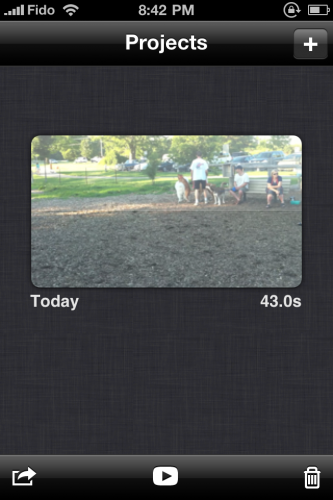
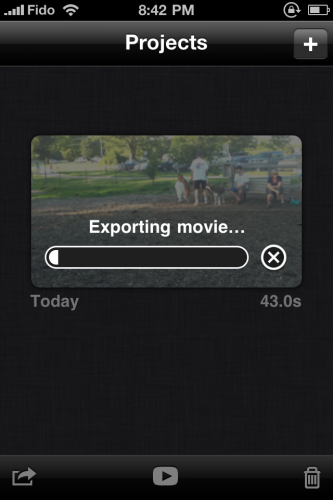
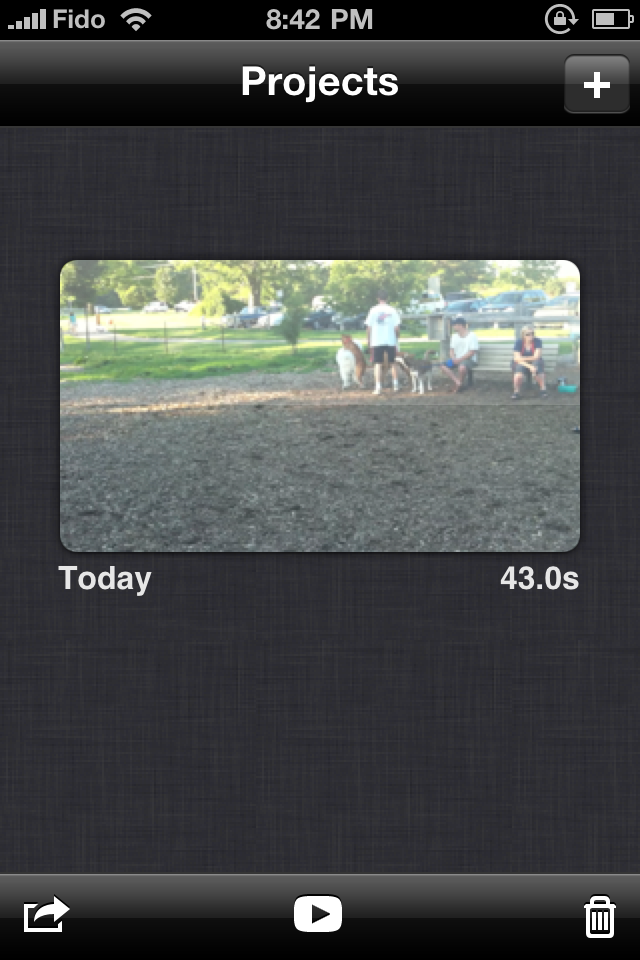
You can add more video and images, rearrange them and modify the transitions until you’re happy. To preview your video press the

Step Ten
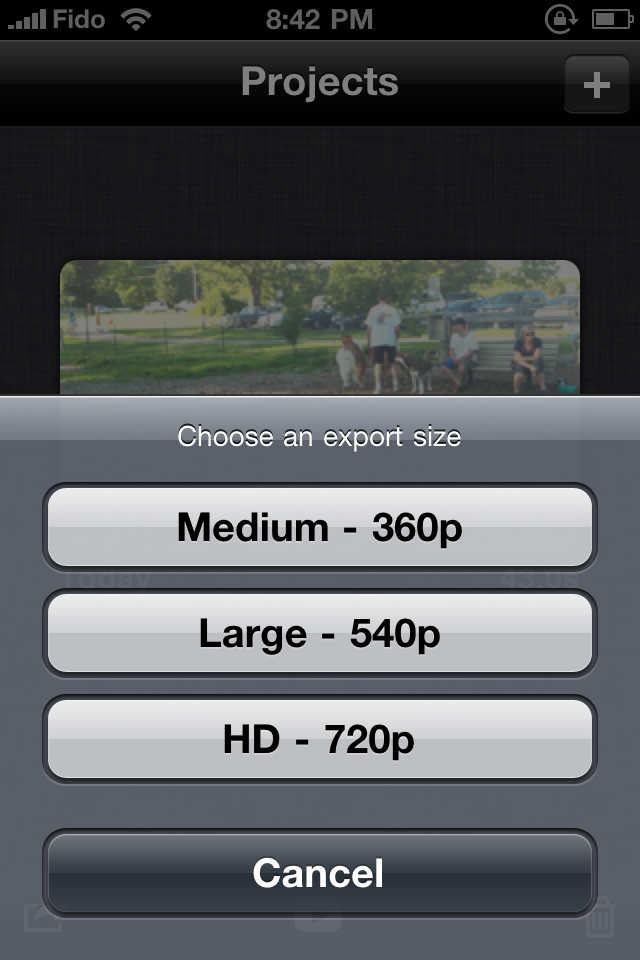
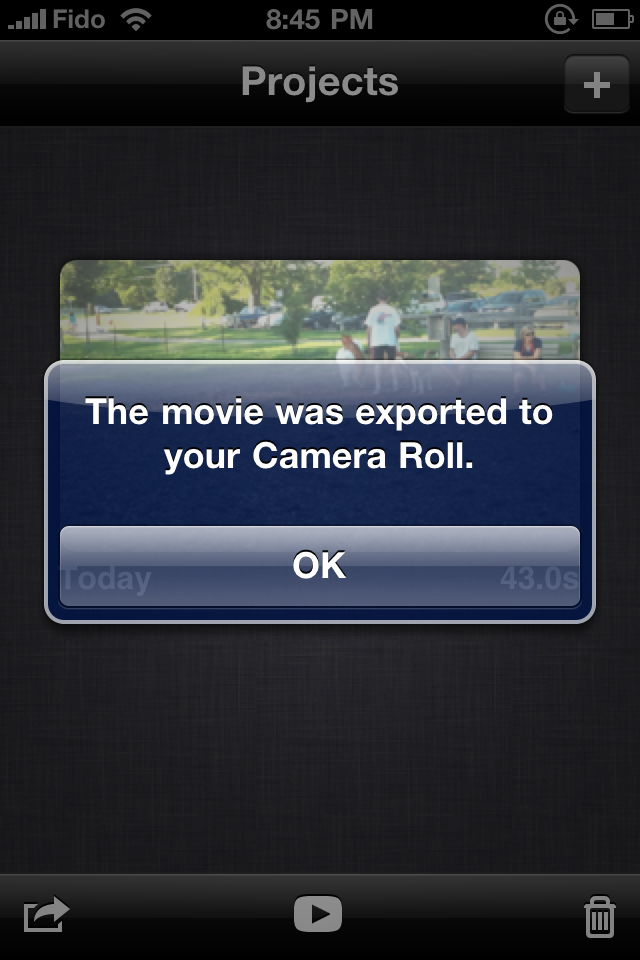
Once you are done making changes press the
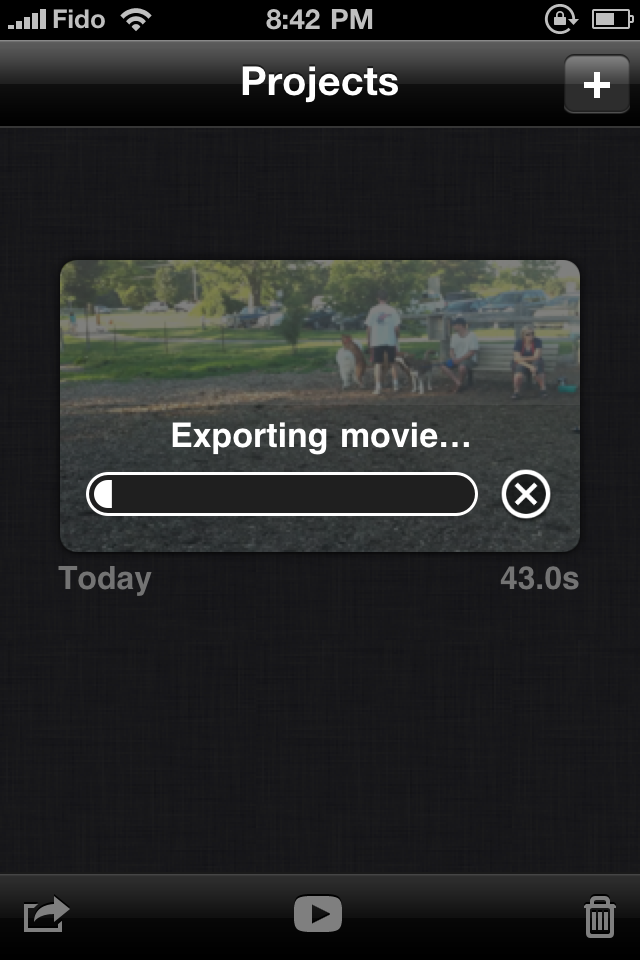
Press to select your desired output format from the popup menu. Once the export is complete it will be placed in your Camera Roll. You can then upload to from there or using any application of your choice.
Skype Calls Will Remain Free Over 3G
Jul 23rd


Skype has announced that they no longer plan to charge customers a monthly fee for calling over 3G.
At Skype, we believe that better call quality and better availability (which is achieved with an app capable of multitasking and/or making calls over 3G) lead to increased call frequency and longer calls. We also believe that the mobile world is in a period of significant change, for example, with some operators starting to move to tiered pricing models.
In light of that, we no longer have plans to charge a supplement to make calls over 3G. We’re delighted to make it easier for you to talk for even longer and do even more together using Skype.
Read More [App] [via Franco]
At Skype, we believe that better call quality and better availability (which is achieved with an app capable of multitasking and/or making calls over 3G) lead to increased call frequency and longer calls. We also believe that the mobile world is in a period of significant change, for example, with some operators starting to move to tiered pricing models.
In light of that, we no longer have plans to charge a supplement to make calls over 3G. We’re delighted to make it easier for you to talk for even longer and do even more together using Skype.
Alongside the release of Skype 2.0 for iPhone in May the company
attempted to inform customers that “Skype-to-Skype calls on 3G are free until at least end of August 2010, after which there will be a small monthly fee (operator charges for data will still apply).” This was met with a lot of criticism and caused the company to delay charges until the end of 2010. Thankfully, they’ve now dropped these plans entirely.Read More [App] [via Franco]


Recent Comments