Mastery of the iPod Starts Here
Archive for November, 2010
iPhone Dev-Team Releases iOS 4.2.1 Unlock for iPhone 3G, 3GS
Nov 28th


The iPhone Dev-Team has released the iOS 4.2.1 unlock for the iPhone 3G and iPhone 3GS.
Please read their announcement very carefully…
—–
Today we’re pleased to announce our free carrier unlock for iPhone3G/3GS owners with a baseband later than 05.13.04. The unlock for that baseband exploited the AT+XAPP command, thanks to a crash initially discovered by @sherif_hashim (@Oranav also found this crash). So what hole are we exploiting today, since Apple closed that AT+XAPP hole? Well, we’re exploiting the exact same hole!
It turns out that the very first iPad firmware 3.2.2 has baseband version 06.15.00 still vulnerable to AT+XAPP. The iPad baseband is built for the exact same baseband chip as the iPhone3G/3GS — they’re fully compatible! Some of us have been running 06.15 for weeks now on our iPhones in preparation for this release.
Since 06.15 is a higher version than 05.14 or 05.15 (where AT+XAPP is gone), anyone stuck at those versions can simply upgrade to 06.15 to unlock again! Luckily for us, Apple *still* provides the iPad FW 3.2.2 with this vulnerable baseband right from their own servers. (Grab it now, before they take it down!)
We’ve been busy updating both PwnageTool and redsn0w to make the baseband update as seamless as possible.
1. First up is “PwnageTool 4.1.3 Unlock Edition”. It has a special dialog box which will ask you if you want to update to the iPad baseband. You must already have the iPad 3.2.2 IPSW on your computer (see the above link)….so just point PwnageTool at it (or let it find it on its own if you’re in “simple” mode).
2. Directly after PwnageTool 4.1.3 is available, the official ultrasn0w repo http://repo666.ultrasn0w.com will be updated with ultrasn0w 1.2, which covers iPhone 4 baseband 01.59.00 and iPhone 3G/3GS basebands 04.26.08, 05.11.07, 05.12.01, 05.13.04 and now 06.15.00.
3. Finally, we’ll release an update to redsn0w today for those without Macs and can’t run PwnageTool. The new redsn0w will give you the option to update your baseband to 06.15 too.
WARNING — YOU DO THIS AT YOUR OWN RISK! PLEASE UNDERSTAND THE CONSEQUENCES OF UPDATING TO 06.15.
1. There is no way to come back down from 06.15, and there’s no hiding the baseband version from Apple. You’ll be voiding your warranty in a very obvious way.
2. If some future baseband comes out with a critical fix, you won’t be able to update to it if it remains down in the 05.xx sequence (then again, you wouldn’t update to it if you wanted to keep your unlock anyway).
3. Starting with FW 4.2.1 if you have 06.15 on your iPhone you won’t ever be able to restore to stock firmware (it will fail). You’ll need to only restore to custom IPSWs (then again, if you’re unlocker you should already be doing that).
Certainly don’t update to 06.15 if you don’t need to! Only do this if you need the unlock and you’re stuck on 05.14 or 05.15, and you’re willing to assume the above risks.
This PwnageTool also contains a 4.2.1 bundle for iPhone3G owners…for all else, it’s still only 4.1. If you have an iPhone3GS with an old bootrom, the new redsn0w will handle 4.2.1 for you (in fact it covers 4.2.1 for all devices, even though some of them are still tethered at 4.2.1 until @comex can work some untethering magic). iPhone3GS users with old bootroms who want to go to 4.2.1 should not use this PwnageTool! Update to stock 4.2.1 first, then use the upcoming redsn0w to update your baseband.
—-
We will be posting tutorials to help you with these new tools as soon as possible.
You can download PwnageTool 4.1.3 from here.
OpenNotifier: Brand-New, Fully-Customizable Status Notifier For iOS 4
Nov 27th

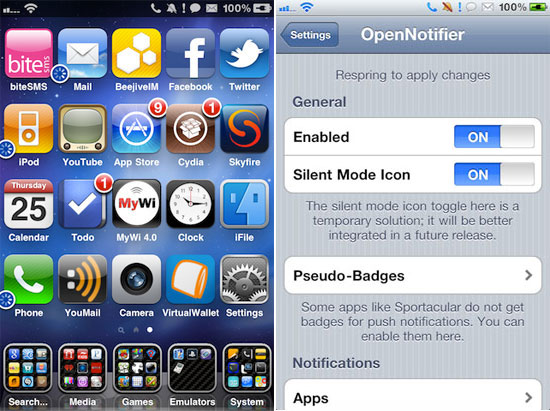
New day, new utility in Cydia: OpenNotifier.OpenNotifier is a brand-new, fully-customizable StatusNotifier for iOS 4. It is a collaborative project, designed and written from scratch.
Features:
• Ultra-customizable: assign any status bar icons to any apps
• Install additional icons from Cydia almost like Winterboard themes
• Add badges to non-badging push apps (like Sportacular)
• Silent mode icon
• Full retina/non-retina display support
• Includes handset, envelope, speech bubble, silent, and exclamation point icons; many more available in Cydia OpenNotifier is an ongoing project, so be on the lookout for new features, including repeat notifications, status bar icons for system processes (like MobileMe syncing), and much more. Consider this release of OpenNotifier to be more of a public beta; we want to gauge feedback and see which features are most in-demand.
OpenNotifier is available for free in Cydia via modmyi repo…
Is iOS 4.3 Just Weeks Away?
Nov 26th

With iOS 4.2 only a few days old, speculation has already turned to iOS 4.3: specifically, the possibility that we’ll see upgraded firmware as soon as mid-December. MacStories is reporting that 4.3 will drop in a few weeks, with bug fixes and an API for app subscriptions to support the new “iPad newspaper” called The Daily.
As we know, iOS 4.2 took longer than Apple had expected: when the WiFi bug in the 4.2 golden master was found, they had to go back to the lab to roll out the 4.2.1 version that was released on Monday. According to MacStories, 4.2 was supposed to be out in the early part of November, preparing the way for 4.3 on all devices that would be able to support billing for apps that you subscribe to, rather than pay for once and download.
As Michael reported on Tuesday, Apple is planning a media event on December 9th that most observers expect will be the rollout for the Daily app. Apple and the News Corporation have been reported to be working for months in secret on the new app, which will be a video-rich news publication. The Daily has been described as “the world’s first ‘newspaper’ designed exclusively for the iPad.” Subscribers will pay 99¢ per week for updated news that will be downloaded in the background.
iOS 4.2.1 Does Baseband Checks; ultrasn0w Out By Sunday?
Nov 26th


Apple has defeated TinyUmbrella’s iPhone 4 baseband protection by implementing a boot level signature check in iOS 4.2.1. It’s probably unnecessary to reiterate the warning that’s been out there since before the upgrade dropped, but unlockers should really, really avoid upgrading. Meanwhile, MuscleNerd wishes everybody a happy Thanksgiving, and says he thinks the next version of ultrasn0w may be ready, at least for some users, as soon as Sunday.
Adventurous unlockers have already found that if they try to run iOS 4.2.1 on a device with an older baseband, it will show the message “An unknown error has occurred” and go into recovery mode. TinyUmbrella is no longer able to kick iPhones out of recovery for iOS 4.2.1 because the baseband nonce is now checked, just like the SHSH is checked for firmware revs. So at this point there’s no way out of that except to install the new baseband
QuickDo: Virtual Home And Power Buttons For The iPhone And iPod Touch
Nov 25th

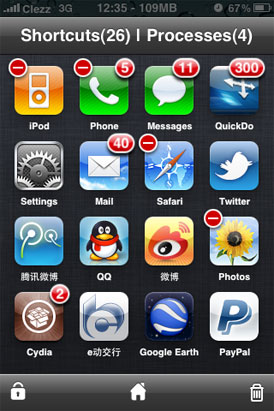
New day, new tweak in Cydia: QuickDo. Formerly called mQuickDo, QuickDo is a virtual Home and Power buttons for the iPhone and iPod Touch. By making use of the trigger function, QuickDo will help you operate the iPhone and Touch easily, like exit an app, reboot or power off, mute or hang up incoming calls, etc.
In addition, QuickDo now lets you define sliding short-cuts to quickly unlock your device and immediately launch your favorite apps . Quick do comes with the following main functions:
* virtual ‘home’ button, exit app, lock the device and iPod everytime
* power button, respring, reboot and power off
* multitask manage, close or switch backgrounded apps
* one click to close all running apps
* app shortcuts: quickly open your favorite app
* mute or hang up the incoming call
* AppSwitcher bar: volume control
* remove recent app icons
* show SBSettings and call backgrounder
QuickDo is available for $7.99 ( 3 days trial ) in Cydia Store via BigBoss repo…
iPhone 4.2.1 UltraSn0w Unlock to Drop this Weekend
Nov 25th


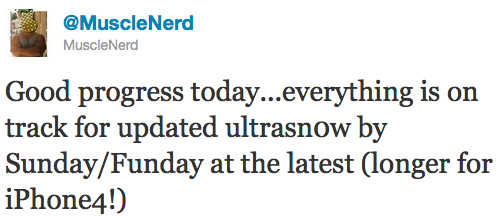
Some very comforting news on this cold Thanksgiving day, as MuscleNerd confirmed today that the iPhone unlock for iOS 4.2.1 will most likely be released this Sunday or even before.
This is good news, especially for those of you who still are using an iPhone 3GS or 3G. It is however not as good news for iPhone 4 users because there won’t have an unlock for iPhone 4 for a little while…
The Dev Team has already released a jailbreak for iPhone iOS 4.2.1 with RedSn0w earlier this week. It is unclear at this point if the unlock will work for the latest iOS 4.2.1 baseband update, but it’s safe to assume so.
So in short, if you’re on an iPhone 3G or 3GS, you will most likely get an unlock this weekend. If you have an iPhone 4 with iOS 4.2.1, you’re going to have to wait a little longer (no ETA at this time).
How to Jailbreak Your iPhone 3G Using RedSn0w (Windows) [4.2.1]
Nov 25th


These are instructions on how to jailbreak your iPhone 3G on the 4.2.1 firmware using RedSn0w for Windows. The Mac version of this tutorial is here.
Do not upgrade to iOS 4.2.1 if you need the unlock as there is no unlock for iOS 4.2.1′s baseband yet.
Step One
Create a folder on your desktop called Pwnage
Download RedSn0w from here and place it in the Pwnage folder. Likewise, download the latest 4.2.1 firmware from below and place it in the same folder.
4.2.1 (3G): iPhone1,2_4.2.1_8C148_Restore.ipsw
Extract the redsn0w executable from the RedSn0w zip file into the same folder.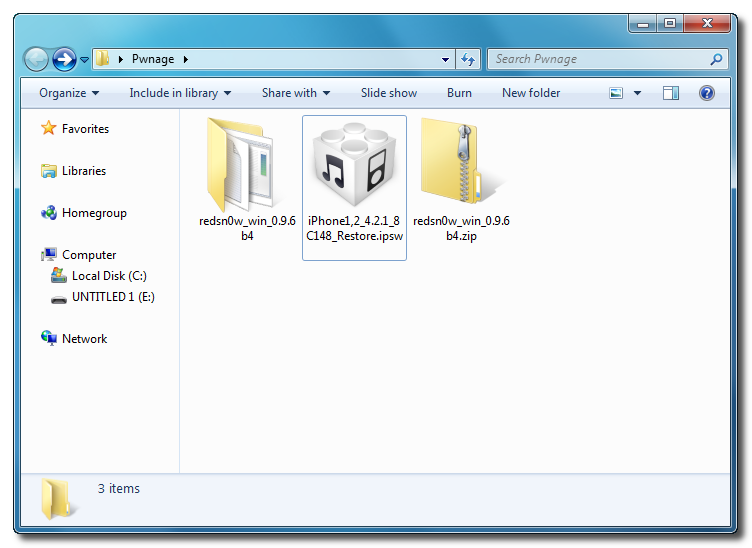
Step Two
Connect your iPhone to the computer and launch iTunes.
Select your iPhone from the list of devices on the left. Now hold down Shift and click the Restore button. Restore is preferred as it won’t create any wasted space on your iPhone.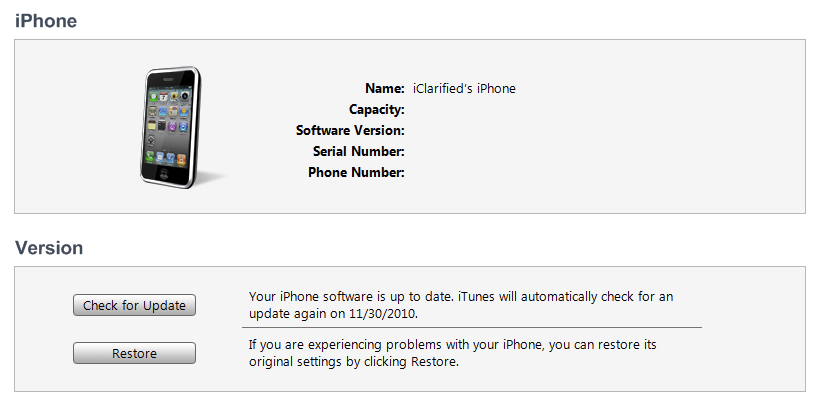
Navigate to the Pwnage folder on your desktop and select the 4.2.1 firmware ipsw. Click the Choose button to continue.
Step Three
Once iTunes has finished updating your iPhone to the desired firmware open the Pwnage folder on your desktop and launch the redsn0w application from the redsn0w folder we extracted earlier.
Step Four
Once RedSn0w opens click the Browse button
Step Five
Select the 4.2.1 firmware ipsw we placed in the Pwnage folder on our desktop then click Open.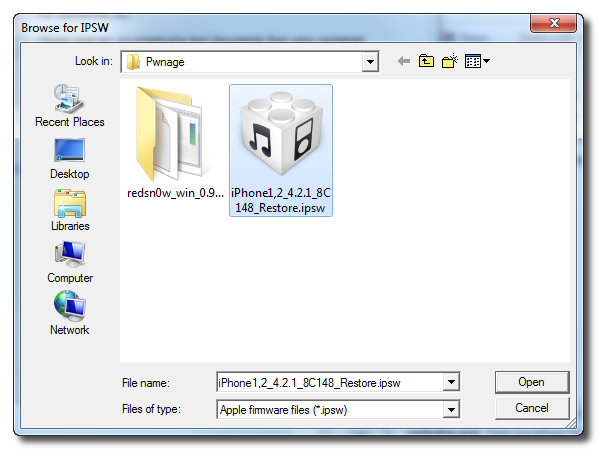
Step Six
Once the firmware has been verified click the Next button to continue.
Step Seven
RedSn0w will now prepare the jailbreak data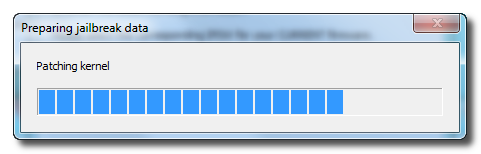
Step Eight
From this window you can select the jailbreak options you would like.
Verbose boot displays detailed information on boot of your device and is generally only needed by developers and advanced users.
Make sure Cydia is selected. For this tutorial we will also select Custom boot logo and Custom recovery logo.
When you click to select each custom logo option a dialog window will appear asking you to select the image. Locate the image you would like to use then press the Open button.
*Remember the rules for boot logos are: RGB or Grayscale format with Alpha channel and dimension below 320×480.
Notice that RedSn0w can Enable multitasking, Enable homescreen wallpaper, and Enable battery percentage. If you do not need multitasking we would recommend deselecting it as it makes your iPhone 3G run very slow.
Click the Next button to continue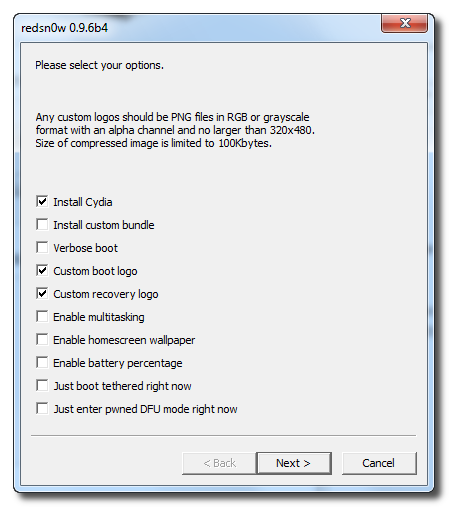
Step Nine
Please plug your iPhone into the computer and make sure its OFF then click the Next button
Step Ten
RedSn0w will now guide you through the steps to get into DFU mode.
Hold down both the Home button and the Power button for 10 seconds.
Release the Power button and continue holding the Home button until RedSn0w detects the device.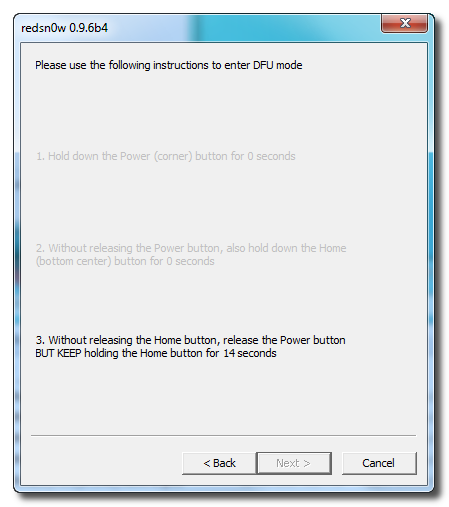
Step Eleven
Your iPhone will now reboot
Step Twelve
RedSn0w will then begin uploading the new RAM Disk and Kernel.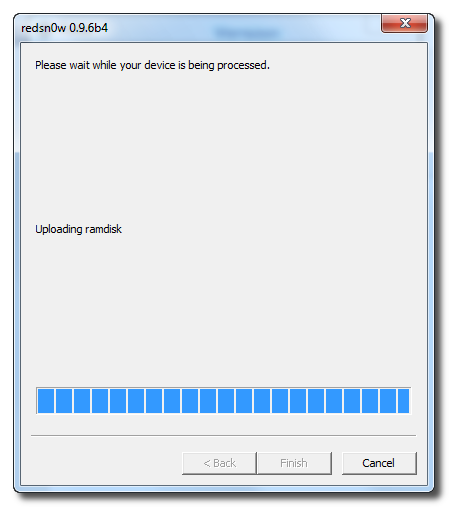
Step Thirteen
Once this is complete you will be notified that RedSn0w is done. Click the Finish button. When your iPhone finishes rebooting (5 minutes or so) it will be jailbroken with Cydia on the SpringBoard.
*As usual a big thanks to the iPhone Dev-Team for their hard work and contribution to the iPhone community.
How to Jailbreak Your iPhone 4 Using RedSn0w (Windows) [4.2.1]
Nov 25th


These are instructions on how to jailbreak your iPhone 4 on the 4.2.1 firmware using RedSn0w for Windows. The Mac version of this tutorial is here.
You will only be able to perform a tethered jailbreak at this time. This means you will need Redsn0w’s assistance to boot into your jailbroken device.
Make sure not to update to iOS 4.2.1 if you need an unlock as one is not yet available!
Step One
Create a folder on your desktop called Pwnage
Download RedSn0w from here and place it in the Pwnage folder. Likewise, download the latest 4.2.1 firmware from below and place it in the same folder.
4.2.1 (4): iPhone3,1_4.2.1_8C148_Restore.ipsw
Extract the redsn0w executable from the RedSn0w zip file into the same folder.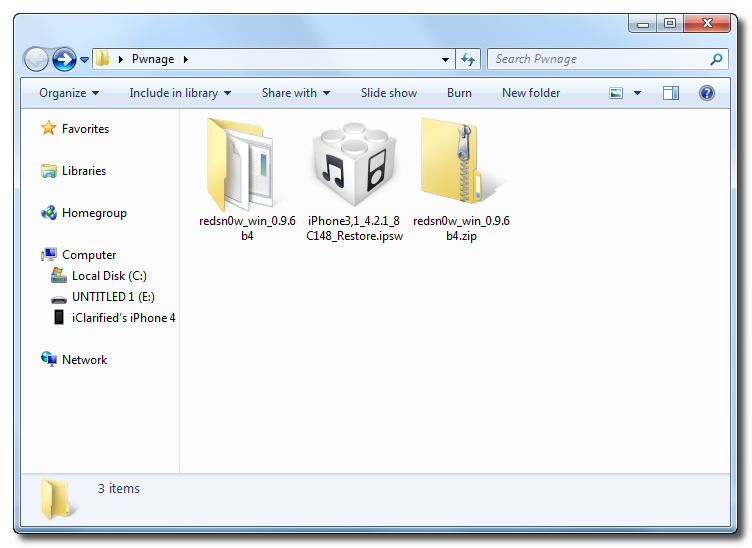
Step Two
Connect your iPhone to the computer and launch iTunes.
Select your iPhone from the list of devices on the left. Now hold down Shift and click the Restore button. Restore is preferred as it won’t create any wasted space on your iPhone.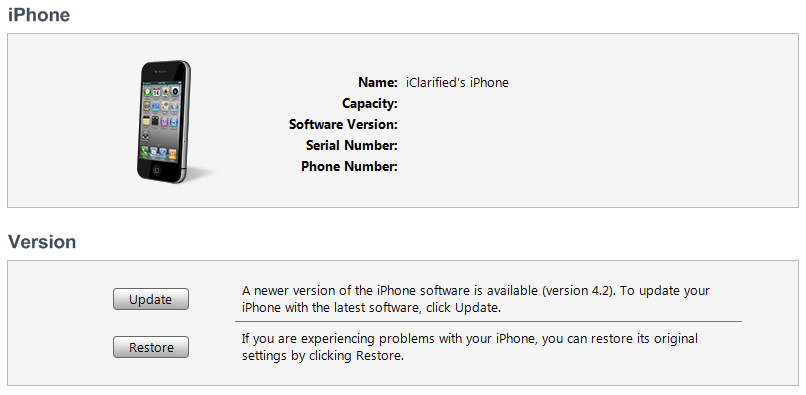
Navigate to the Pwnage folder on your desktop and select the 4.2.1 firmware ipsw. Click the Choose button to continue.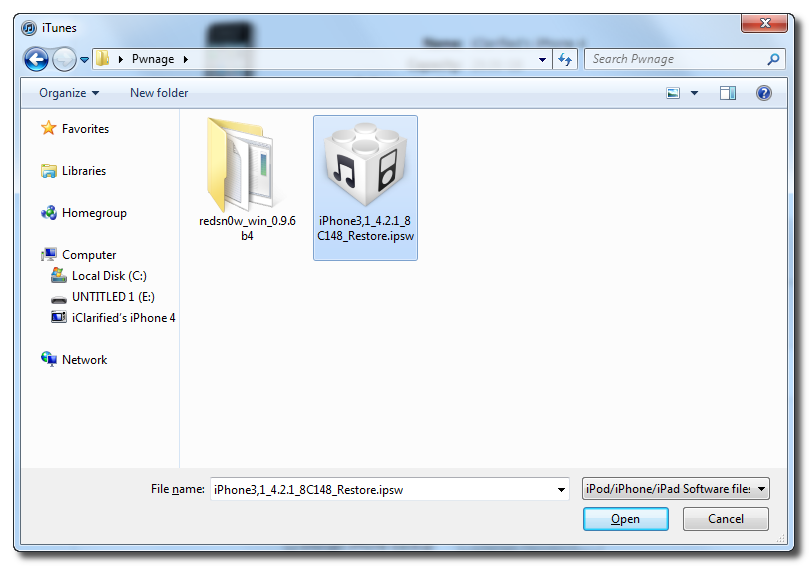
Step Three
Once iTunes has finished updating your iPhone to the desired firmware open the Pwnage folder on your desktop and launch the redsn0w application from the redsn0w folder we extracted earlier.
Step Four
Once RedSn0w opens click the Browse button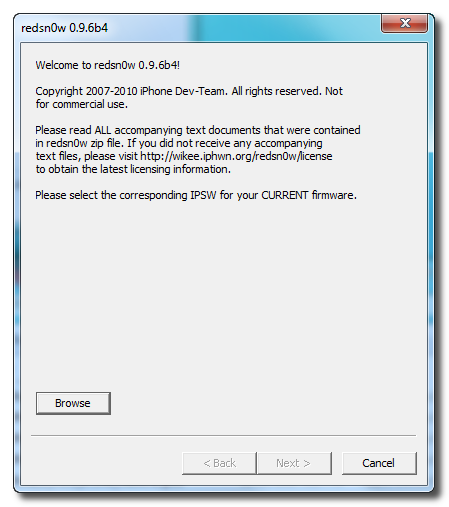
Step Five
Select the 4.2.1 firmware ipsw we placed in the Pwnage folder on our desktop then click Open.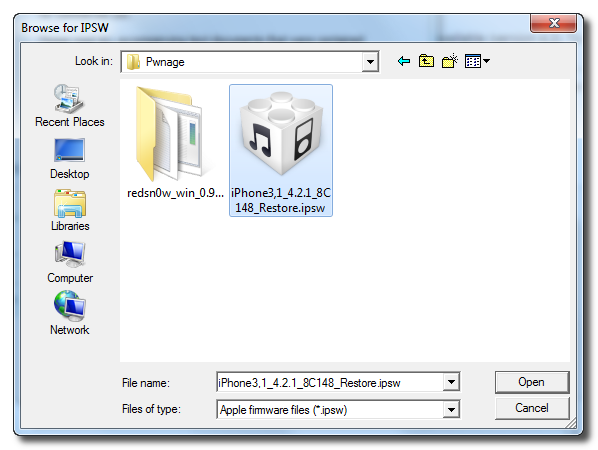
Step Six
Once the firmware has been verified click the Next button to continue.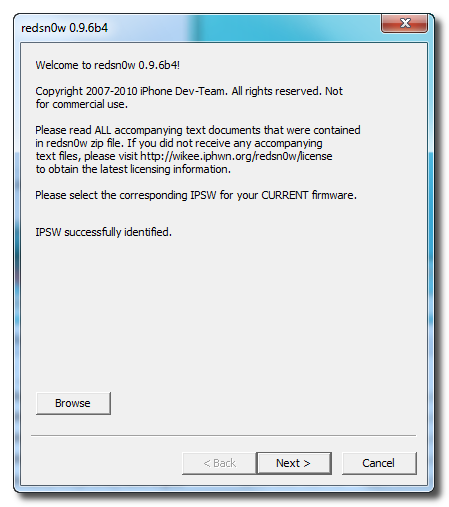
Step Seven
RedSn0w will now prepare the jailbreak data
Step Eight
From this window you can select the jailbreak options you would like.
Make sure Cydia is selected and click the Next button to continue.
Step Nine
Please plug your iPhone into the computer and make sure its OFF then click the Next button
Step Ten
RedSn0w will now guide you through the steps to get into DFU mode.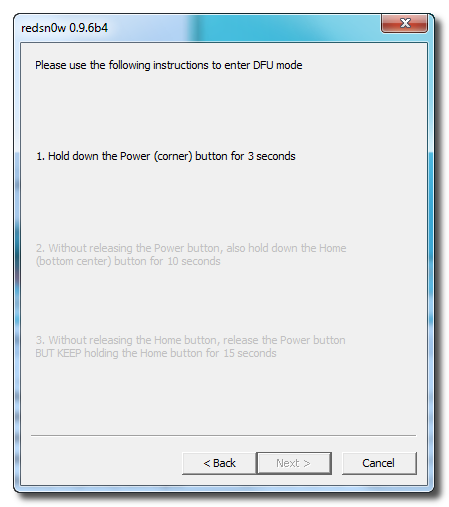
Hold down both the Home button and the Power button for 10 seconds.
Release the Power button and continue holding the Home button until RedSn0w detects the device.
Step Eleven
Your iPhone will now reboot
Step Twelve
RedSn0w will then begin uploading the new RAM Disk and Kernel.
Step Thirteen
Once this is complete you will be notified that RedSn0w is done. Click the Finish button. When your iPhone finishes rebooting (5 minutes or so) it will be jailbroken with Cydia on the SpringBoard.
IMPORTANT:
To use Redsn0w to help you boot back into your jailbroken device simply select Just boot tethered right nowfrom the options window and click Next.
*As usual a big thanks to the iPhone Dev-Team for their hard work and contribution to the iPhone community.
How to Jailbreak Your iPhone 3GS Using RedSn0w (Windows) [4.2.1]
Nov 25th


These are instructions on how to jailbreak your iPhone 3GS on the 4.2.1 firmware using RedSn0w for Windows. The Mac version of this tutorial is here.
Do not upgrade to iOS 4.2.1 if you need the unlock as there is no unlock for iOS 4.2.1′s baseband yet.
If you have an iPhone 3GS with the new bootrom you will only be able to perform a tethered jailbreak at this time. This means you will need Redsn0w’s assistance to boot into your jailbroken device.
Step One
Create a folder on your desktop called Pwnage
Download RedSn0w from here and place it in the Pwnage folder. Likewise, download the latest 4.2.1 firmware from below and place it in the same folder.
4.2.1 (3GS): iPhone2,1_4.2.1_8C148a_Restore.ipsw
Extract the redsn0w executable from the RedSn0w zip file into the same folder.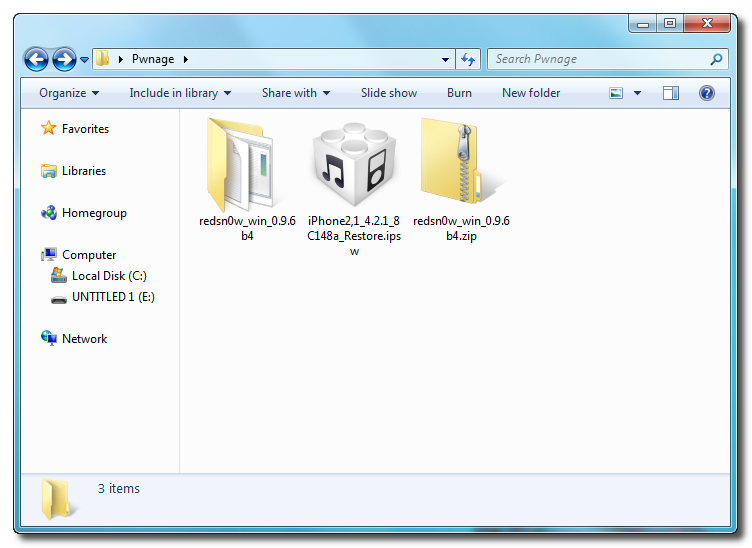
Step Two
Connect your iPhone to the computer and launch iTunes.
Select your iPhone from the list of devices on the left. Now hold down Shift and click the Restore button. Restore is preferred as it won’t create any wasted space on your iPhone.
Navigate to the Pwnage folder on your desktop and select the 4.2.1 firmware ipsw. Click the Choose button to continue.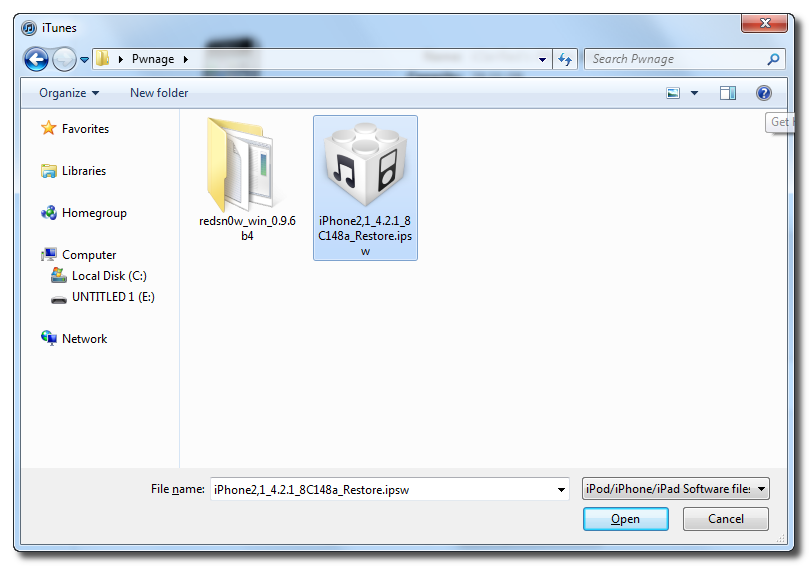
Step Three
Once iTunes has finished updating your iPhone to the desired firmware open the Pwnage folder on your desktop and launch the redsn0w application from the redsn0w folder we extracted earlier.
Step Four
Once RedSn0w opens click the Browse button
Step Five
Select the 4.2.1 firmware ipsw we placed in the Pwnage folder on our desktop then click Open.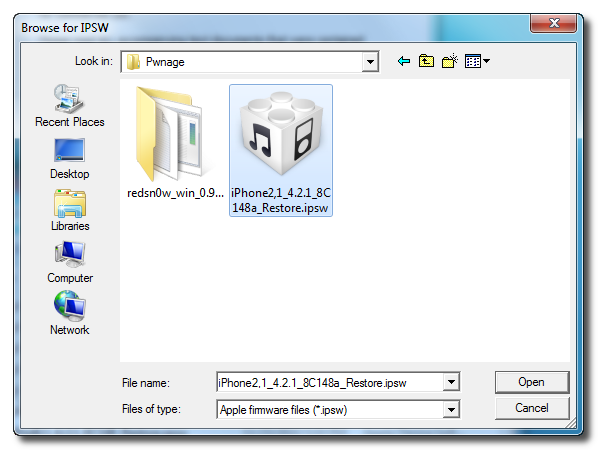
You will be asked if this device is a newer fixed model. If yours is then click the Yes button; otherwise, click the No button. At this time you can only perform an untethered jailbreak on the older model.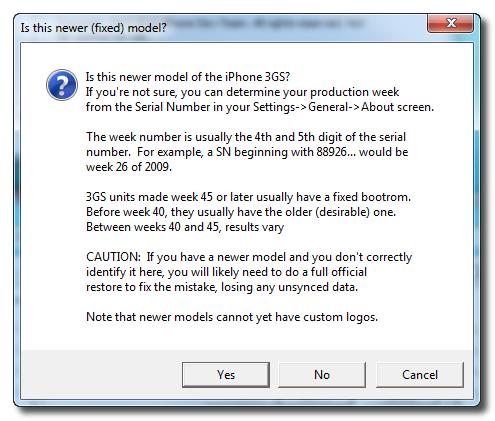
Step Six
Once the firmware has been verified click the Next button to continue.
Step Seven
RedSn0w will now prepare the jailbreak data
Step Eight
From this window you can select the jailbreak options you would like.
Verbose boot displays detailed information on boot of your device and is generally only needed by developers and advanced users.
Make sure Cydia is selected. For this tutorial we will also select Custom boot logo and Custom recovery logo.
When you click to select each custom logo option a dialog window will appear asking you to select the image. Locate the image you would like to use then press the Open button.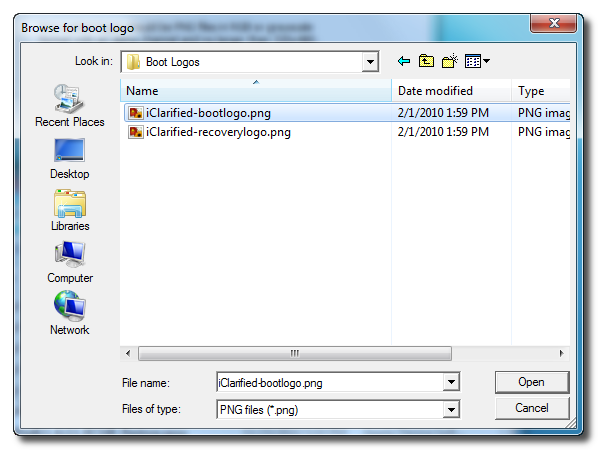
*Remember the rules for boot logos are: RGB or Grayscale format with Alpha channel and dimension below 320×480.
Click the Next button to continue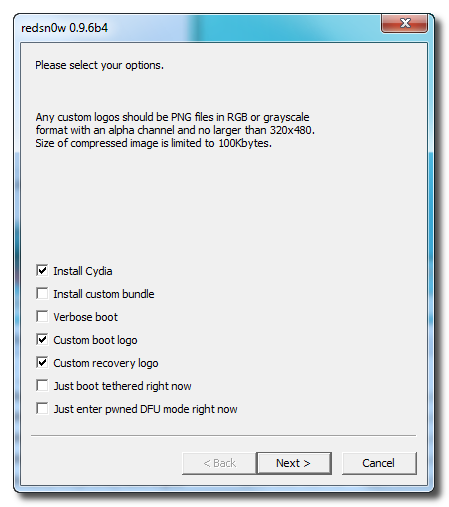
Step Nine
Please plug your iPhone into the computer and make sure its OFF then click the Next button
Step Ten
RedSn0w will now guide you through the steps to get into DFU mode.
Hold down both the Home button and the Power button for 10 seconds.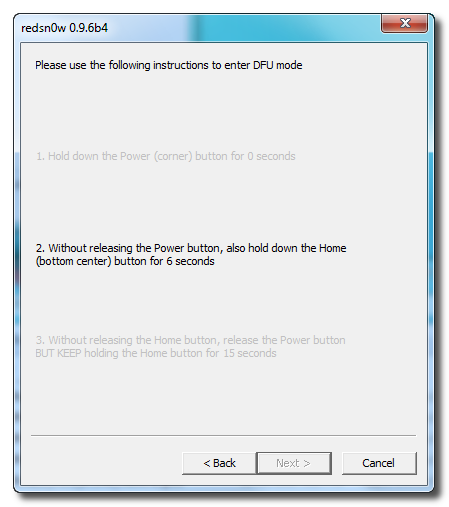
Release the Power button and continue holding the Home button until RedSn0w detects the device.
Step Eleven
Your iPhone will now reboot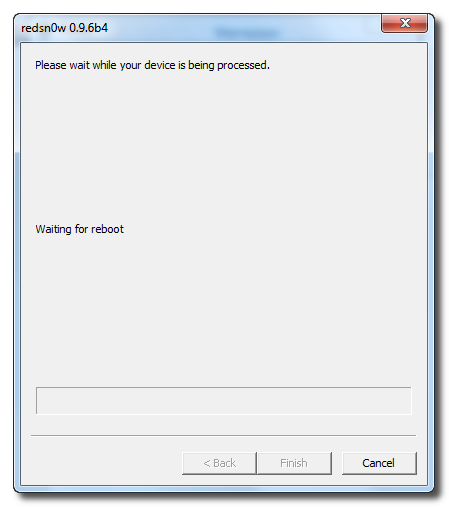
Step Twelve
RedSn0w will then begin uploading the new RAM Disk and Kernel.
Step Thirteen
Once this is complete you will be notified that RedSn0w is done. Click the Finish button. When your iPhone finishes rebooting (5 minutes or so) it will be jailbroken with Cydia on the SpringBoard.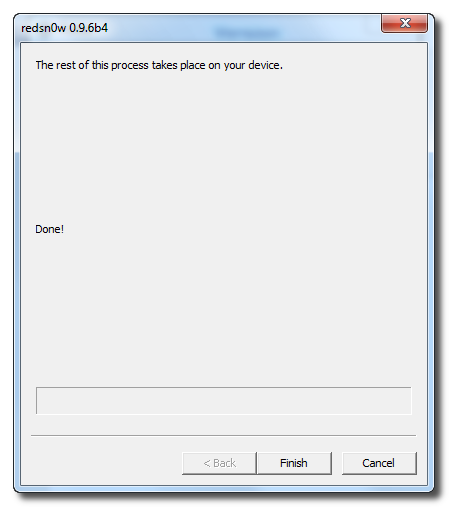
IMPORTANT:
If you have a newer iPhone 3GS and performed a tethered jailbreak you can use Redsn0w to help you boot back into your jailbroken device. Simply select Just boot tethered right now from the options window and clickNext.
*As usual a big thanks to the iPhone Dev-Team for their hard work and contribution to the iPhone community.
How to Jailbreak Your iPhone 3G Using RedSn0w (Mac) [4.2.1]
Nov 25th


These are instructions on how to jailbreak your iPhone 3G on the 4.2.1 firmware using RedSn0w for Mac. If you are on a lower firmware version and need to unlock then stay on your current version until an update to PwnageTool is released.
Step One
Create a folder on your desktop called Pwnage
Download RedSn0w from here and place it in the Pwnage folder. Likewise, download the latest 4.2.1 firmware from below and place it in the same folder.
4.2.1 (3G): iPhone1,2_4.2.1_8C148_Restore.ipsw
Extract the redsn0w app from the RedSn0w zip file by double clicking it.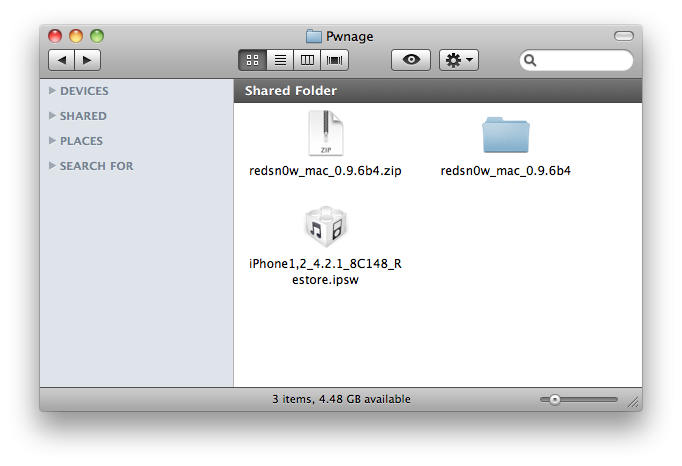
Step Two
Connect your iPhone to the computer and launch iTunes.
Select your iPhone from the list of devices on the left. Now hold down Option and click the Restore button. Restore is preferred as it won’t create any wasted space on your iPhone.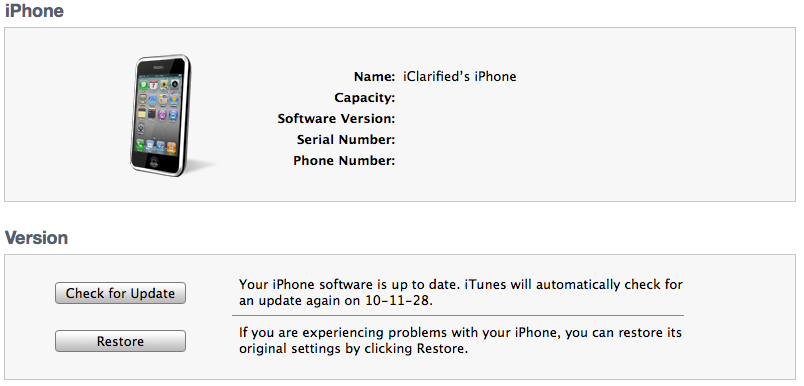
Navigate to the Pwnage folder on your desktop and select the 4.2.1 firmware ipsw. Click the Choose button to continue.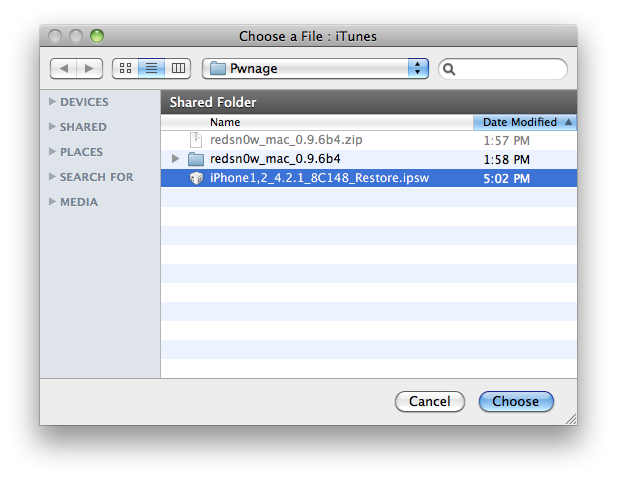
Step Three
Once iTunes has finished updating your iPhone to the desired firmware open the Pwnage folder on your desktop and launch the redsn0w application from the redsn0w folder we extracted earlier.
Step Four
Once RedSn0w opens click the Browse button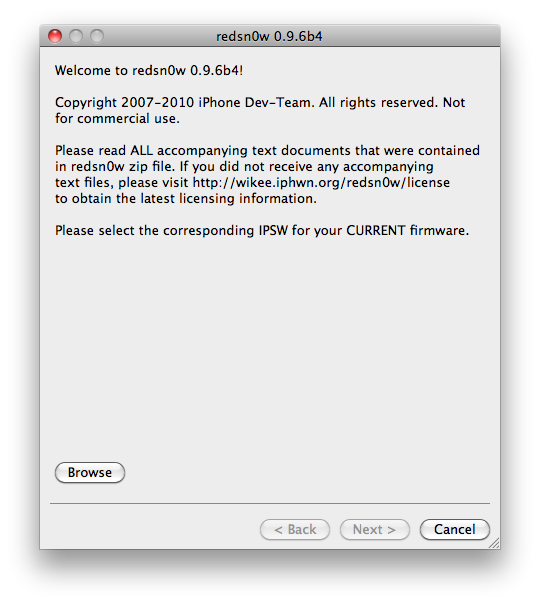
Step Five
Select the 4.2.1 firmware ipsw we placed in the Pwnage folder on our desktop then click Open.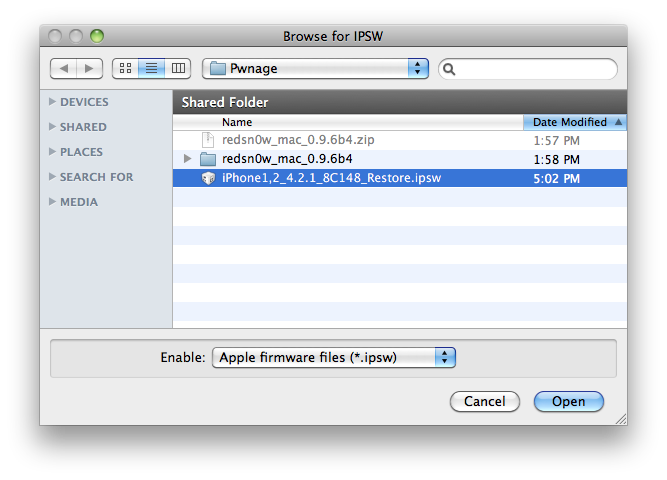
Step Six
Once the firmware has been verified click the Next button to continue.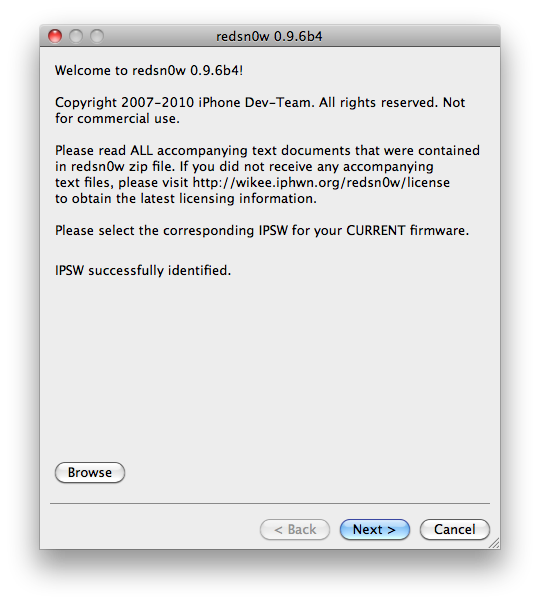
Step Seven
RedSn0w will now prepare the jailbreak data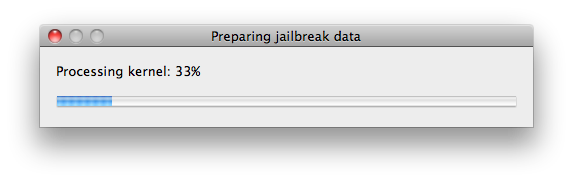
Step Eight
From this window you can select the jailbreak options you would like.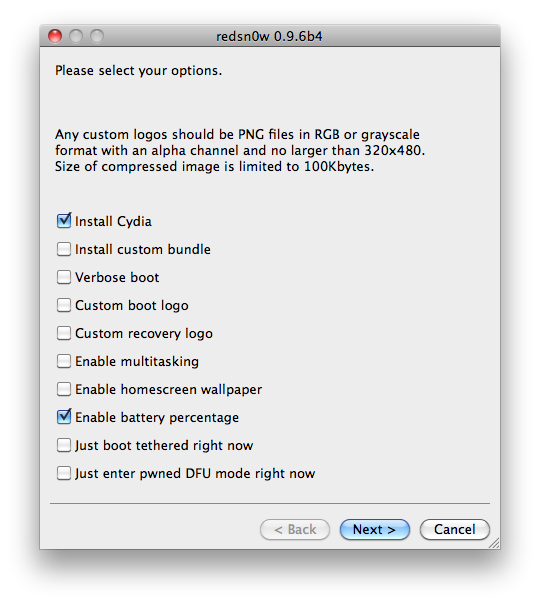
Verbose boot displays detailed information on boot of your device and is generally only needed by developers and advanced users.
Make sure Cydia is selected. For this tutorial we will also select Custom boot logo and Custom recovery logo.
When you click to select each custom logo option a dialog window will appear asking you to select the image. Locate the image you would like to use then press the Open button.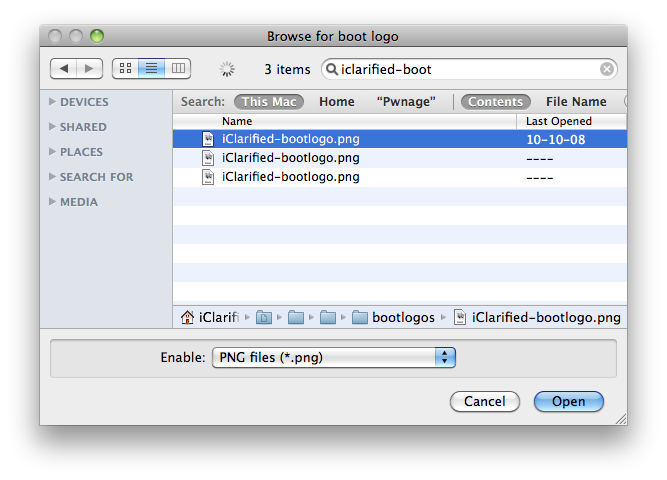
*Remember the rules for boot logos are: RGB or Grayscale format with Alpha channel and dimension below 320×480.
Notice that RedSn0w can Enable multitasking, Enable homescreen wallpaper, and Enable battery percentage. If you do not need multitasking we would recommend deselecting it as it makes your iPhone 3G run very slow.
Click the Next button to continue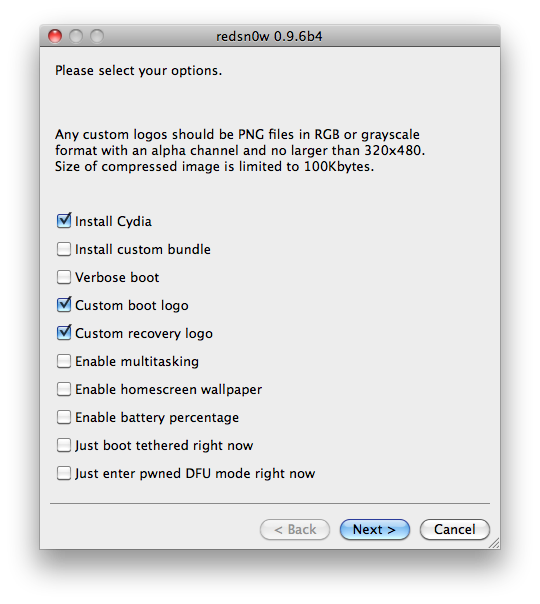
Step Nine
Please plug your iPhone into the computer and make sure its OFF then click the Next button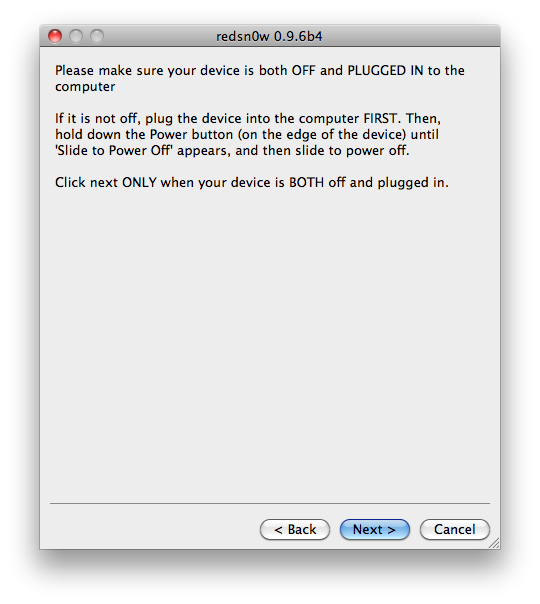
Step Ten
RedSn0w will now guide you through the steps to get into DFU mode.
Hold down both the Home button and the Power button for 10 seconds.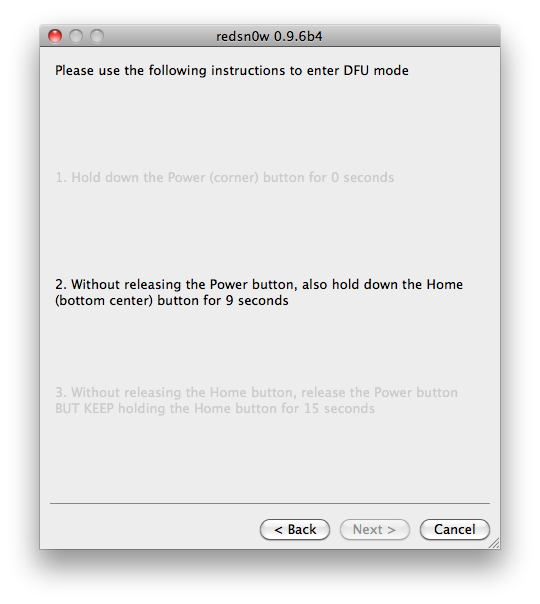
Release the Power button and continue holding the Home button until RedSn0w detects the device.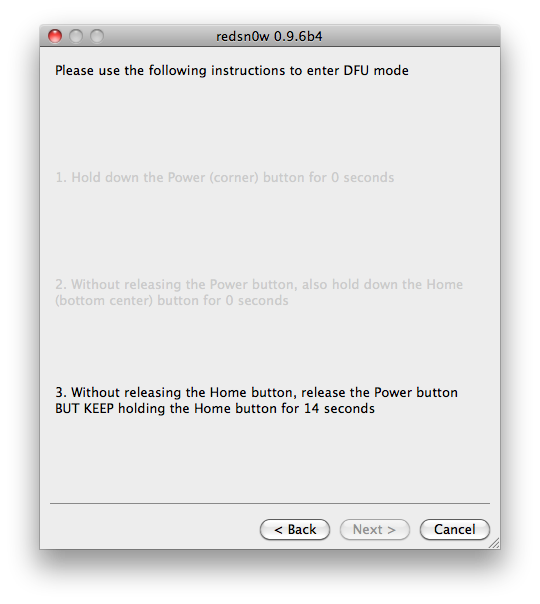
Step Eleven
Your iPhone will now reboot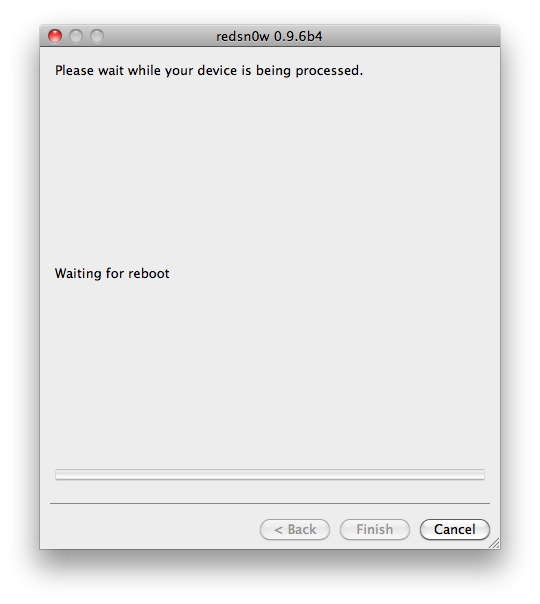
Step Twelve
RedSn0w will then begin uploading the new RAM Disk and Kernel.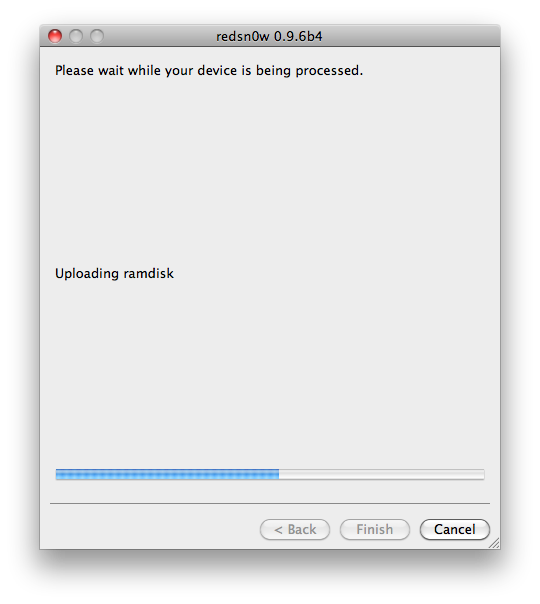
Step Thirteen
Once this is complete you will be notified that RedSn0w is done. Click the Finish button. When your iPhone finishes rebooting (5 minutes or so) it will be jailbroken with Cydia on the SpringBoard.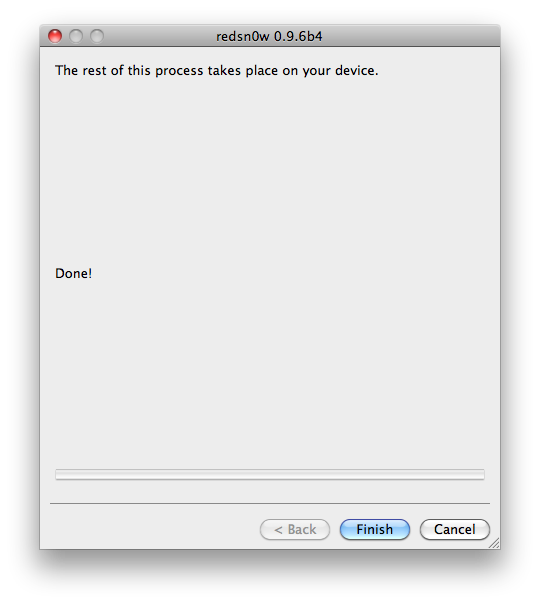
*As usual a big thanks to the iPhone Dev-Team for their hard work and contribution to the iPhone community.


Recent Comments