Mastery of the iPod Starts Here
Archive for January, 2010
Backup Switch: Disable Automatic iTunes Backup [Windows]
Jan 25th
Backup Switch is a Windows tool that allows you to disable the automatic backup of the iPhone whenever you connect it to your PC. After downloading and installing the tool, all you have to do is run it and click the “Disable iPhone backup in iTunes” button. When you want to reactivate it, simply click on “Enable iPhone Backup”. Mac users, we got a tool for you too…

download links:
http://www.multiupload.com/CCY7XW9HKQ
http://www.megaupload.com/?d=JFYYTPQI
http://www.zshare.net/download/71678264cb772561/
http://www.sendspace.com/file/dxhys1
http://www.mediafire.com/?zwydjhzmijz
Install0us — The end
Jan 25th
“>
Yes, you read well, this is the end. The end of Install0us.
Most of you would not appreciate what follows, just as we definitely do not, yet some of you will be strangely happy…Why is this happening?
Legalities. When I started up solo, it was for legal reasons, and that still stands: I was fed up of hiding behind other people and wanted the freedom to develop apps without being in the shadows of the law.
For Install0us to offer the same services as other installer apps : browse / download / install, without providing any links to cracked materials, I thought we had something legal and legitimate to offer.
Some really nice people proposed me their help, and from a small blog we evolved to these forums, which just kept growing and maturing, thanks to a wonderful team. That was not appreciated by everybody…but anyway, that is another topic.
During all this time I have been actively searching for a lawyer to know how legal we were. Not the lawyer you can find just anywhere, but one that understands Internet legislations and specializes in copyright laws. Trust me, these people are rare, very in demand, and very expensive.
As such I have been looking for three months, and I finally found one recently. Unfortunately our discussion left me sad and even feeling stupid to have invested so much effort into this, and involved people with me… You see, after talking for more than an hour with him, I’m sorry but the conclusion is that what we do would be very hard to defend against in court.
I am at the moment already at risk, and would risk even more with the exposure that an Install0us v3 release will definitely bring me. Call me a coward, but as I said, hiding under covers is not a life for me. Moreover, these days in my country piracy is a hot subject among politicians… I do not want to be flamed in a trial for something that I do as a hobby, and I do not want to involve any people with me in this. I am sincerely sorry to the people who followed me thinking we were legit, my honest mistake.What’s going to happen?
These forums will close, and repositories too. Just a few more weeks, and everything will be shut down and deleted.
Install0us v2.5 has already been unleashed to you, and it will continue to run. We cannot do anything about it, so be happy!
The bad news is, however, Install0us 3 will not and cannot ever be released. It all must end here. This is extremely disappointing for all of us, considering the time and energy we have spent on it.
Soon after, the server behind Install0us 3 will also be shut down. We are very sorry, beta testers.On a brighter note, we have introduced some concepts in v3 with native interfaces that have revolutionised what people will be expecting, and I am sure you will see these conceptualisations sooner or later in similar apps, although of course not done by us. In short, we feel we have made a positive contribution to the community we now leave.
To make things clear, we have never shared our source code, and we can never do so, simply for legality’s sake. I know from experience that no one is irreplaceable.
But if there were to be one concept I would really like to see one day out of all this, it is the plugin system. An open application not dedicated to any one website.About Donations
We raised donations and understandably we now have no use for them. Many of you have noticed that recently we have been refunding most of them. In fact we are refunding all refundable donations.
Only very few will not be refunded, mostly because of Paypal rules which restricts refunds to the last 60 days of transaction, or eChecks that just cannot be refunded. (Please be patient if you haven’t been refunded yet, Paypal is incredibly slow, blame their staff not ours!)
Once again, thank you very much for your willing support, but our expenses has been covered and since our activities are ending, we just want to be fair with you and refund as much as we can. We are not salesmen, we did all of this for fun, nothing more.Thanks (a lot)
I have always wanted to do a credits/thanks screen in Installous since the first version. But apologetically, I am a lazy developer who always preferred to code features over making a thanks screen.
I cannot stop all of this without repairing that fault. First of all, many thanks go to all of you for making this journey what it has been, without the users and your continued support and encouragement none of this could have ever been reality.
A group of people that I’d like to take the time to individually thank for their support throughout my time are :
- CCW, for being a friend and all that time spent on the appDB adding missing apps by hand
.
- cdecl, for being in #ipa on that first day, for his skills and leaking Crackulous source code (lol).
- crash-x, for the nice chats, sharing knowledge with you have been a real pleasure, you are so right to be on the bright side
- csmithdesigns.com for the awesome v3 graphics.
- Doosje, for being a friend since almost the beginning, and then to have joined Install0us and bringing along that amazing datclothse
- fareal, for pressuring me to create these forums (would still be a blog without him lol), and helping so much to create these forums and make them alive (I’m not really a forum administration guy
).
- Flawless, for creating AppShare a long long time ago that we all have such fond memories of.
- Hackulo.us community, I remember a time when it wasn’t all about money and power… but a community.
- hostjf, from iphonecake, for all your time and help. You are right to be far away from that “scene”…
- lsemtex, that was a real fun day 0 to see that agitation to reproduce The Monkey’s Ball crack
- Kyek, for teaching me a bit of php, for everything you have done. Words cannot express what you’ve done for us and the community. You will never be forgotten.
- Monster (aka furballinatOor), for his nice contribution to the forums.
- Puy0, For being my tutor, friend and so many other things.
- RealZg/Poxy, for being nice even when the whole world was standing against him (even if he was responsible for some leaks I disapprove of).
- Sadam, from xSellize, for his advices and participation
- Secretss, for being the heart and soul of this community in recent times. Yay!
- skram, for his friendly attitude and being a great AppStore dev sharing his knowledge freely
- WYSE, your dedication is something to be admired, I will always have a place in my heart for you.
- You, for reading this.
- Sorry if I forget you…there’s always going to be someone

Just a couple of extra little bits
- Questions > If you have any questions please pop by our IRC channel #Install0us on the server Rizon. We will be hanging around a little longer in case there is anything more you would like to ask or know.
- Forums > If there are any posts you would specifically like a copy of after we close, please just ask as we would be glad to provide them. If you are looking for somewhere nice to go, why not try xSellize.com?
- Hackulo.us *Has been* a nice community. The core staff has gone nuts at money making. Today they just consider members and even their moderators as puppets. I am really happy to have left them, what happened after Install0us was created is just proof of it.
- TDDebug / dissident > I have always been polite with you, but what a waste. Continue to bring down hackulo.us, people will eventually understand who you really are, a salesman/bullshitter. One sincere advice, you really need a psychotherapist. (Our good friend venusanann was right).
Adieu.

If iPhone OS 4.0 Will Bring The Look And Feel Of Mac System 1, Would You Upgrade?
Jan 25th
“>
Everybody is talking about what they want from Apple and iPhone OS 4.0. We discussed it a bit too. We discussed what Apple needs to do in order to stay in the game vs Google. But bottom line is that everybody wants widgets, organization, and simultaneous Apps. Well how about , the 1984 Mac System 1 for your iPhone? Would you upgrade?
Continue reading…
Get A FREE iPod Touch (8, 32, or 64 GB)!!
Jan 25th
FREE iPod Touch 8GB, 32GB, or 64 GB!!

Summary: There’s a cool website called YouriPodTouch4Free created by Transcendent Innovations and they’re willing to mail you a FREE iPod Touch if you simply complete an advertiser trial or subscription and refer a few friends to do the same. You can choose what advertiser “offer” you’d like and some are free or very cheap. Even if you end of spending a little, its nothing compared to the value of a Free iPod Touch! After your offer requirements are completed you just need to refer a few friends to do the same. Just 5 friends and you get a 8GB iPod Touch, 6 for 32GB, and 8 for 64GB! As always iPodTouchMaster.com has a guide for it with complete detailed steps.

Step 1: Sign Up
http://www.YouriPodTouch4free.com
The sign up processes is very painless. Click Here for the link or Click The Image Above. Choose what FREE iPod Touch model you would like for FREE or you can even choose a $350 Cash/Apple card option (you can change your selection at any time after you account is created). Next enter your email address and other info it asks. You can change your address later if needed. When it asks what type of account you would like, choose Referral Account.
Step 2: Complete ”Offer” Requirements
On your progress page you will see it says “To complete your offer requirements, you must complete 1 Level A offer or 50 points worth of Level B offers.”
This is the hardest step for some people because it requires you to sign up from an advertiser and all of them require using a credit card. There are some EASY and FREE ones however that you can cancel without being charged a dime!
The one I recommend is the Stamps.com offer under the Level B offers (find this by clicking most popular offers tab, it will be the top offer). You will be directed to Stamps.com’s website, It is important to note that you will need a credit card to complete ANY of the offers. But don’t worry. As long as you follow these instructions you will not be charged. You must apply for their FREE 21 day trial (they will say you must keep the account for at least 21 days in order to retain the credit towards your free gift but this is not true, you can cancel after a couple of days and will receive an e-mail saying that you will not be charged a thing. Just make sure you cancel BEFORE 21 days. After you have finished the sign up, printout your $5 free from stamps.com. Once you have the printout you’ll want to cancel your account. They give you a toll free phone number: 1-877-782-6736.
*NOTE: If you don’t own a credit card I recommend heading over to Safeway and getting one of those visa gift cards, these work fine!
—>Don’t forget you’re getting a FREE iPod Touch which is worth a few hundred so spending a little to complete these offers isn’t much.
Other Easy Offers:
Level A (complete 1 offer):
Audible.com: $7.49 for Gold Membership. Credit is typically awarded same day.
Gamefly.com: Rent video games with a $9 trial. Credit is typically awarded 2-3 business days.
Blockbuster: Rent movies for $10/month. Credit is typically awarded instantly.
Level B (must add up to 50 points):
Stamps.com: Register for a 4 week trial, install, and print postage. Credit is typically awarded instantly.
Napster.com: Register and complete the 7-day Napster trial. Credit is typically awarded on the 8th day.
eMusic.com: Register for the eMusic trial. Credit is typically awarded same day.
Crunkingringtones.com: Register for Crunking Ringtones and confirm the PIN. Credit is typically awarded instantly.
Step 3: Refer Your Friends To Do The Same
You will need to get required amount of referrals depending on what iPod Touch you choose:
8GB iPod Touch – 5 referrals
32GB iPod Touch – 6 referrals
64GB iPod Touch – 8 referrals
Give your referral link to your friends, family, co-workers, post a YouTube video, or post on Facebook and tell them to follow the simple steps you just did. Your referral link is displayed on your status page when you login.
Step 4: Receive Your FREE iPod Touch!
This is the most exciting step. If you‘ve successfully completed the above step, your FREE iPod Touch will be on its way. A year ago, I received an iPod from this company and it was shipped with UPS. The only thing I’m sure is that you’ll receive your iPod Touch in the mail within one or two weeks!
Make Sure To Follow The Rules!
-Don’t sign up at the same site more than once
-Don’t do the same offer more than once
-Don’t sign up under yourself!


Major changes to Lockerz.com, Join Now! Need an invite?
Jan 14th
Check out the latest video from lockerz.com It gives a good overview of what the site is about.
The best part is you can get a FREE iPod Touch by participating on their site!
You can get your invite quick right here at iPodTouchMaster.com! Just fill out the form below:
Invitation Request Form

*Your email address is not shared with anyone or saved anywhere. It is simply submitted to Lockerz.com
*Check your Spam Folder! Many mail services mark lockerz.com as spam.
*No disposable e-mails are accepted! Such as Mailinator, TenMinuteMail, etc.
*To avoid sign-up issues, only submit one request!
*iPodTouchMaster.com is not Owned, Operated, or Affiliated with Lockerz.com in any way.
Note: When you sign up, you get 2 free points PLUS you get to play a game that can earn you up to 100 points.
How to Read, Copy From, and Write Contacts to Your iPhone SIM Card
Jan 14th
These are instructions on how to read, copy from, and write contacts to your iPhone’s SIM card using SIManager.
Step One
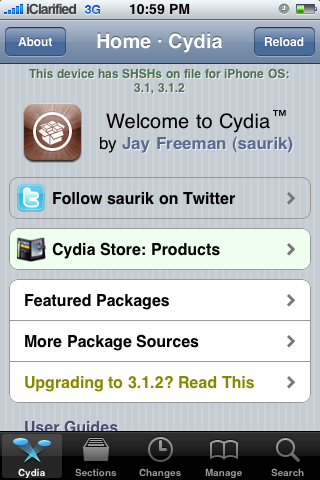
Press to launch Cydia from your iPhone Springboard.

Step Two
Press to select Manage from the tabs at the bottom of the screen.

Step Three
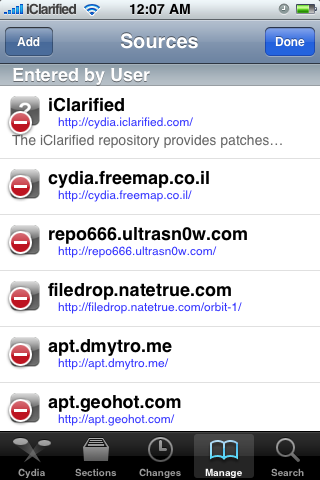
Press the large Sources button.

Step Four
Press the Edit button at the top right of the screen.

Step Five
Press the Add button at the top left of the screen.
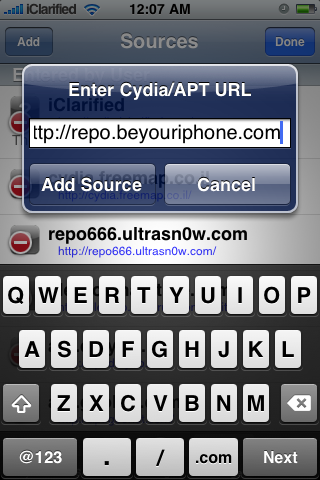
Step Six
Input http://repo.beyouriphone.com then press the Add Source button.
Step Seven
Once the source has been successfully added, press the large Return to Cydia button.

Step Eight
Press the Done button to exit Edit mode.

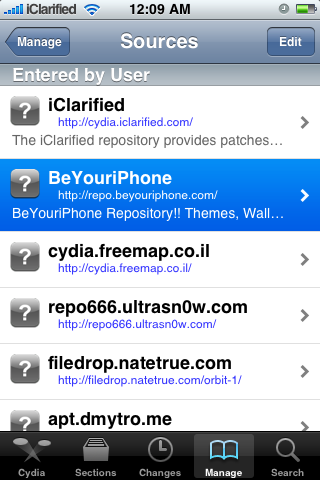
Step Nine
Press to select the BeYouriPhone repository from the list of sources.
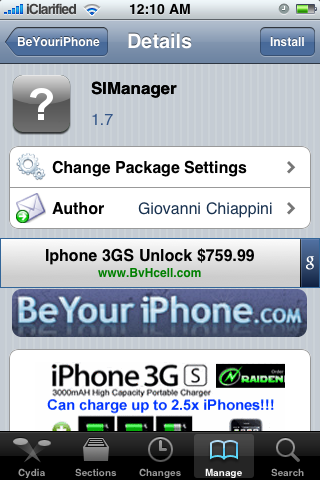
Step Ten
Press to choose SIManager from the list of packages.

Step Eleven
Press the Install button at the top right of the screen.
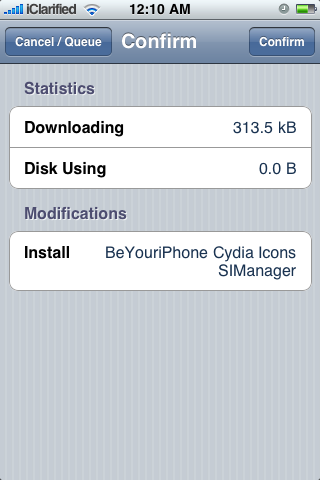
Step Twelve
Press the Confirm button to begin installation.
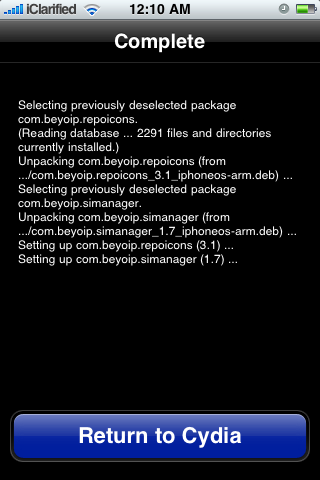
Step Thirteen
Once installation has completed successfully press the Return to Cydia button.
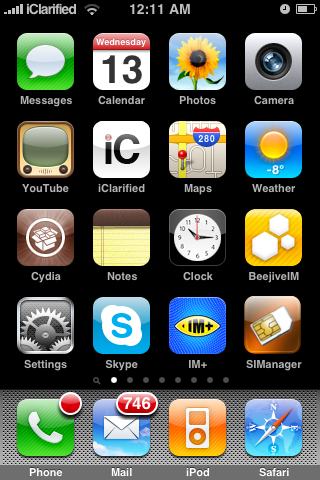
Step Fourteen
Press the Home button to return to your Springboard then tap the SIManager icon to launch the application.
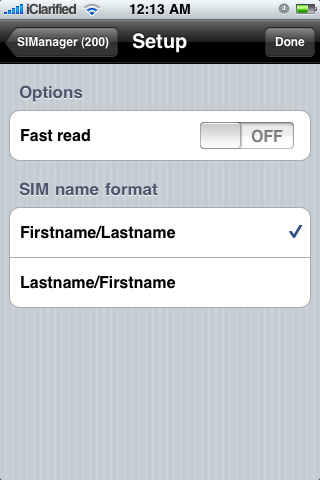
Step Fifteen
Once the program has opened you can use the Setup button at the top left to enable Fast Read as well as set the SIM name format. ie Firstname/Lastname or Lastname/Firstname.
Step Sixteen
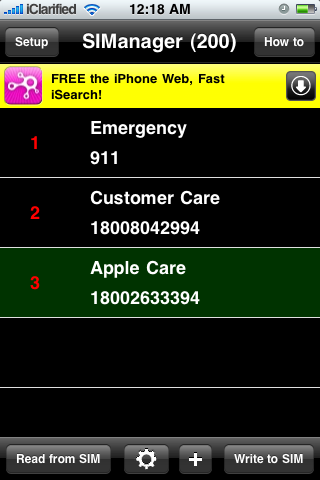
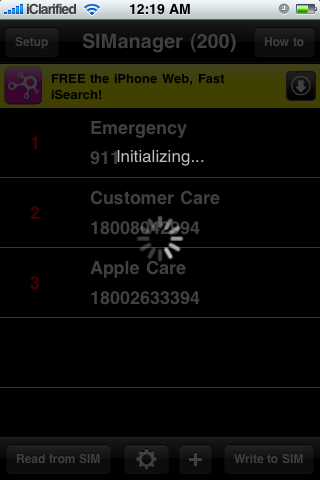
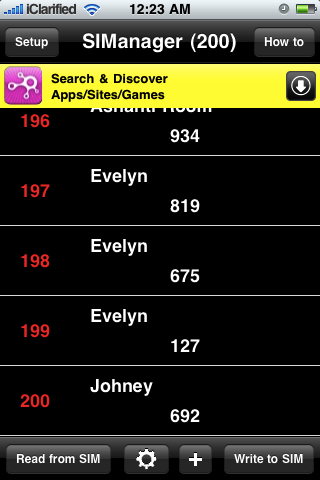
To read your contacts from the SIM card press the Read from SIM button at the bottom of the screen.
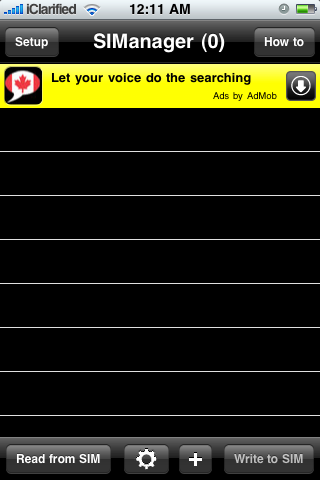

Once all the contacts have been loaded they will be displayed on the screen.

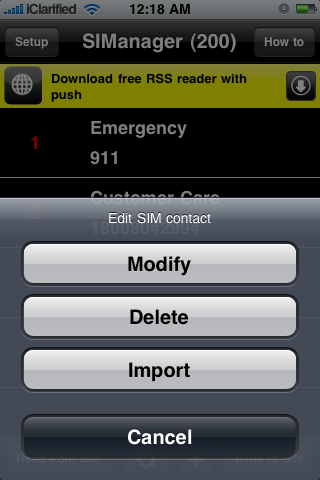
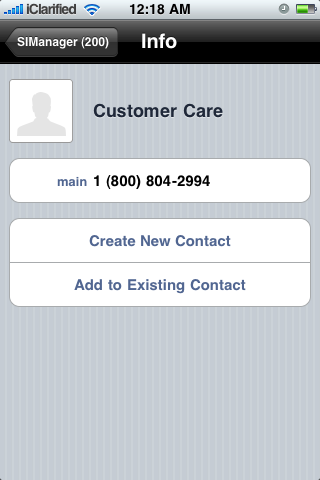
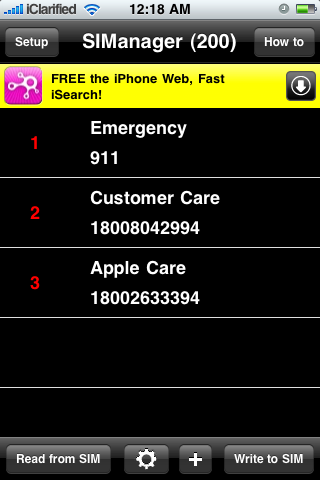
Step Seventeen
You can press to select a contact and choose to Modify, Delete, or Import it.

Step Eighteen
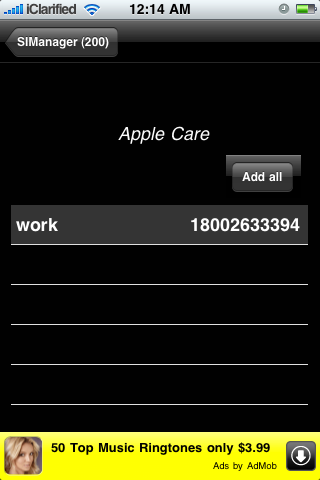
To add a contact to your SIM card you can press the + button at the bottom of the main screen.

Navigate through your contacts and select the one you would like to add.

Then select the specific number or press the Add all button if you would like to add all the contacts numbers. Press the SIManager button at the top left to return to the main screen.
You will notice that the contact has been added to the list and appears on a green background. This means that when you write to the SIM card this contact will be added.
Press the Write to SIM button at the bottom right to commit your changes to the SIM card. Notice when you are done the contact now appears on a black background similar to the other contacts in your list.

Step Nineteen
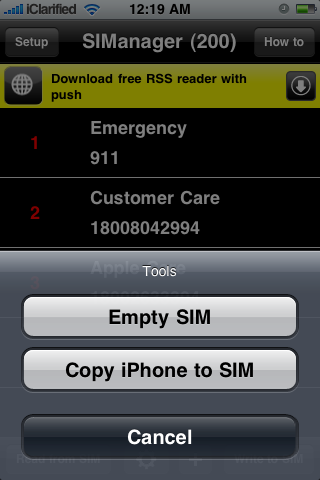
SIManager also allows you to copy all the contacts on your iPhone to the SIM card. Press the Gear icon at the bottom of the screen then press the large Copy iPhone to SIM button.
You will be asked to confirm this action. Press the OK button.

If you have more then 200 numbers you may be informed that the SIM is full. Press the large OK button.

To commit the changes to the SIM card press the Write to SIM button at the bottom of the screen.


Step Twenty
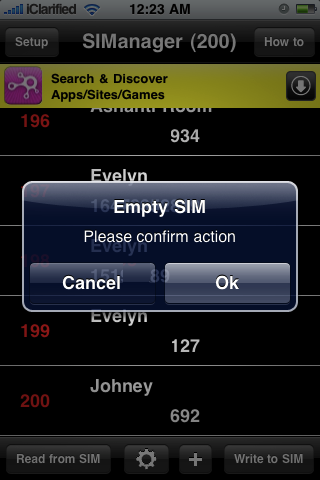
You can also use SIManager to empty your SIM card. Press the Gear icon at the bottom of the screen then press the Empty SIM button.

Press the OK button to confirm the action.
Notice all the numbers to be deleted have a red background. Press the Write to SIM button to commit the changes.


Once done your list of contacts on the SIM card will be empty!

How to Customize Your iPhone Lockscreen Using LockInfo
Jan 4th
These are instructions on how to customize your iPhone Lockscreen to display your calendar, mail, calls, sms, weather, twitter, todo, and more using LockInfo.
Step One
Press to launch Cydia from your Springboard.
 Step Two
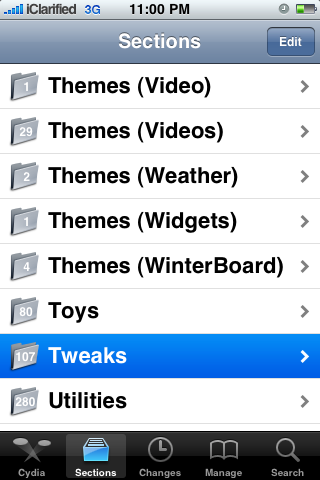
Press to choose Sections from the tabs at the bottom of the screen.
Step Two
Press to choose Sections from the tabs at the bottom of the screen.
 Step Three
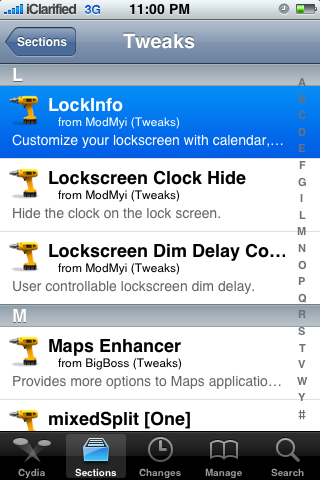
Press to select Tweaks from the list of Sections.
Step Three
Press to select Tweaks from the list of Sections.
 Step Four
Tap to choose LockInfo from the list of Packages.
Step Four
Tap to choose LockInfo from the list of Packages.
 Step Five
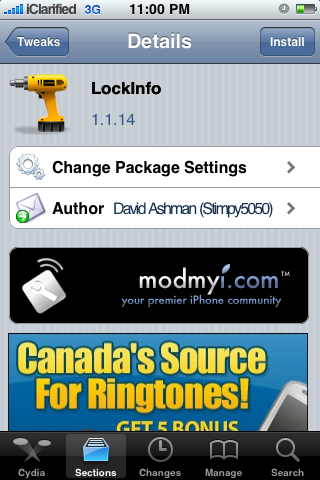
Press the Install button at the top right of the screen.
Step Five
Press the Install button at the top right of the screen.
 Step Six
Press the Confirm button at the top right to begin installation.
Step Six
Press the Confirm button at the top right to begin installation.
 Step Seven
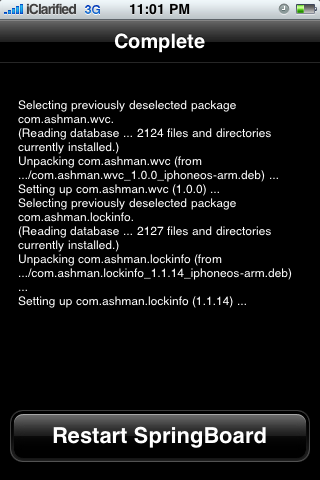
Once the installation has completed successfully press the large Respring Springboard button.
Step Seven
Once the installation has completed successfully press the large Respring Springboard button.
 Step Eight
Notice that you now have some useful information on your Lockscreen! Lets try to customize it…
Step Eight
Notice that you now have some useful information on your Lockscreen! Lets try to customize it…

 Step Nine
Press to select Settings from your Springboard.
Step Nine
Press to select Settings from your Springboard.
 Step Ten
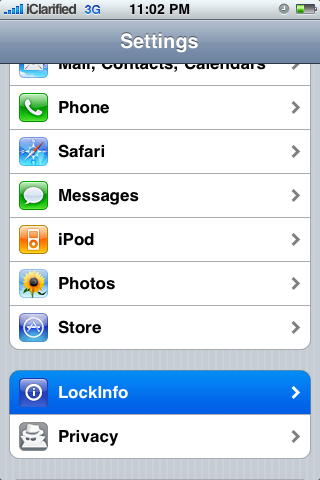
Scroll down and select LockInfo from the Settings Menu.
Step Ten
Scroll down and select LockInfo from the Settings Menu.
 Step Eleven
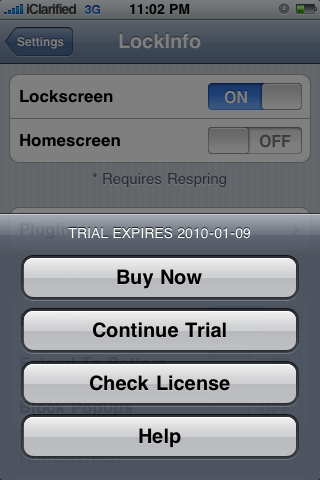
If you haven’t already purchased LockInfo you will be prompted to Buy Now or continue your trial. Press the appropriate button.
Step Eleven
If you haven’t already purchased LockInfo you will be prompted to Buy Now or continue your trial. Press the appropriate button.
 Step Twelve
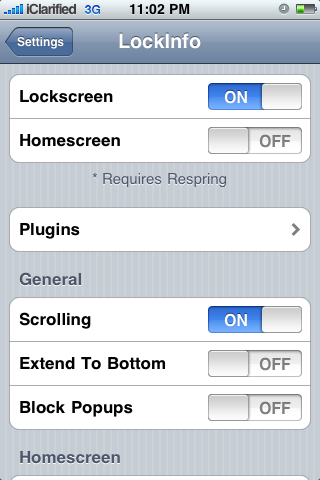
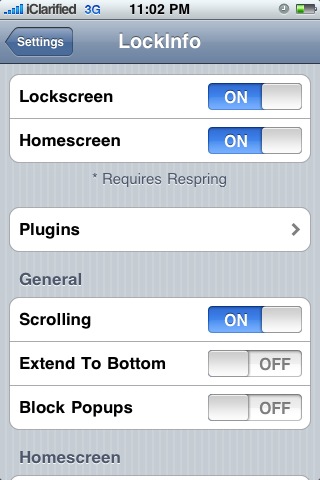
At the top of the LockInfo Settings Menu you will see two switches. One places LockInfo on your lockscreen. The other places LockInfo on your Homescreen by inserting a page before your first Springboard page.
Step Twelve
At the top of the LockInfo Settings Menu you will see two switches. One places LockInfo on your lockscreen. The other places LockInfo on your Homescreen by inserting a page before your first Springboard page.
 If you choose to add LockInfo to the homescreen then you must reboot your iPhone for the change to take effect.

 Step Thirteen
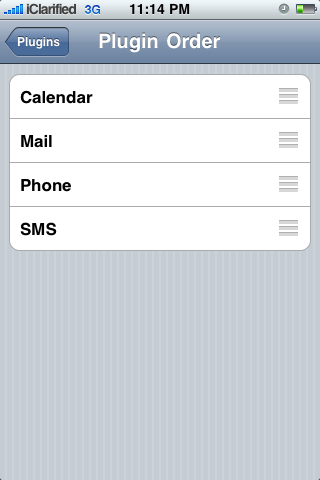
LockInfo comes with Calendar, Mail, Phone, and SMS plugins installed. You can also add Twitter, Clock, Appigo Todo, WeatherIcon, and Push Notifications (Beta).
We will deal with adding another plugin below. For now press Plugins then press Plugin Order. Here you can drag to set the order your information appears in.
Step Thirteen
LockInfo comes with Calendar, Mail, Phone, and SMS plugins installed. You can also add Twitter, Clock, Appigo Todo, WeatherIcon, and Push Notifications (Beta).
We will deal with adding another plugin below. For now press Plugins then press Plugin Order. Here you can drag to set the order your information appears in.

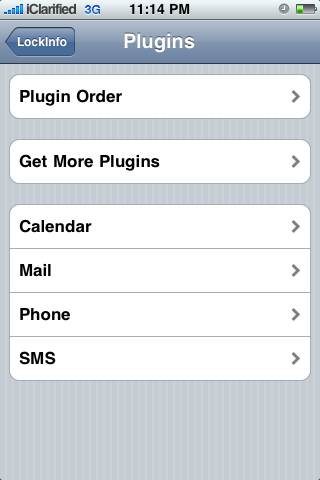
 From the Plugins Setting screen you can also select a plugin to modify its individual settings. For example, if you select Calendar you can enabled or disable it, choose which Calendars appear, set the days, max events shown, and change the view options.
 Step Fourteen
Back in the LockInfo main settings screen you can enable or disable scrolling, choose to extend info to bottom, and block popups.
Step Fourteen
Back in the LockInfo main settings screen you can enable or disable scrolling, choose to extend info to bottom, and block popups.
 Step Fifteen
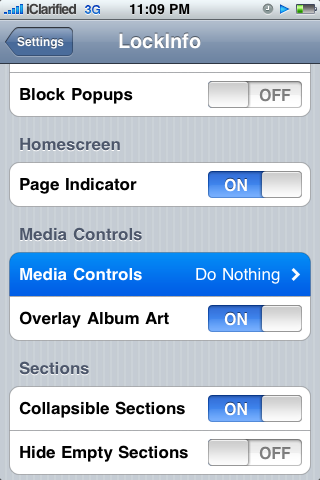
You can also choose to display a page indicator on the Homescreen.
Step Fifteen
You can also choose to display a page indicator on the Homescreen.
 Step Sixteen
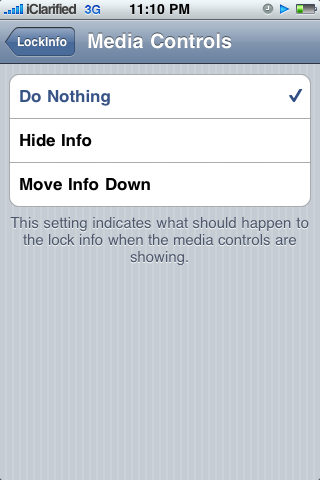
When playing music or video a popup controller normally appears on your lockscreen. When this occurs you can have LockInfo do nothing, hide the LockInfo or move the LockInfo down. You also have a choice to overlay the album art as the lockscreen background.
Step Sixteen
When playing music or video a popup controller normally appears on your lockscreen. When this occurs you can have LockInfo do nothing, hide the LockInfo or move the LockInfo down. You also have a choice to overlay the album art as the lockscreen background.
 Step Seventeen
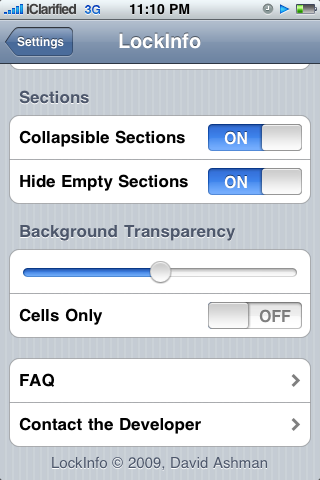
The LockInfo is divided into different sections for each plugin. You have the option to enable or disable collapsible sections as well as the option to hide empty sections.
Step Seventeen
The LockInfo is divided into different sections for each plugin. You have the option to enable or disable collapsible sections as well as the option to hide empty sections.

 Step Eighteen
Finally you can set the transparency of the LockInfo and choose to apply the transparency to cells only.
INSTALLING A LOCKINFO PLUGIN
To install a lockinfo plugin follow these steps:
Step One
Press to launch Settings from your iPhone Springboard.
Step Two
Press to select LockInfo from your Settings menu.
Step Three
Press to choose Plugins from the LockInfo Settings menu.
Step Four
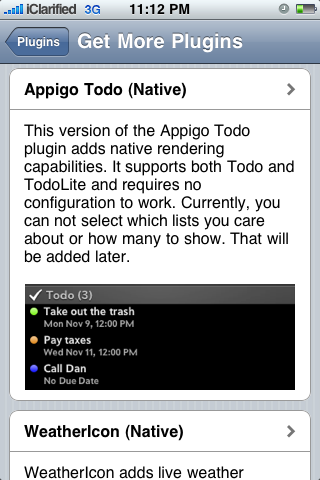
Press the Get More Plugins button from the Plugins Settings menu.
Step Eighteen
Finally you can set the transparency of the LockInfo and choose to apply the transparency to cells only.
INSTALLING A LOCKINFO PLUGIN
To install a lockinfo plugin follow these steps:
Step One
Press to launch Settings from your iPhone Springboard.
Step Two
Press to select LockInfo from your Settings menu.
Step Three
Press to choose Plugins from the LockInfo Settings menu.
Step Four
Press the Get More Plugins button from the Plugins Settings menu.
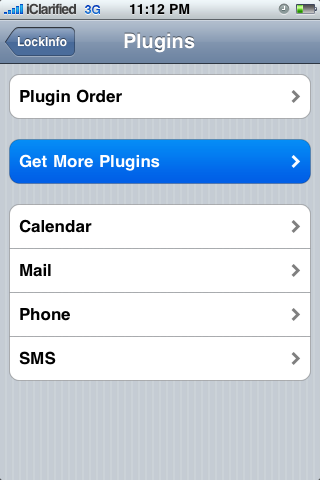 Step Five
Press to select the plugin you would like to install from the list of available plugins. For this example we will choose WeatherIcon.
Step Five
Press to select the plugin you would like to install from the list of available plugins. For this example we will choose WeatherIcon.
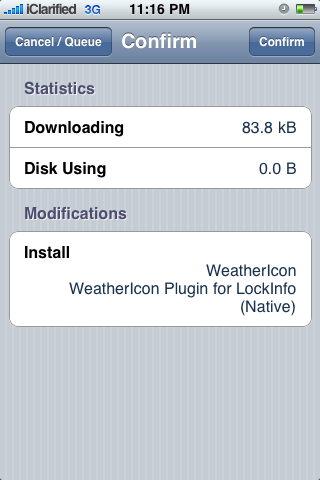
 Step Six
Cydia will automatically launch and open to the plugin package you just selected. Press the Install button at the top right of the screen.
Step Six
Cydia will automatically launch and open to the plugin package you just selected. Press the Install button at the top right of the screen.
 Step Seven
Press the Confirm button at the top right to begin installation.
Step Seven
Press the Confirm button at the top right to begin installation.
 Step Eight
Once the installation has completed successfully you will notice that LockInfo has an extra section to display the new information.
Step Eight
Once the installation has completed successfully you will notice that LockInfo has an extra section to display the new information.
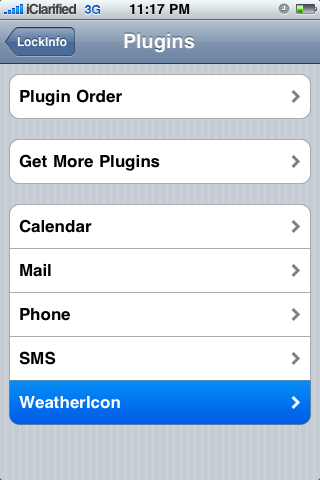
 Step Nine
The newly installed plugin can be configured in two areas. First you can go into Settings:LockInfo:Plugins and you will find your newly installed plugin listed.
Press to select it. From here you can choose to enabled or disable the plugin as well as modify some basic settings such as collapsed by default and hide description.
Step Nine
The newly installed plugin can be configured in two areas. First you can go into Settings:LockInfo:Plugins and you will find your newly installed plugin listed.
Press to select it. From here you can choose to enabled or disable the plugin as well as modify some basic settings such as collapsed by default and hide description.
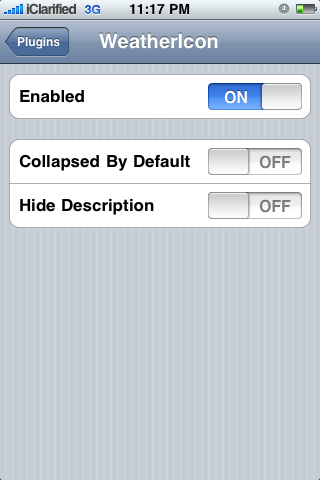 Step Ten
To access the detailed settings for your plugin press Settings from the Springboard then select the plugin name from the Settings menu.
Step Ten
To access the detailed settings for your plugin press Settings from the Springboard then select the plugin name from the Settings menu.

 From this window you have the ability to modify advanced settings for the plugin. If you installed the WeatherIcon plugin like us you can modify the icon’s settings, put the temperature on the status bar, change how often the weather is refreshed, show the wind chill temperature, use local time and even override the default location.


 Of course the settings in this area will change depending on which plugin you have installed. Currently you can choose to install these additional plugins: Twitter, Clock, Appigo Todo, WeatherIcon, and Push Notifications (Beta).


Recent Comments